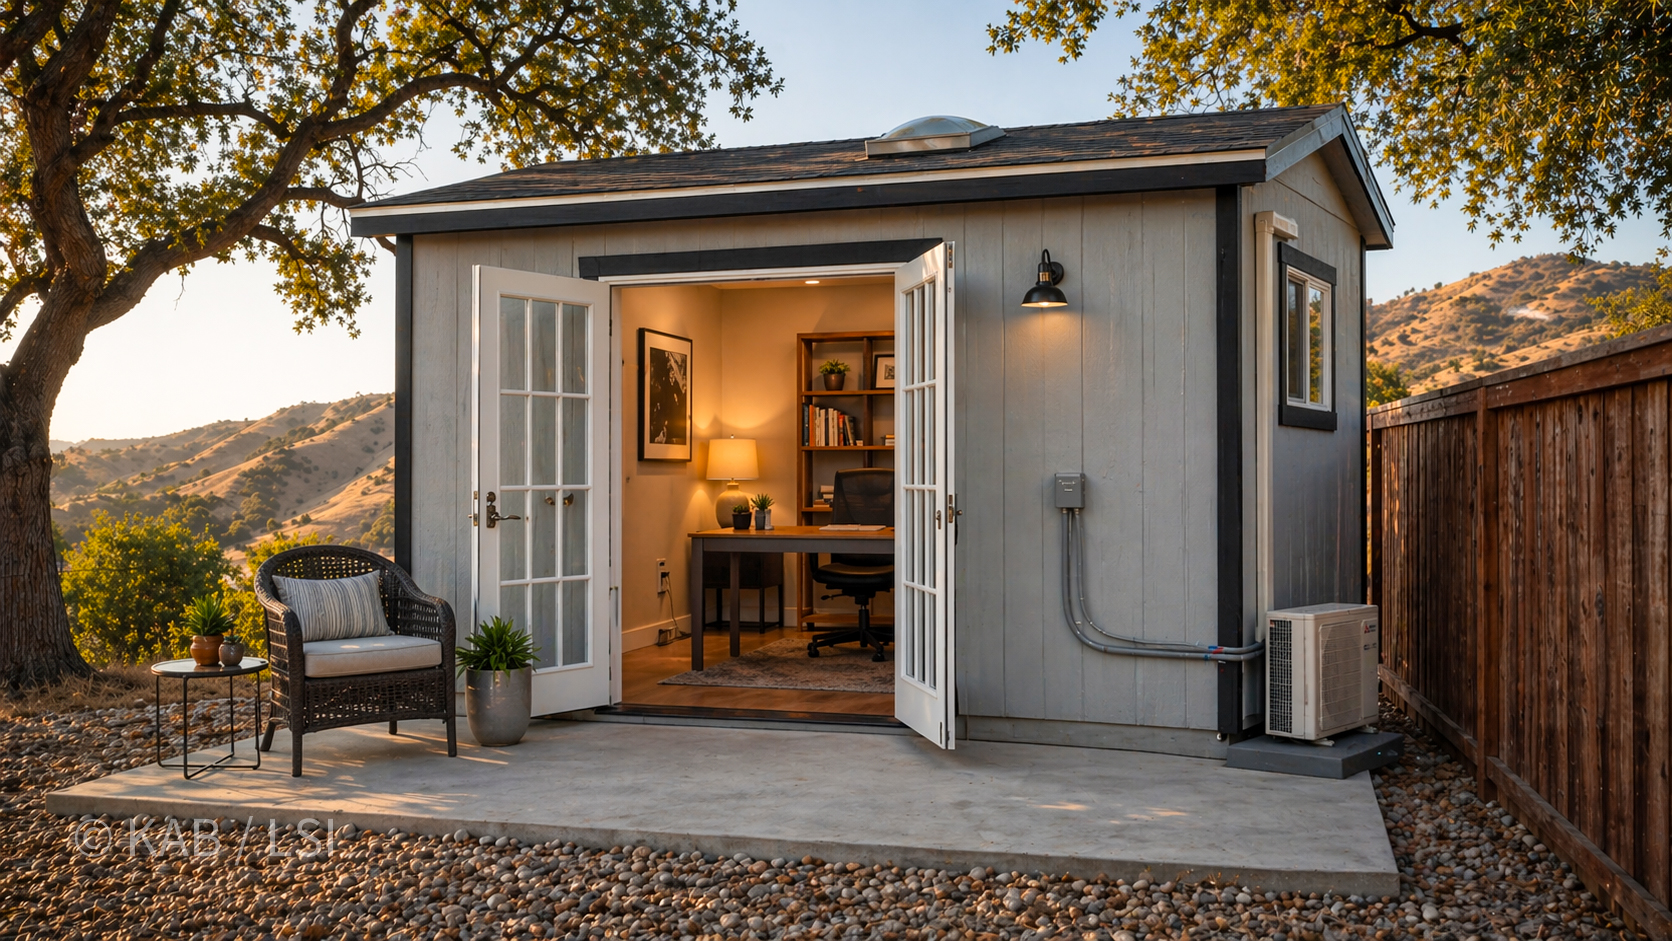
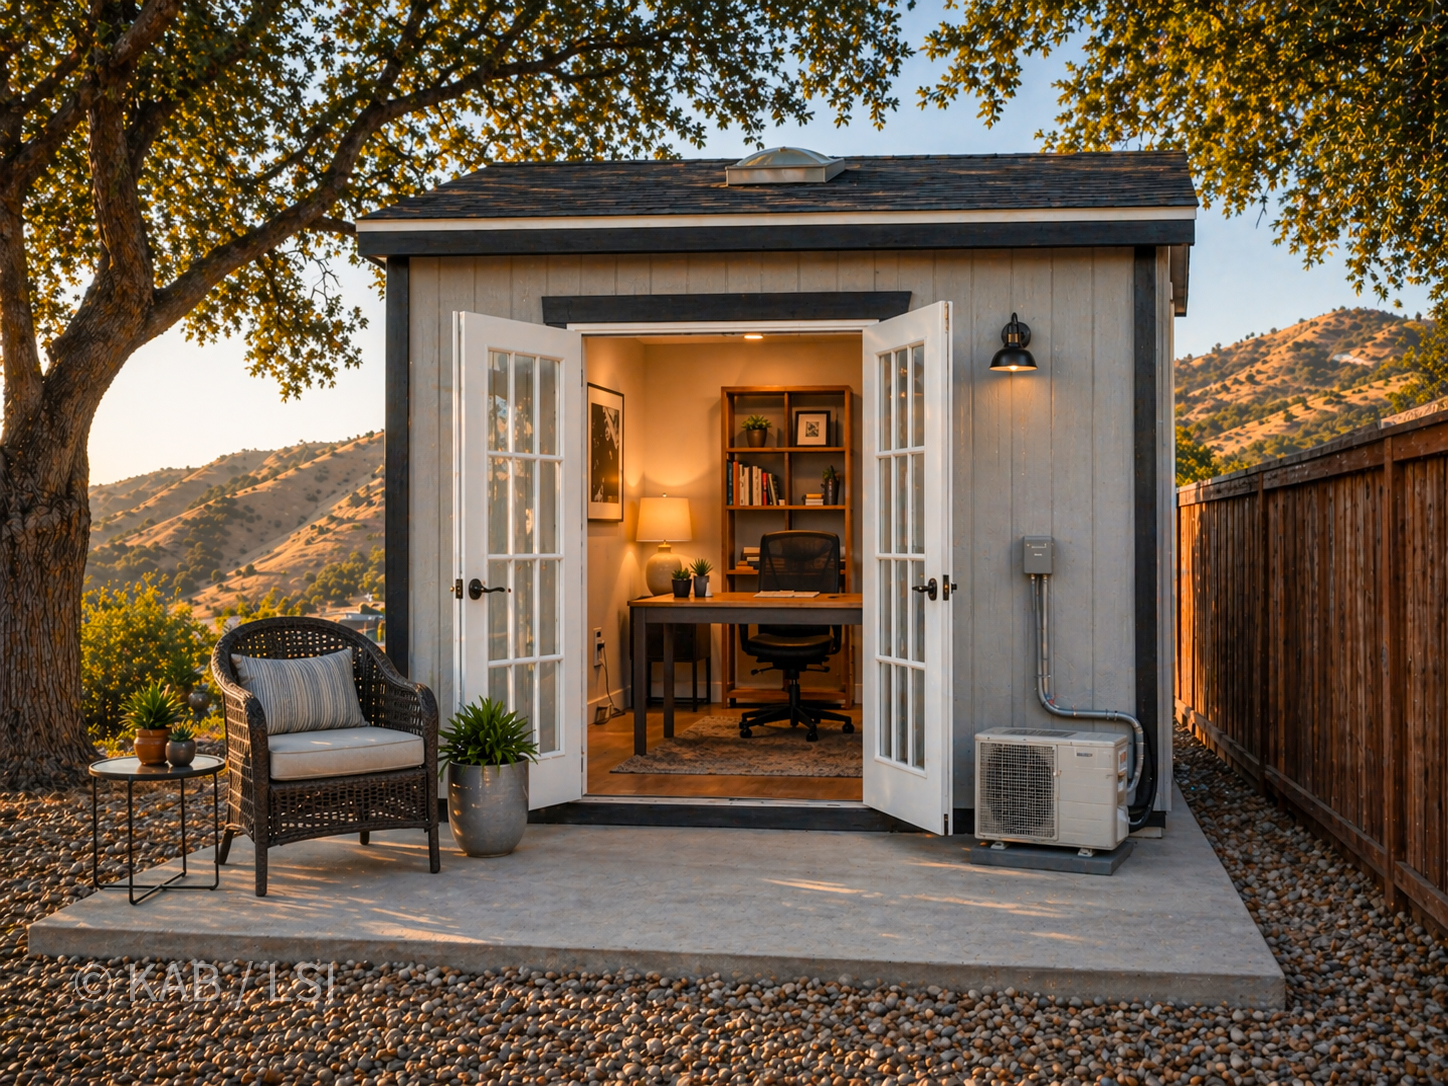
Private Spaces · La Habra Heights
Sheds & Outbuildings — The Step Between Wanting One and Having One
you didn’t buy.
The aisle where it starts. And stalls.
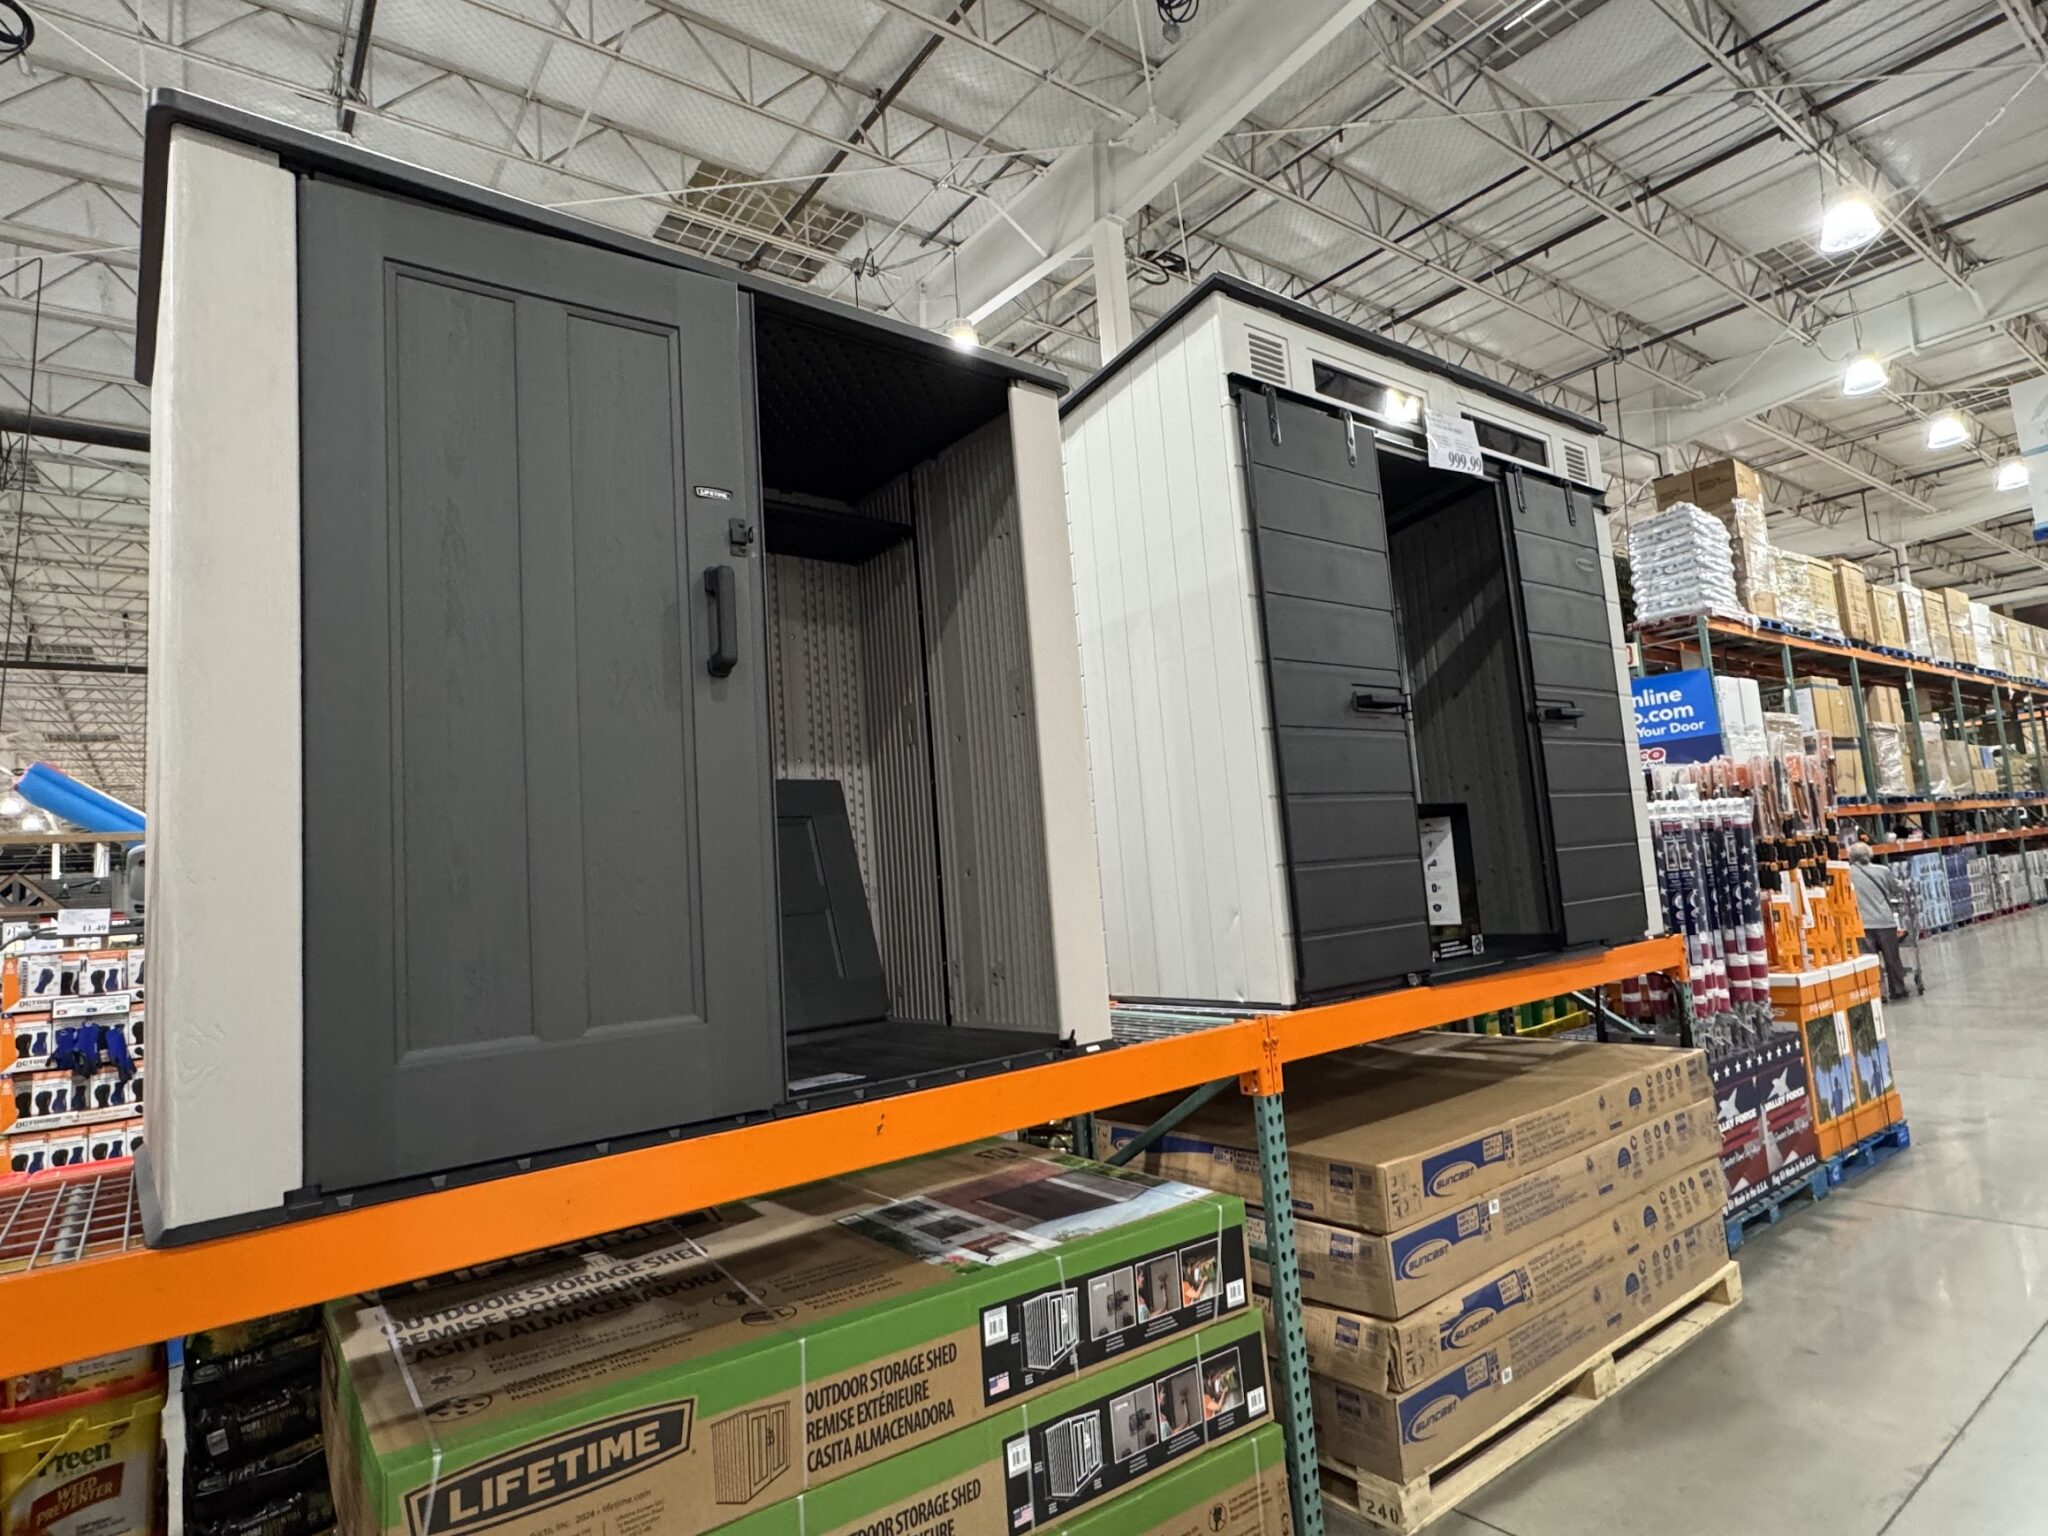
You’ve walked through Costco. Through Sam’s Club, through Home Depot, through Lowe’s. You’ve passed the sheds they stack three-deep at the end of every garden center aisle. Plastic ones for $999. Wood-framed ones for $3,800. The better Gorilla and Tuff Shed units at four and five thousand. One Costco near Los Angeles sells fifteen hundred of these a month. You’ve almost bought one twice.
What stopped you wasn’t the price. It wasn’t the taste. What stopped you were the questions nobody on the store floor could answer. How do I get it home? Who puts it together? What do I put it on?
Can it sit on the grass? On the dirt? On a couple of concrete blocks at the corners? Do I need a slab? Who pours the slab? Who trenches the power out to it if I want lights? What about a mini-split if I’m turning it into a private space? What about gas if I want to stop hauling propane tanks? Who does that part?
We do that part. Or more precisely — I help you figure out what’s needed, and I can refer tradespeople I’ve watched work before. I don’t run their crews and I can’t guarantee every one will always be stellar — but the ones who earn a place in my referral database earn it the same way, every time.
Step One
You pick the shed
You’ve already done this, or you’re about to. Every big-box store stocks them at three price points:
- The plastic storage sheds (Lifetime, Keter, Suncast) — around $999 to $1,500. Good for tools, garden equipment, kids’ bikes, the stuff you want off the side yard. Not going to become an office.
- The wood-framed commodity sheds (Tuff Shed Sundance Series at Home Depot, the Gorilla line at Costco) — $3,800 to $5,000. Bare studs inside, plywood or OSB floor, shingle roof. These can become private spaces — offices, studios, or storage buildings with the right interior work.
- The custom-built outbuildings — starting around $10,000 and climbing from there, where you’re specifying the siding, the window placement, the interior finish.
Any of the three can be the right answer. It depends on what you’re putting inside and how many seasons you need it to survive a hillside.
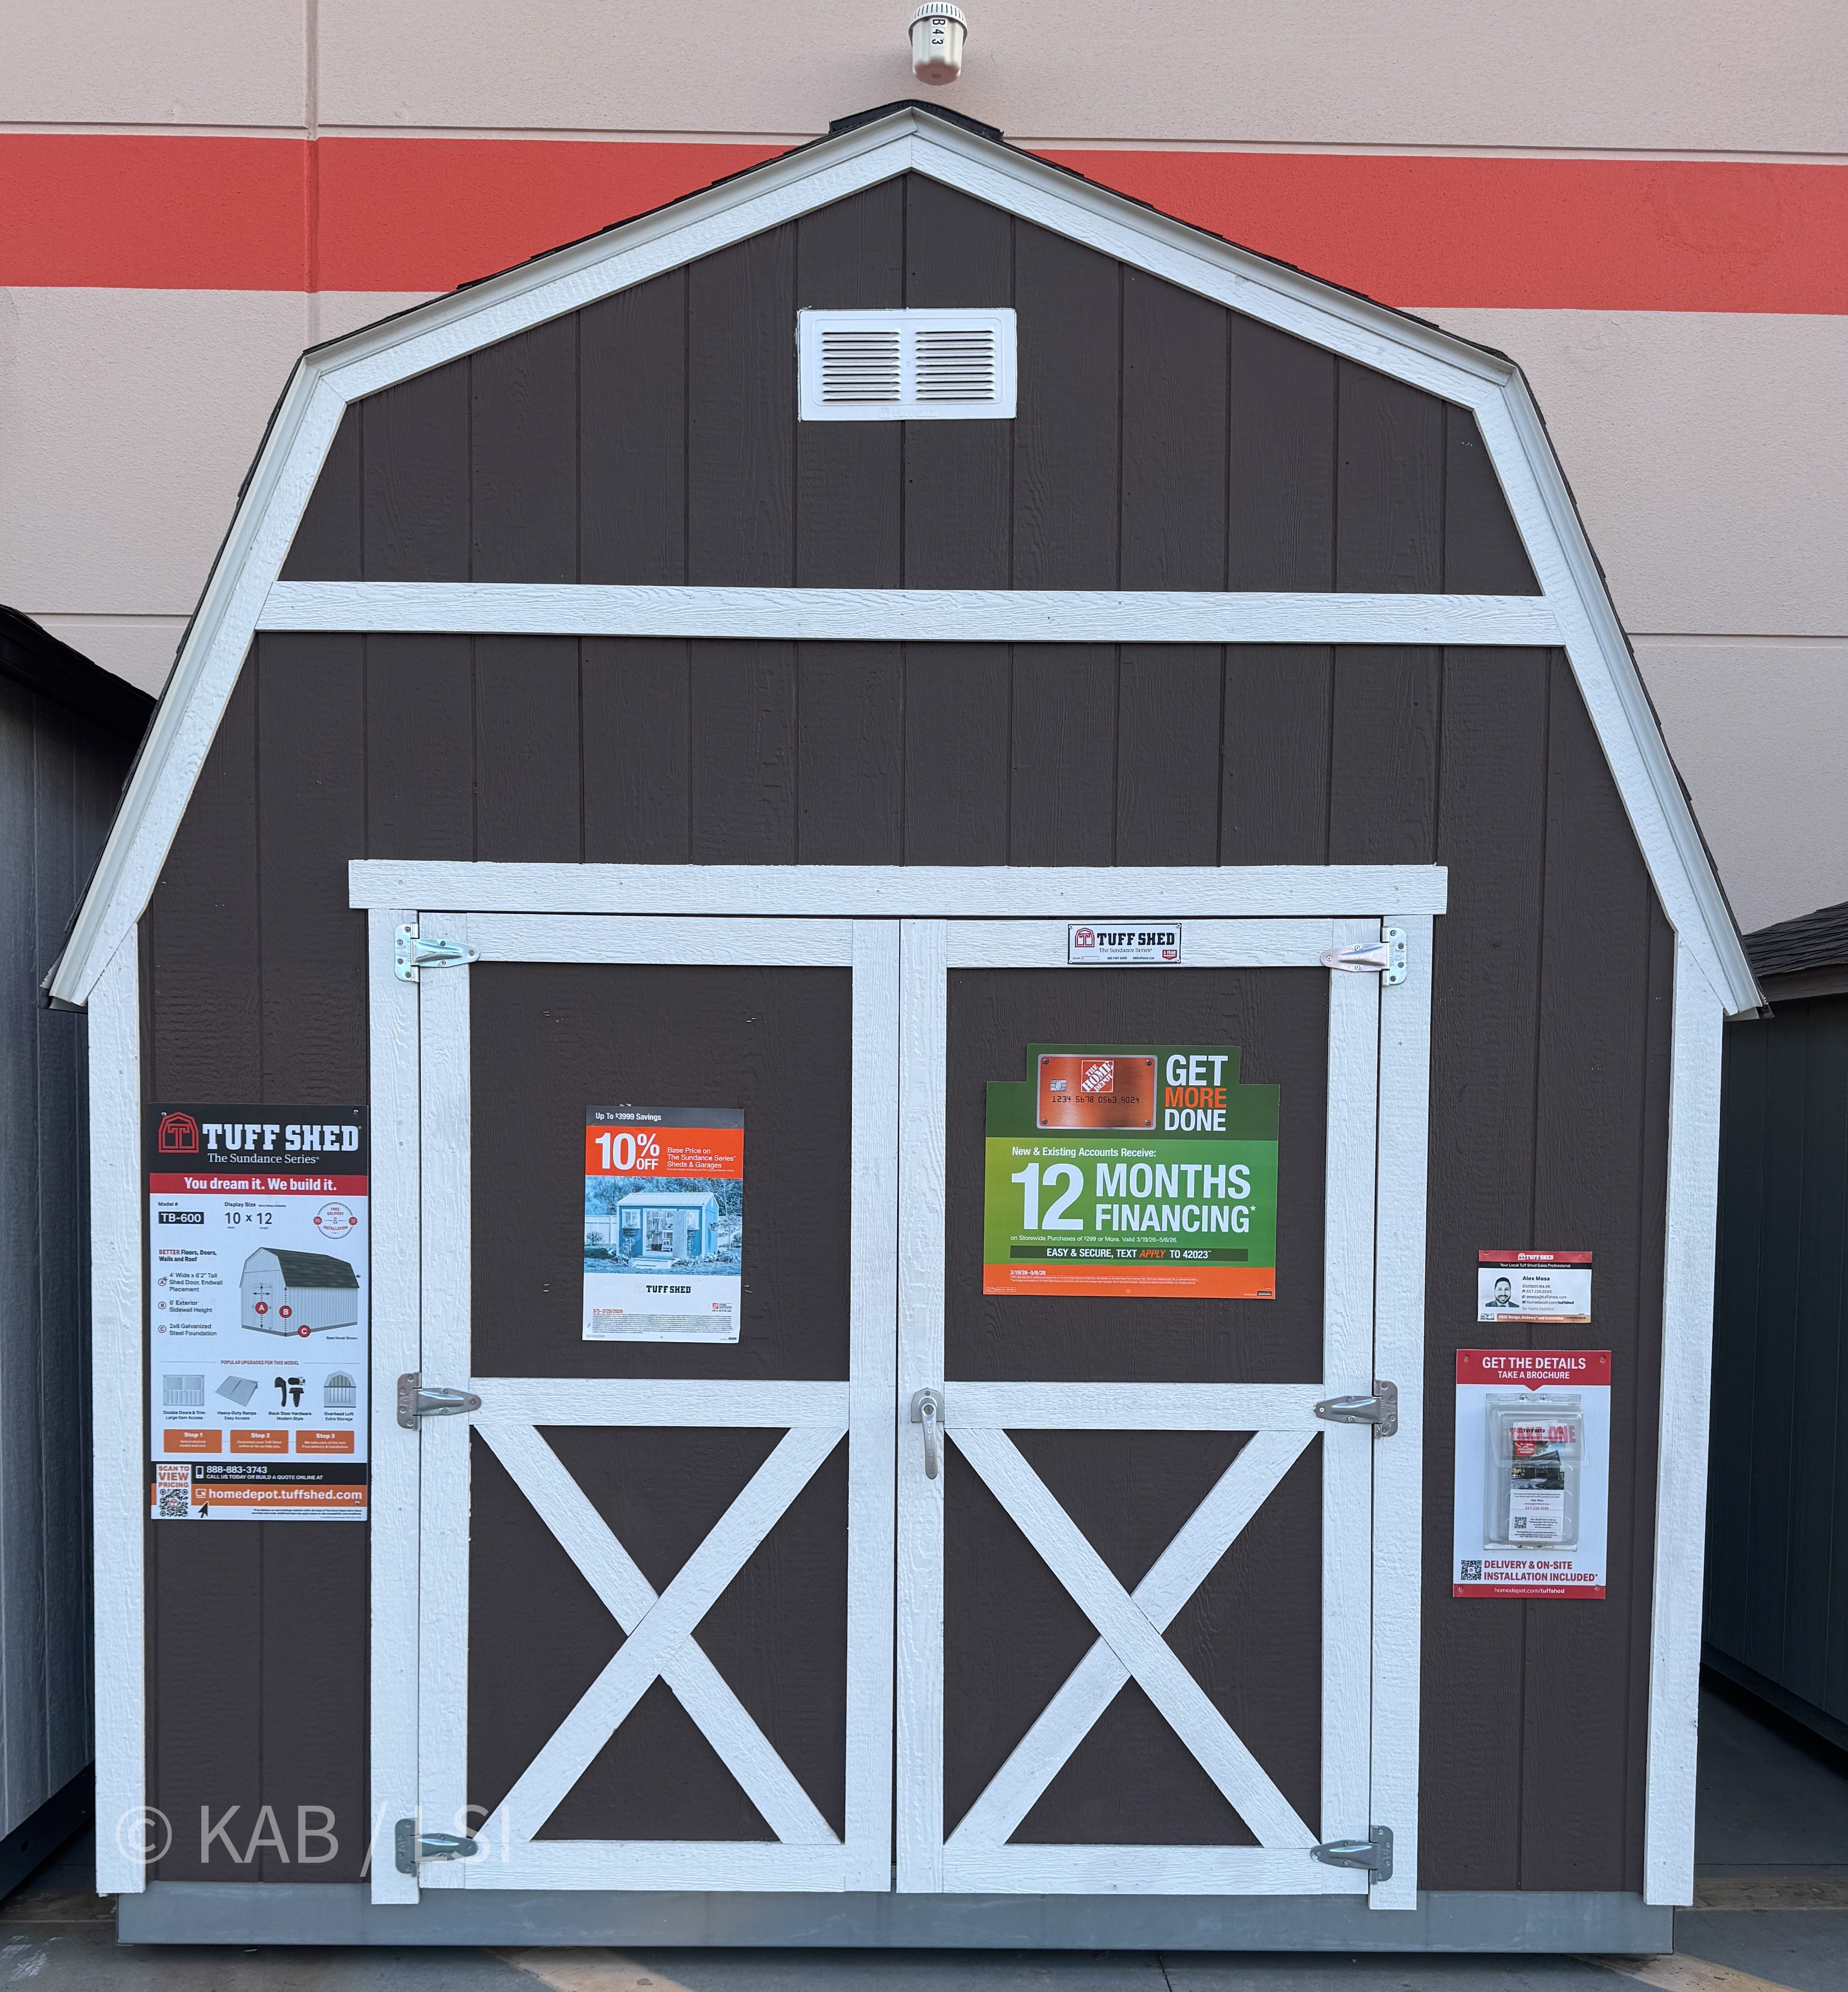
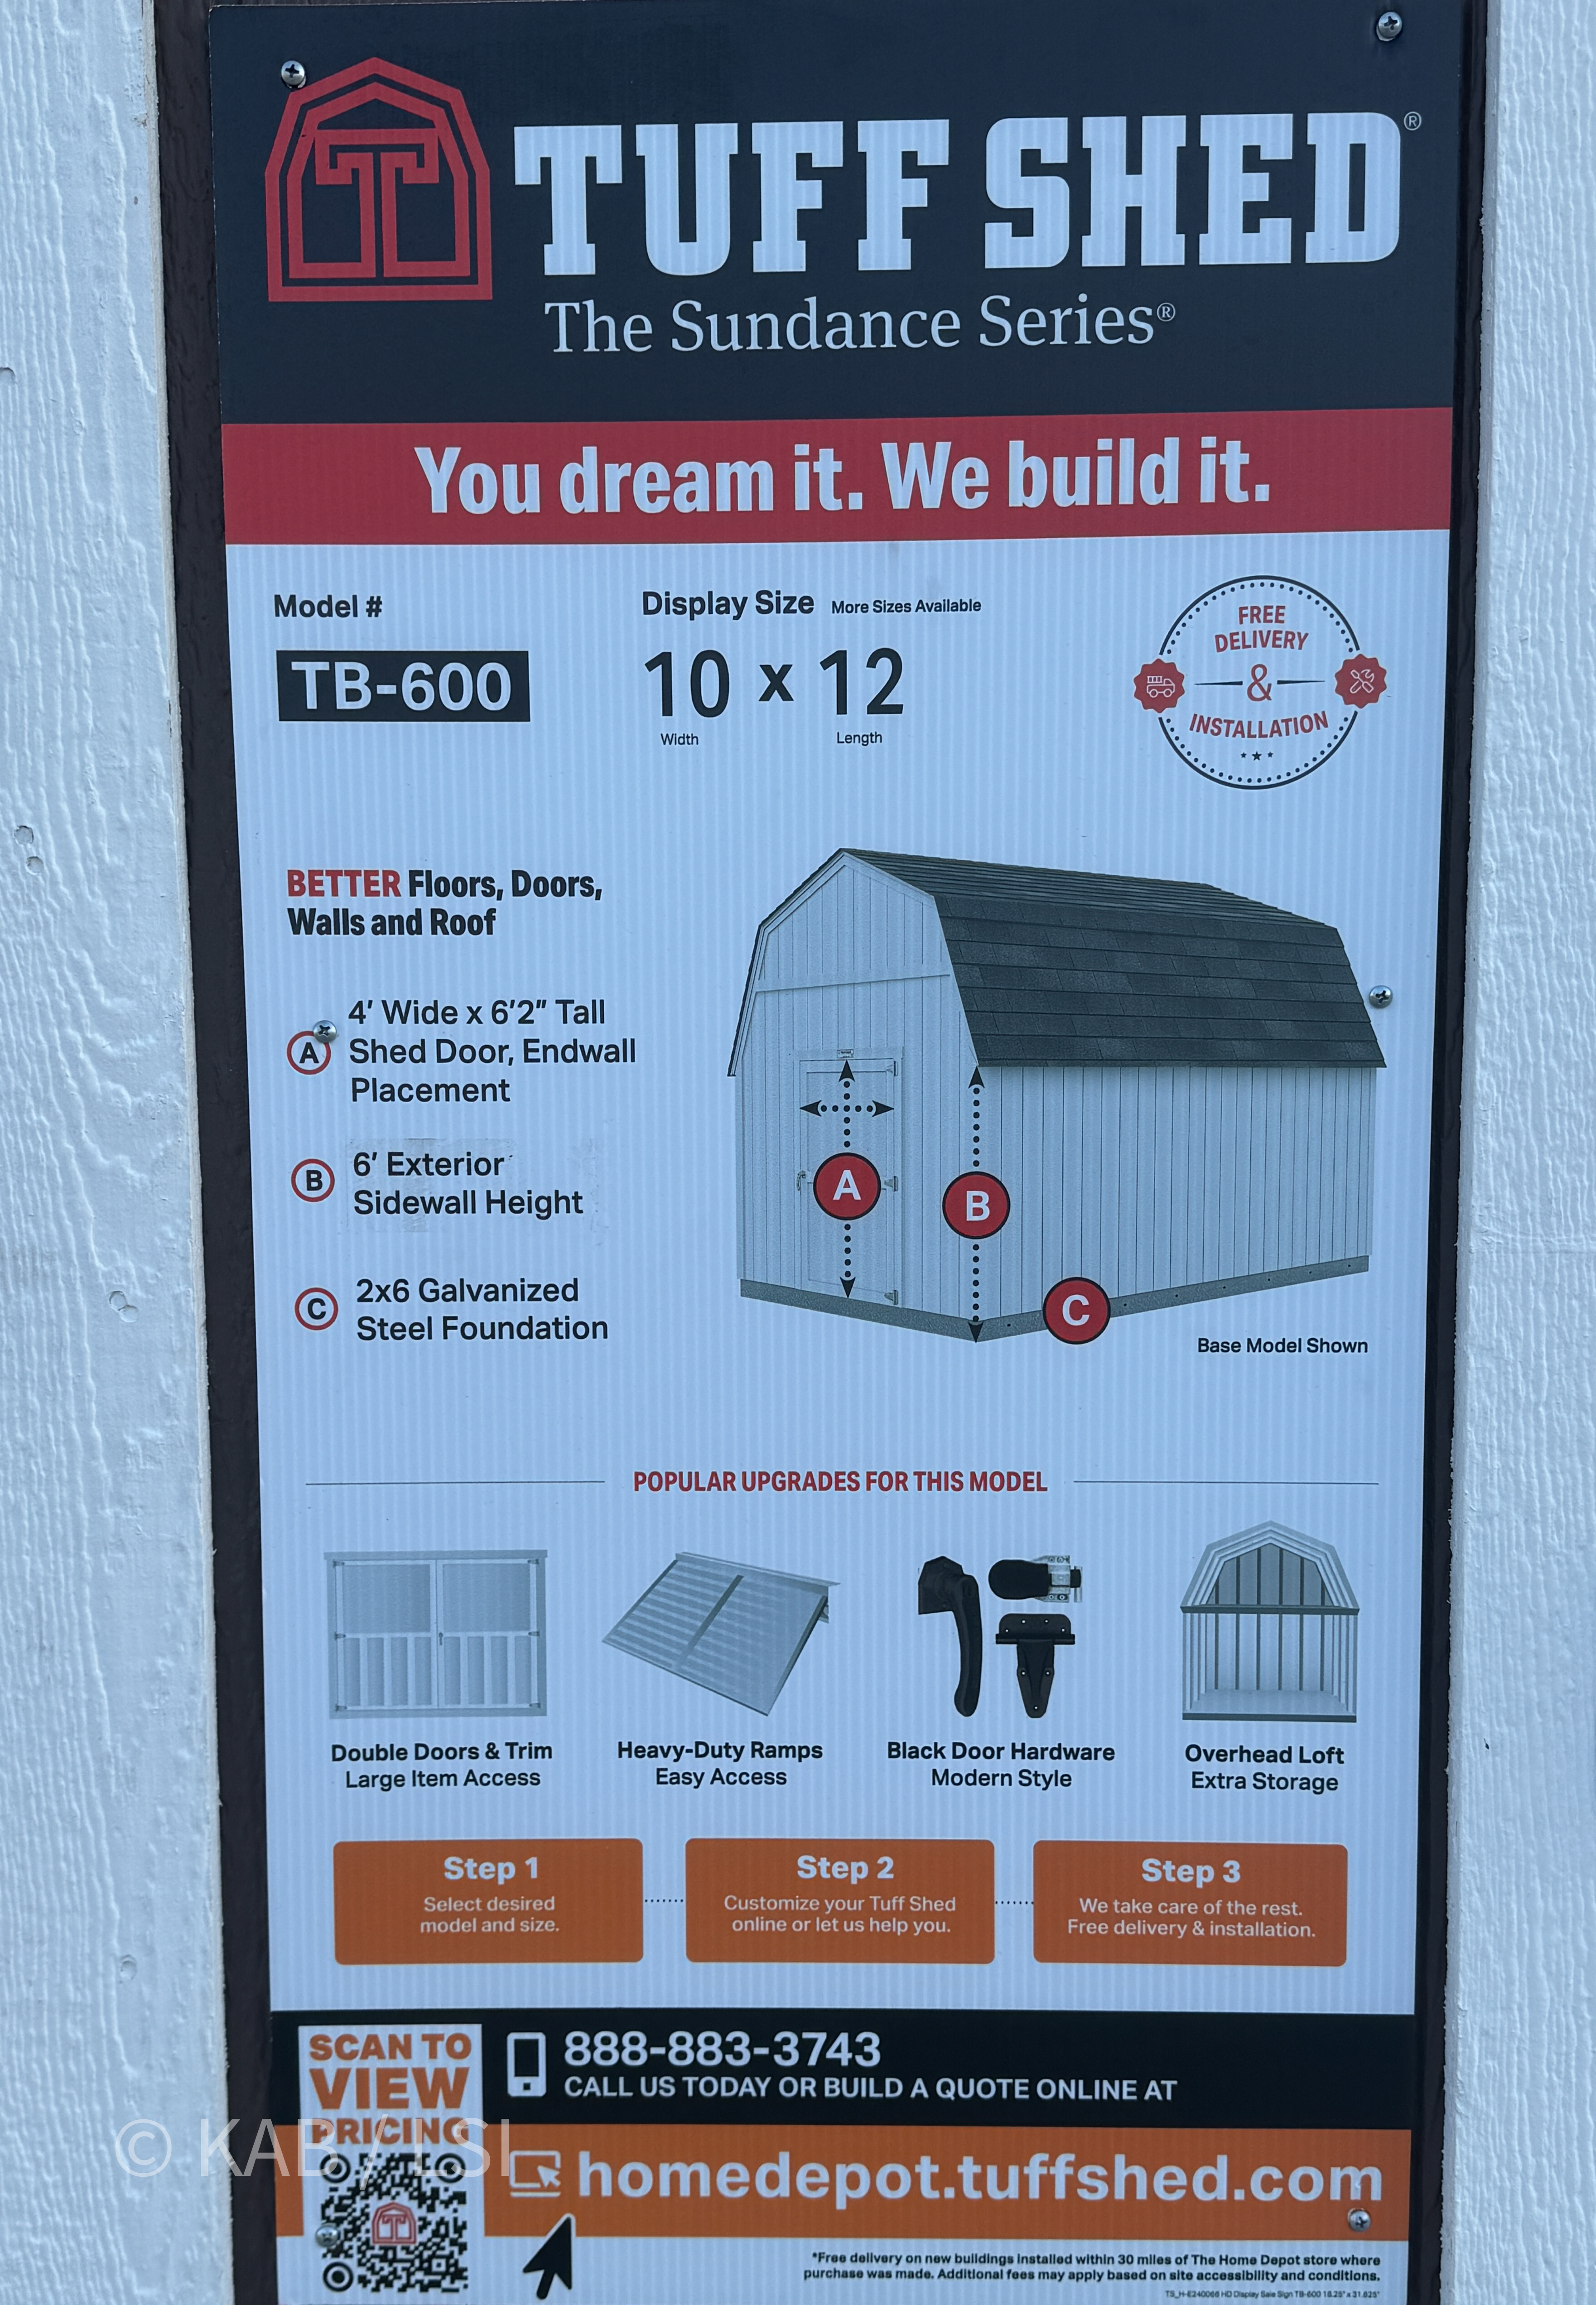
Tuff Shed Sundance TB-600 10×12 at Home Depot
chocolate-brown gambrel with the X-braced double doors that are Tuff Shed’s signature. 10% off the base price; 12 months financing available.
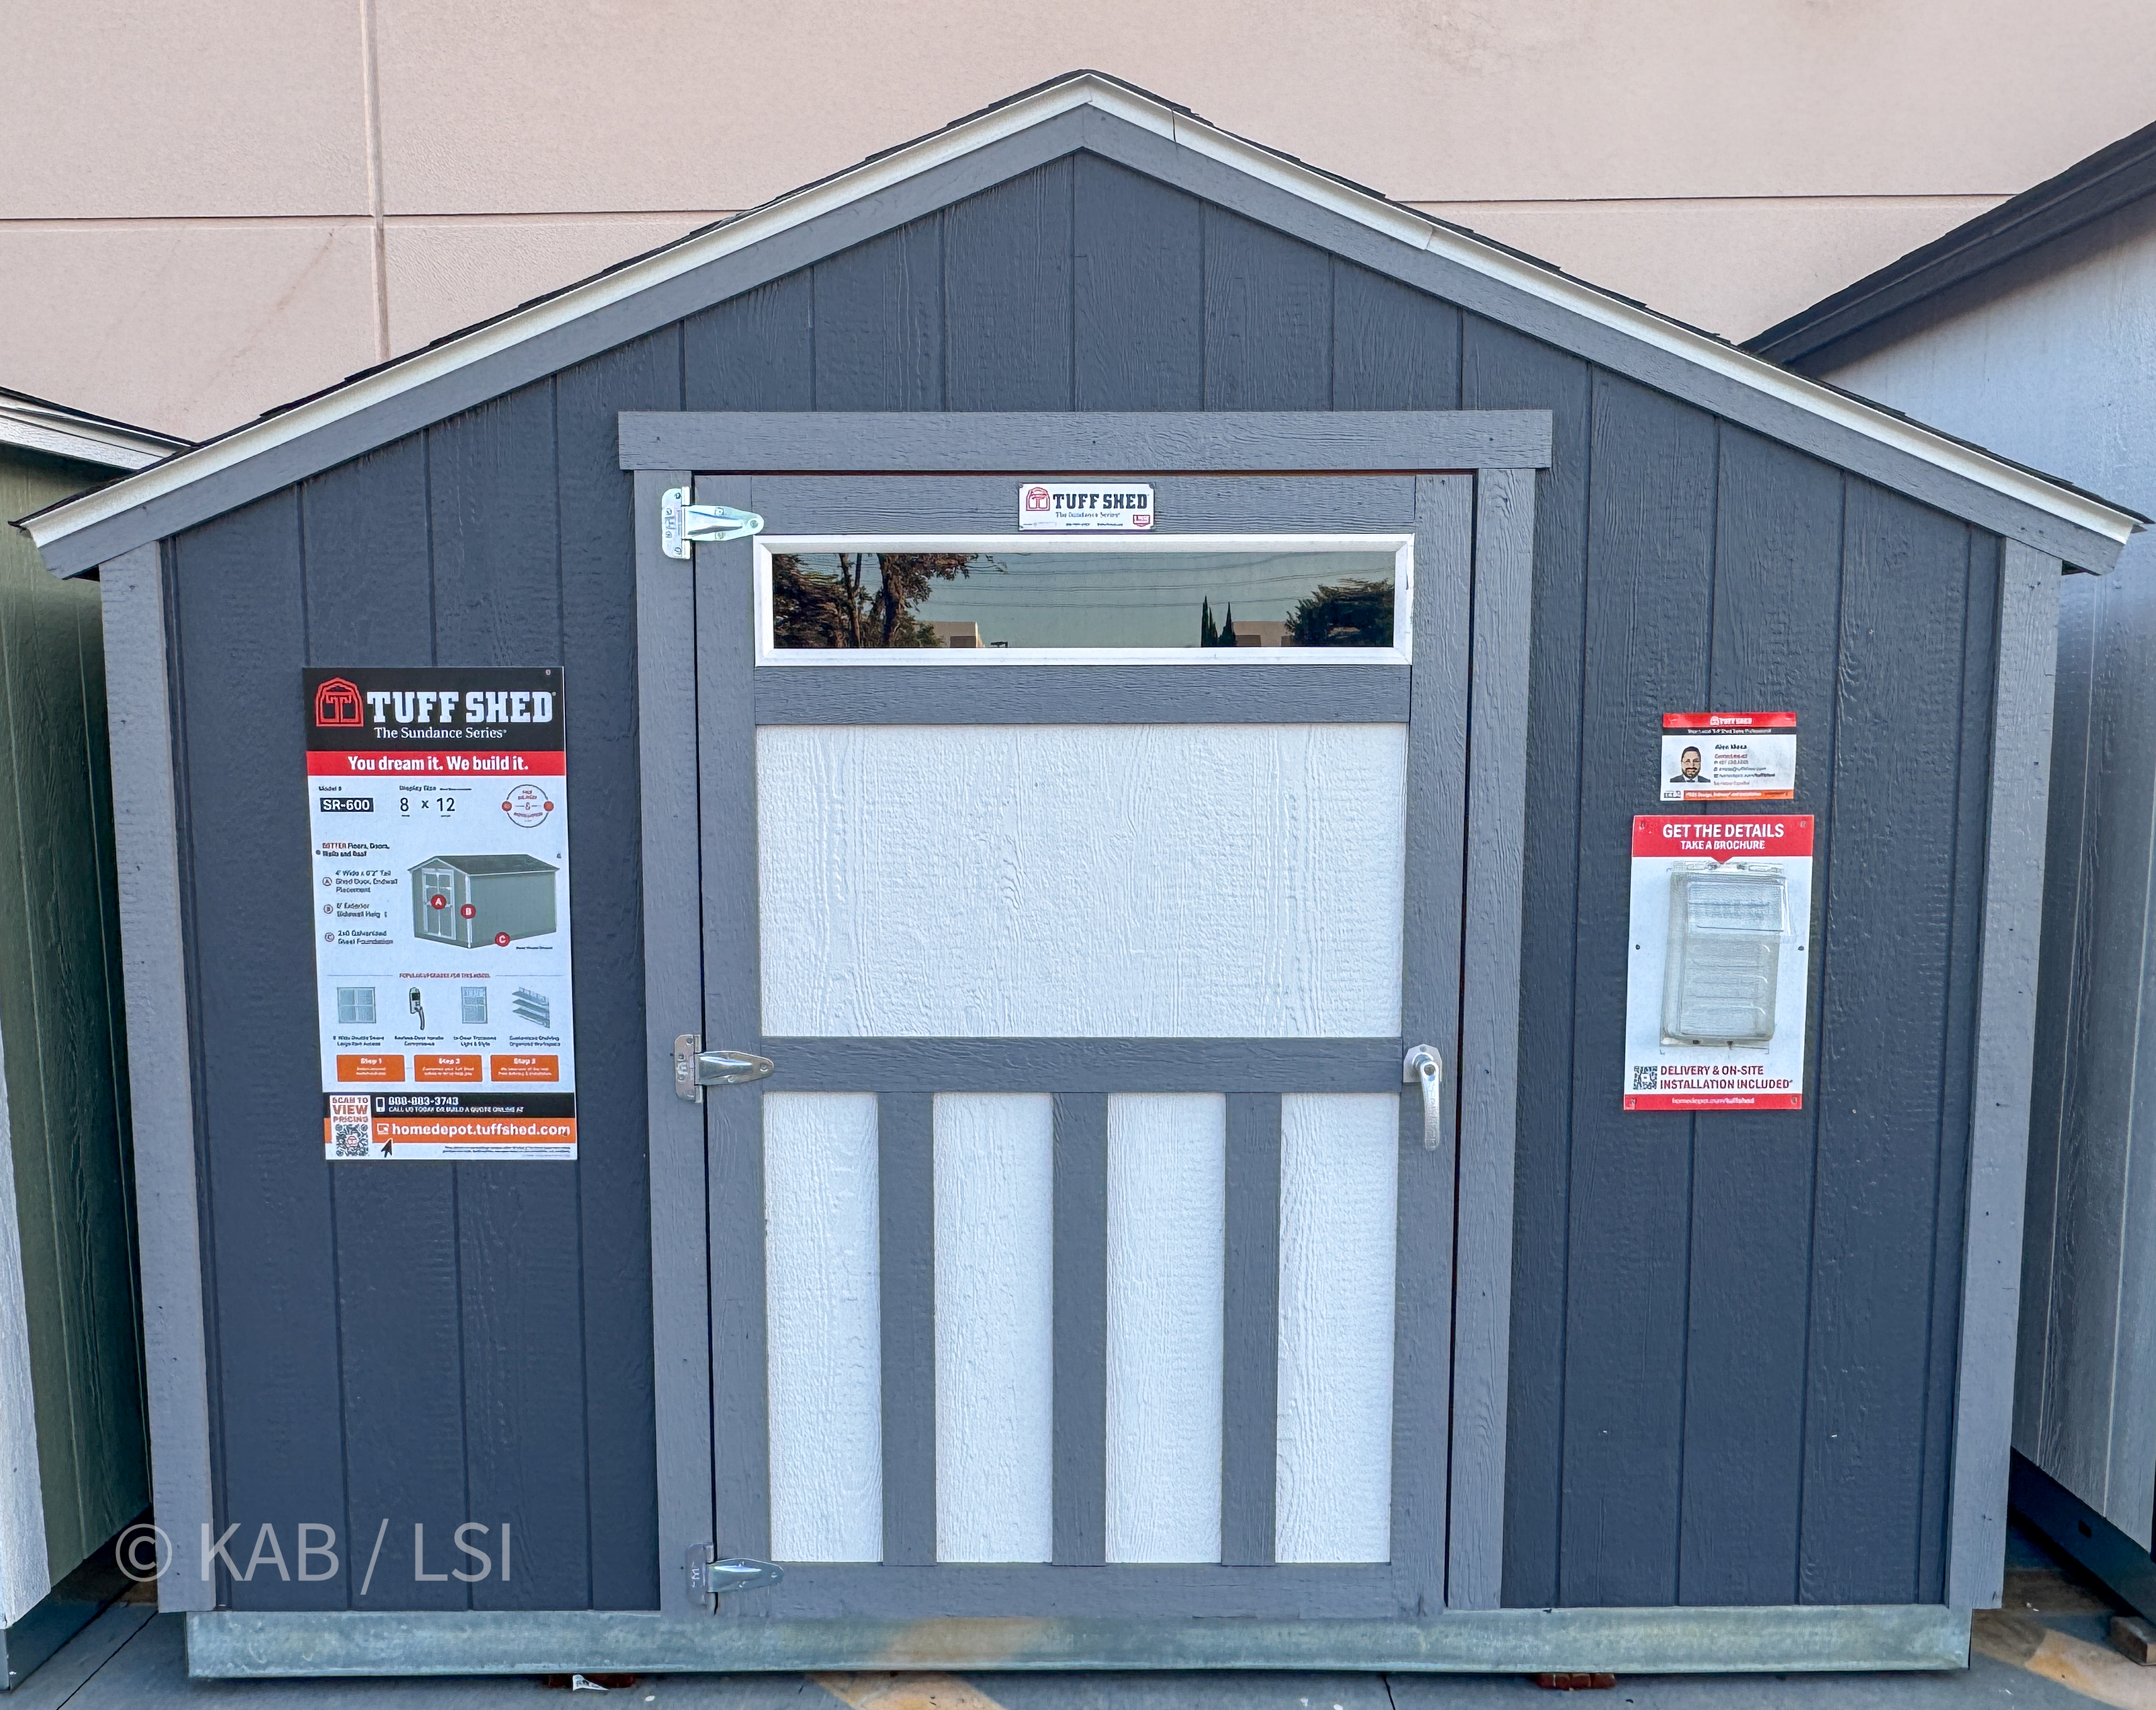
Tuff Shed Sundance SR-600 8×12 at Home Depot
the entry-tier utility shed. Single door, a transom light above, slate-gray two-tone. Same manufacturer, same salesman, different buyer.
Tuff Shed Sundance TR-800 10×12 at Home Depot
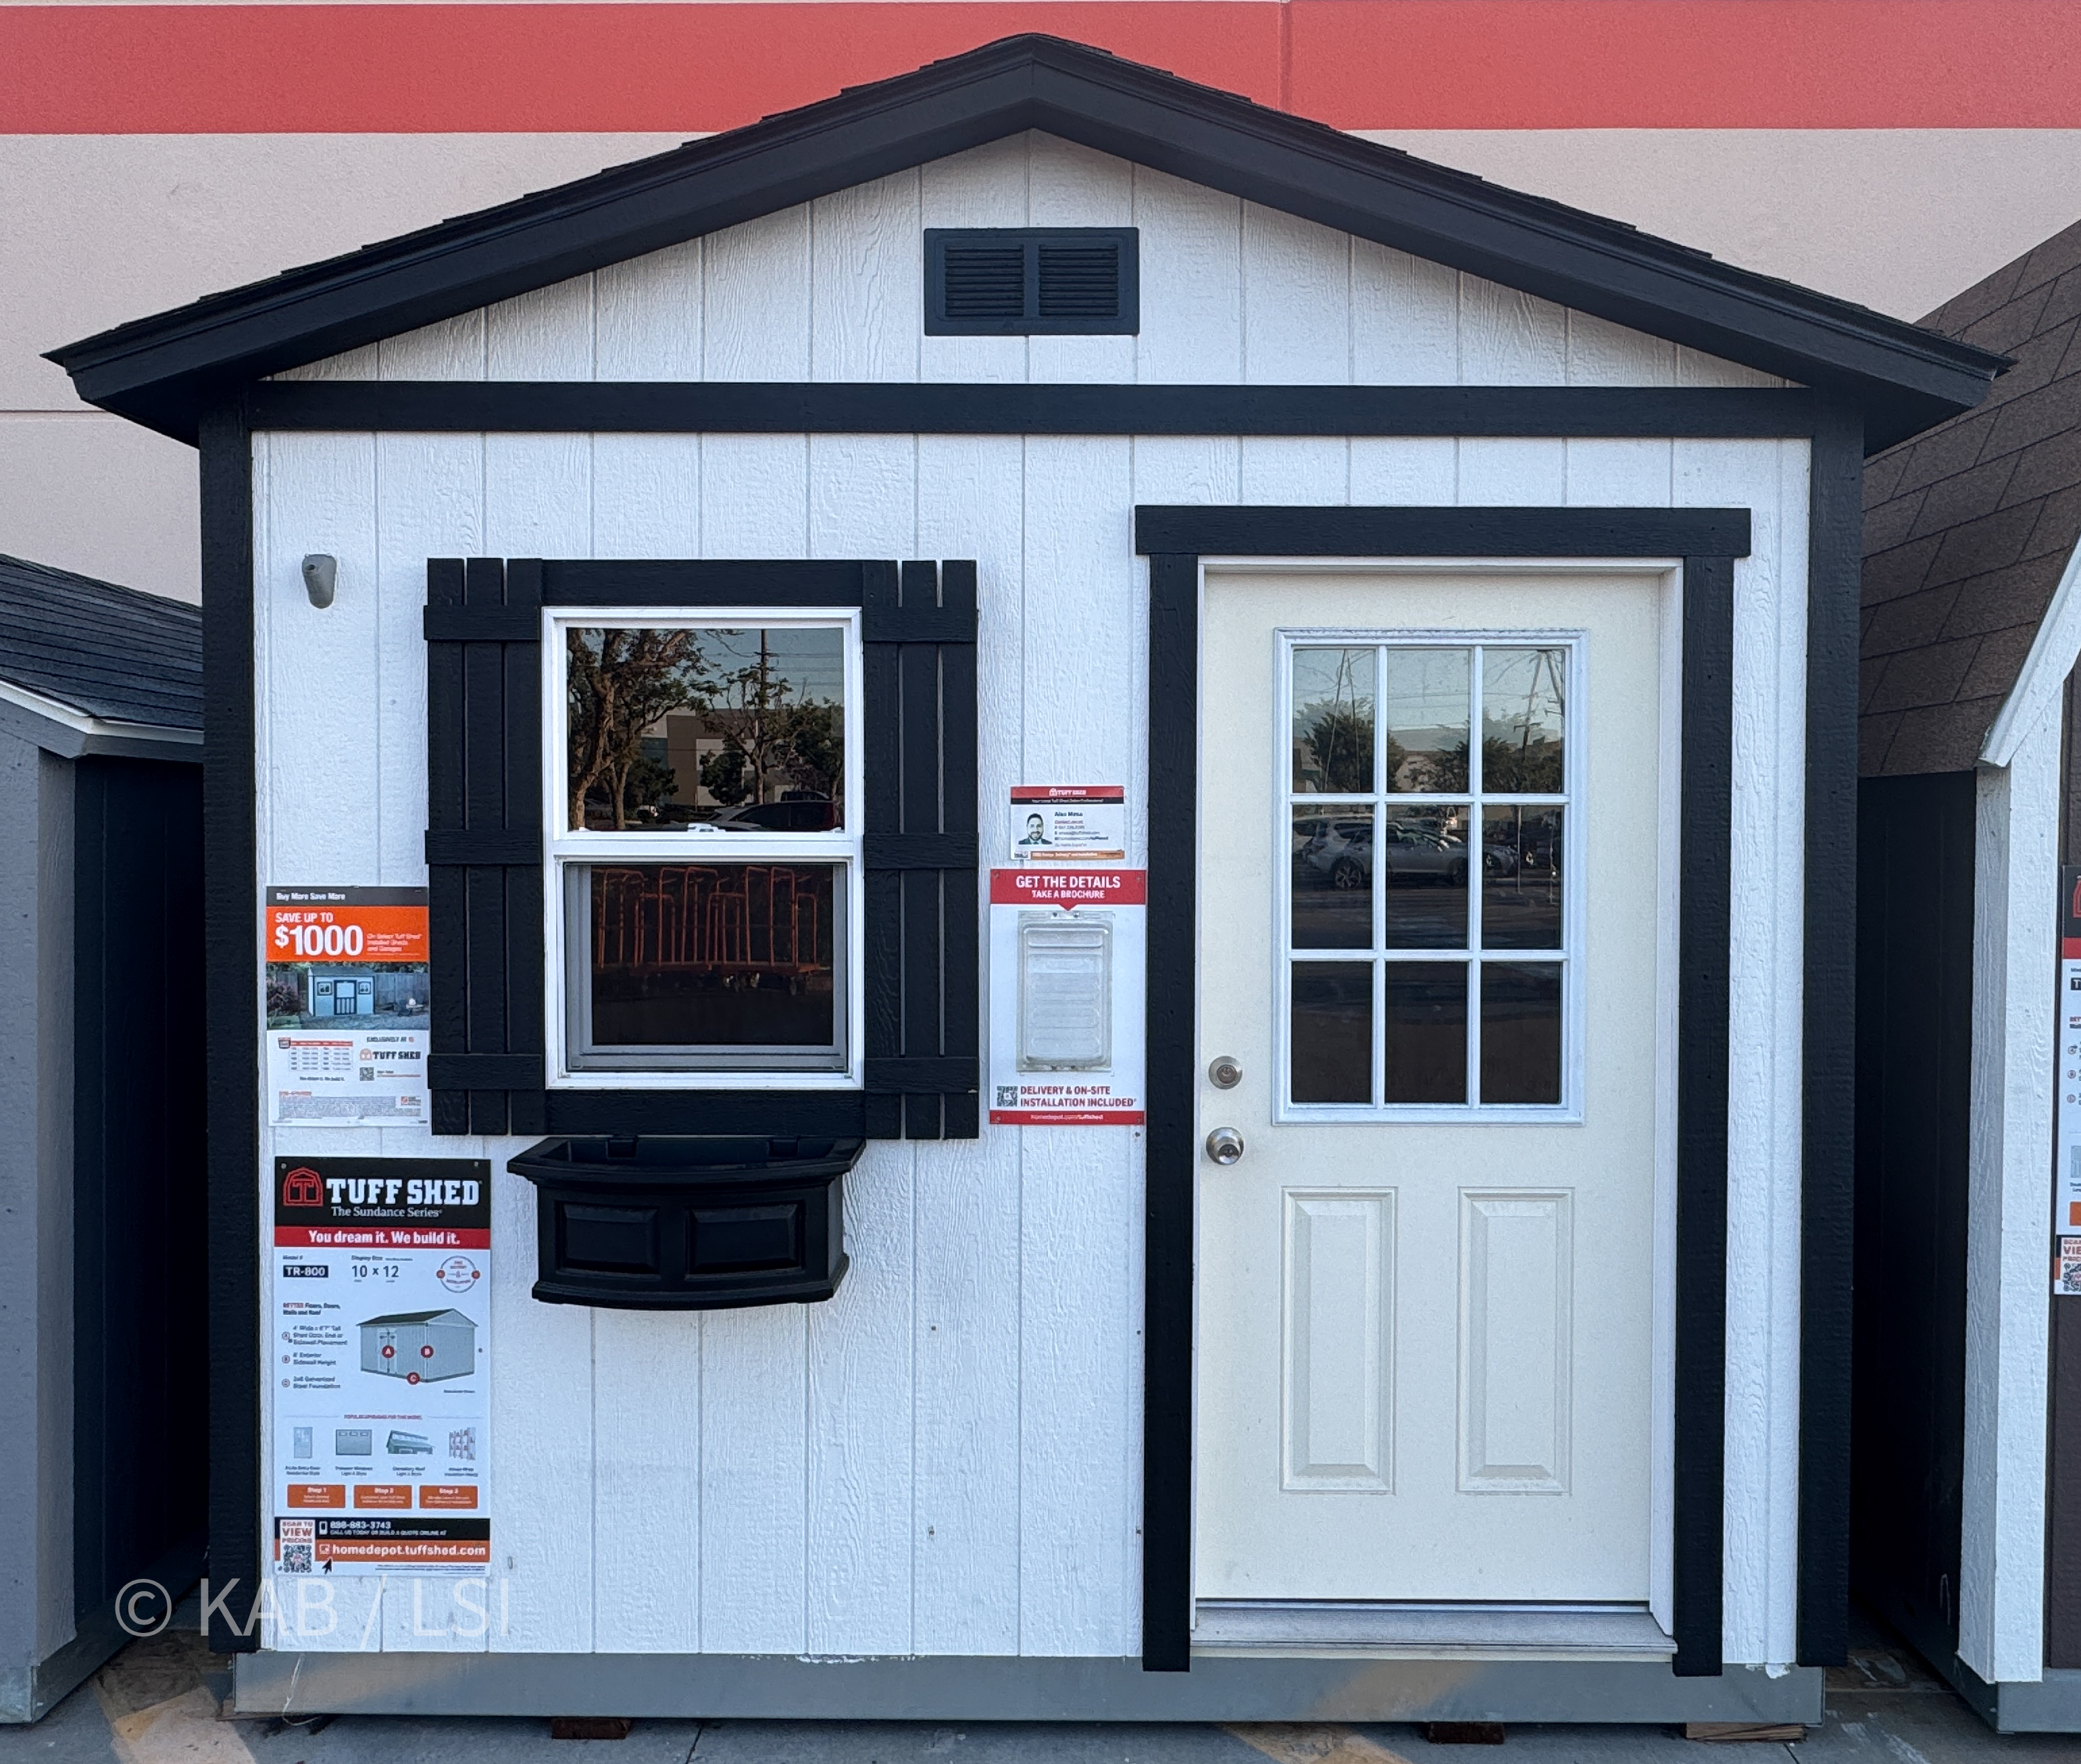
same series, same footprint, completely different intent. Residential 9-lite glass door, shutters, flower box, gable roof. Buy more, save up to $1,000.
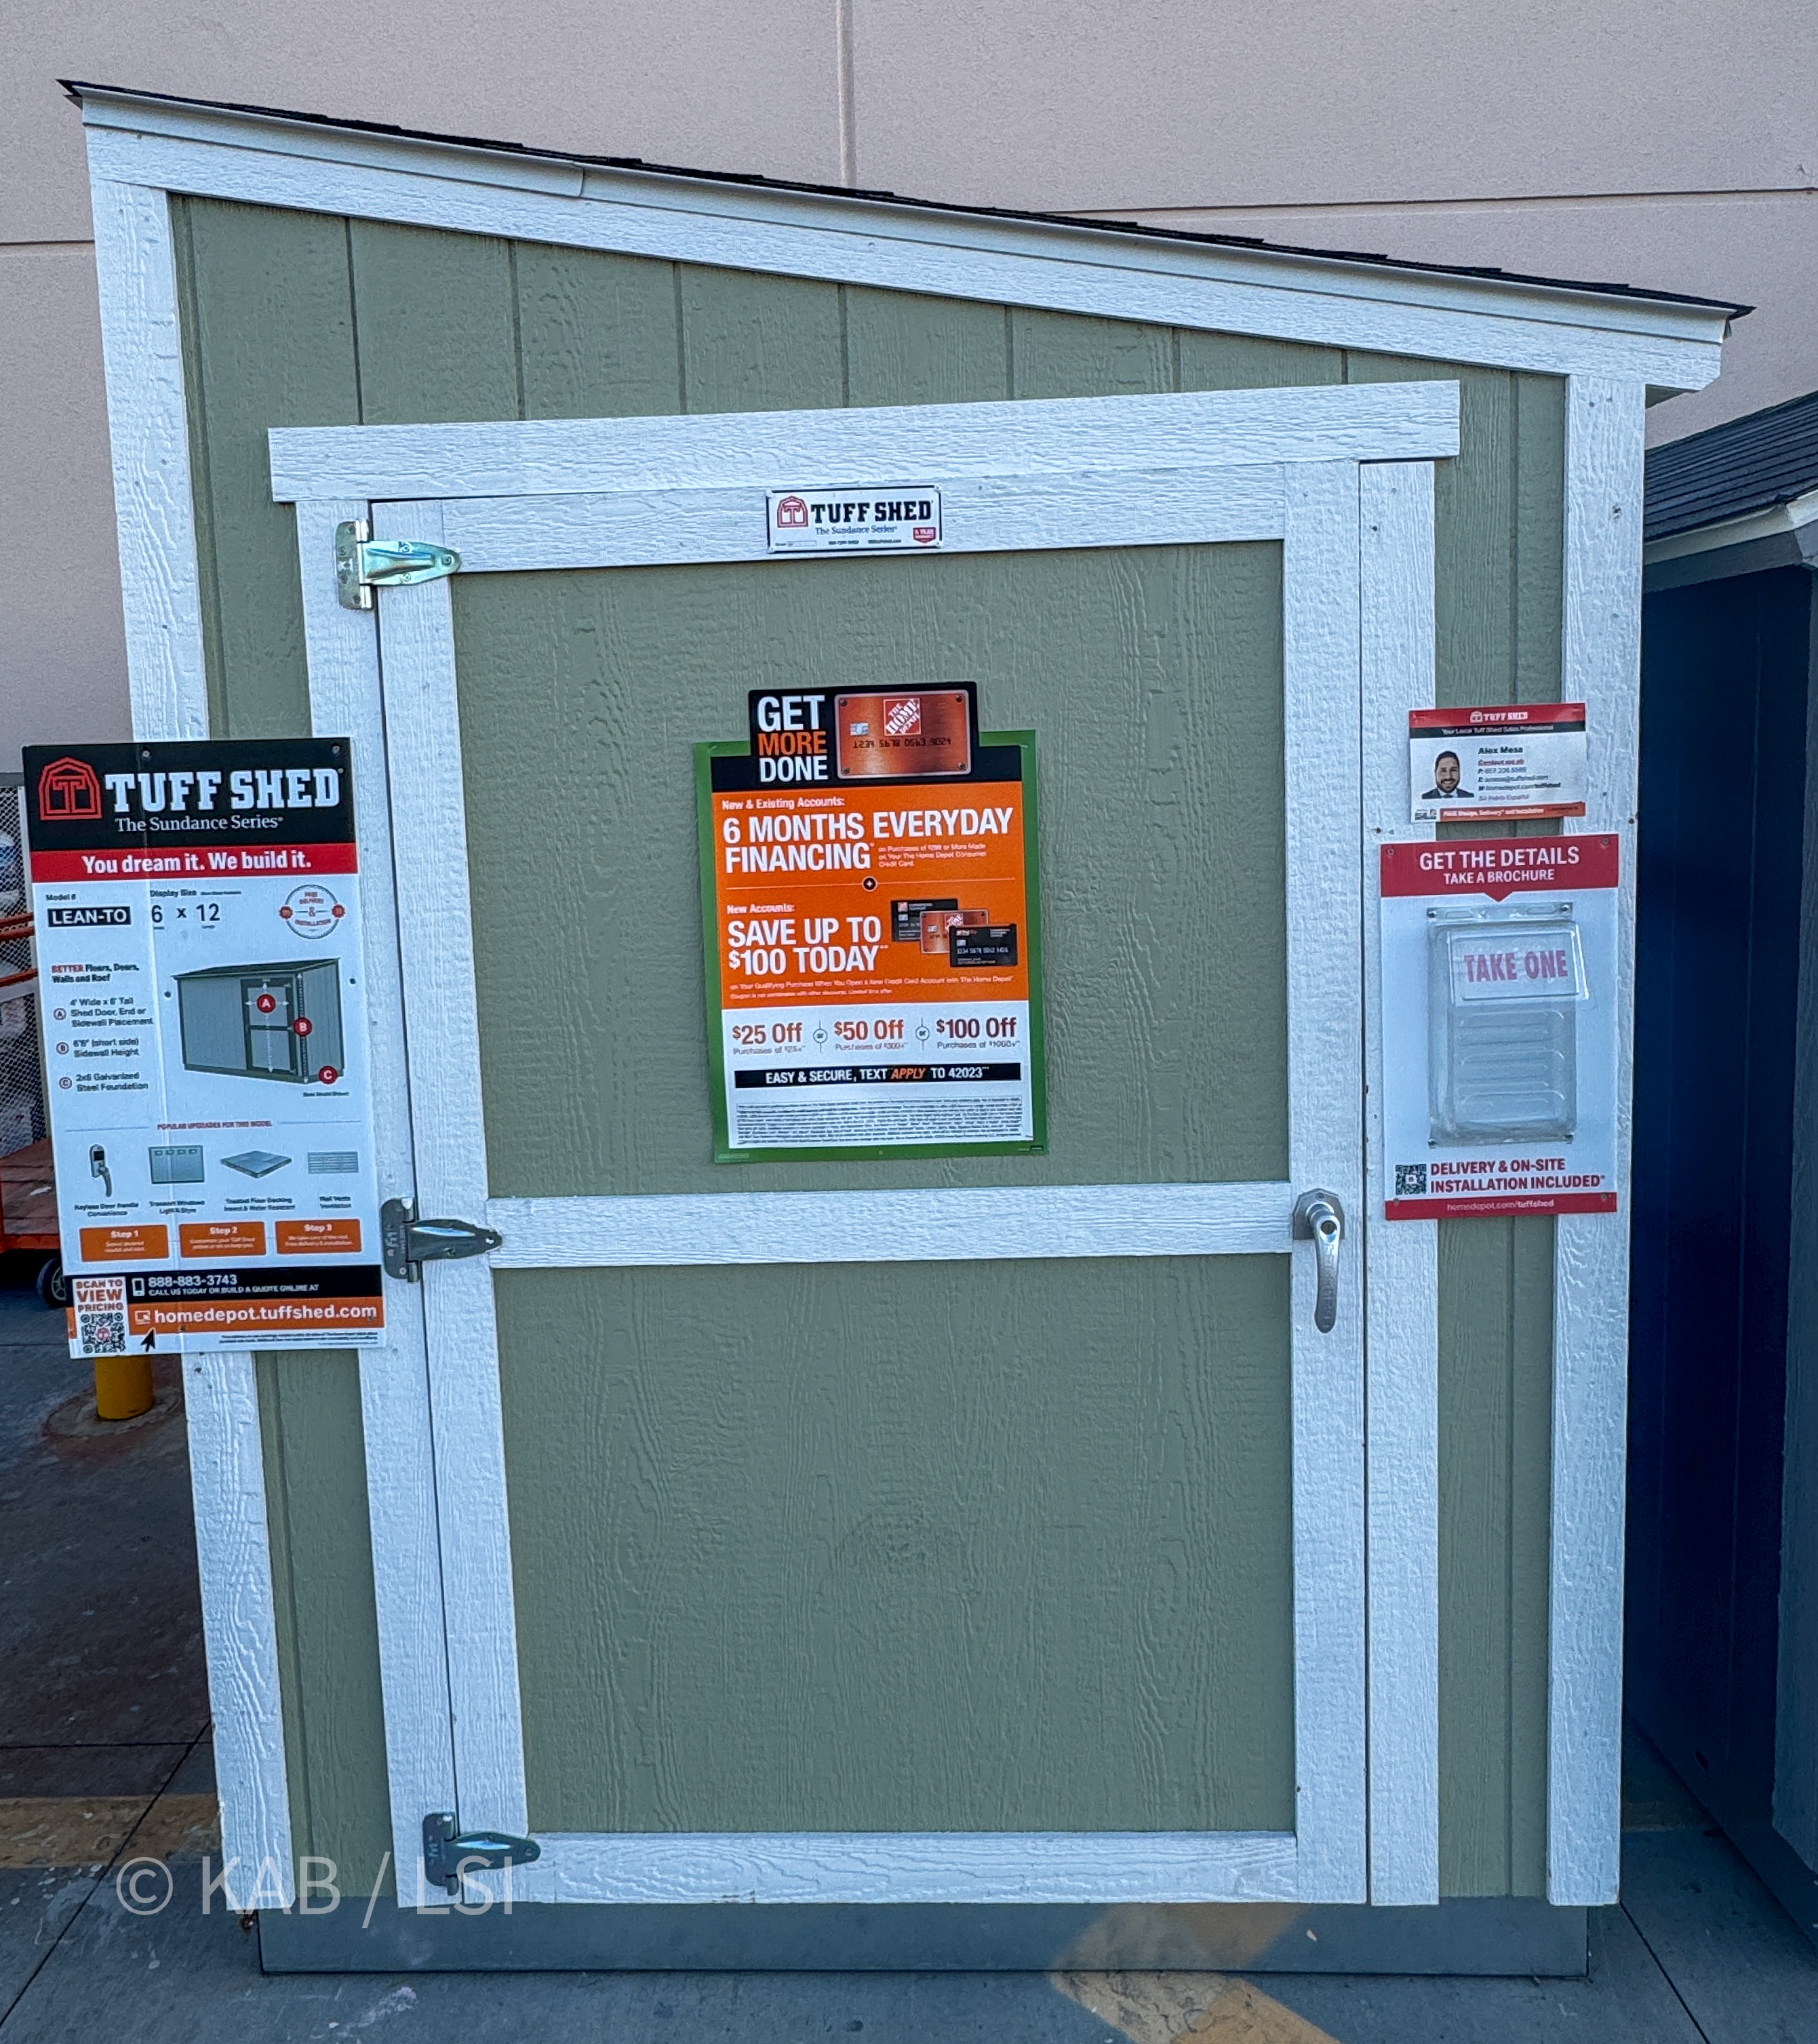
Tuff Shed Sundance LEAN-TO 6×12 at Home Depot
the one you buy when you want the shed to tuck against an existing wall. Single-slope roof pitches rain AWAY from whatever it’s leaning against.
The Tuff Shed TB-600 placard
“Free Delivery & Installation” in the big seal. Read the fine print: “Additional fees may apply based on site accessibility and conditions.” The hillside is a site condition.
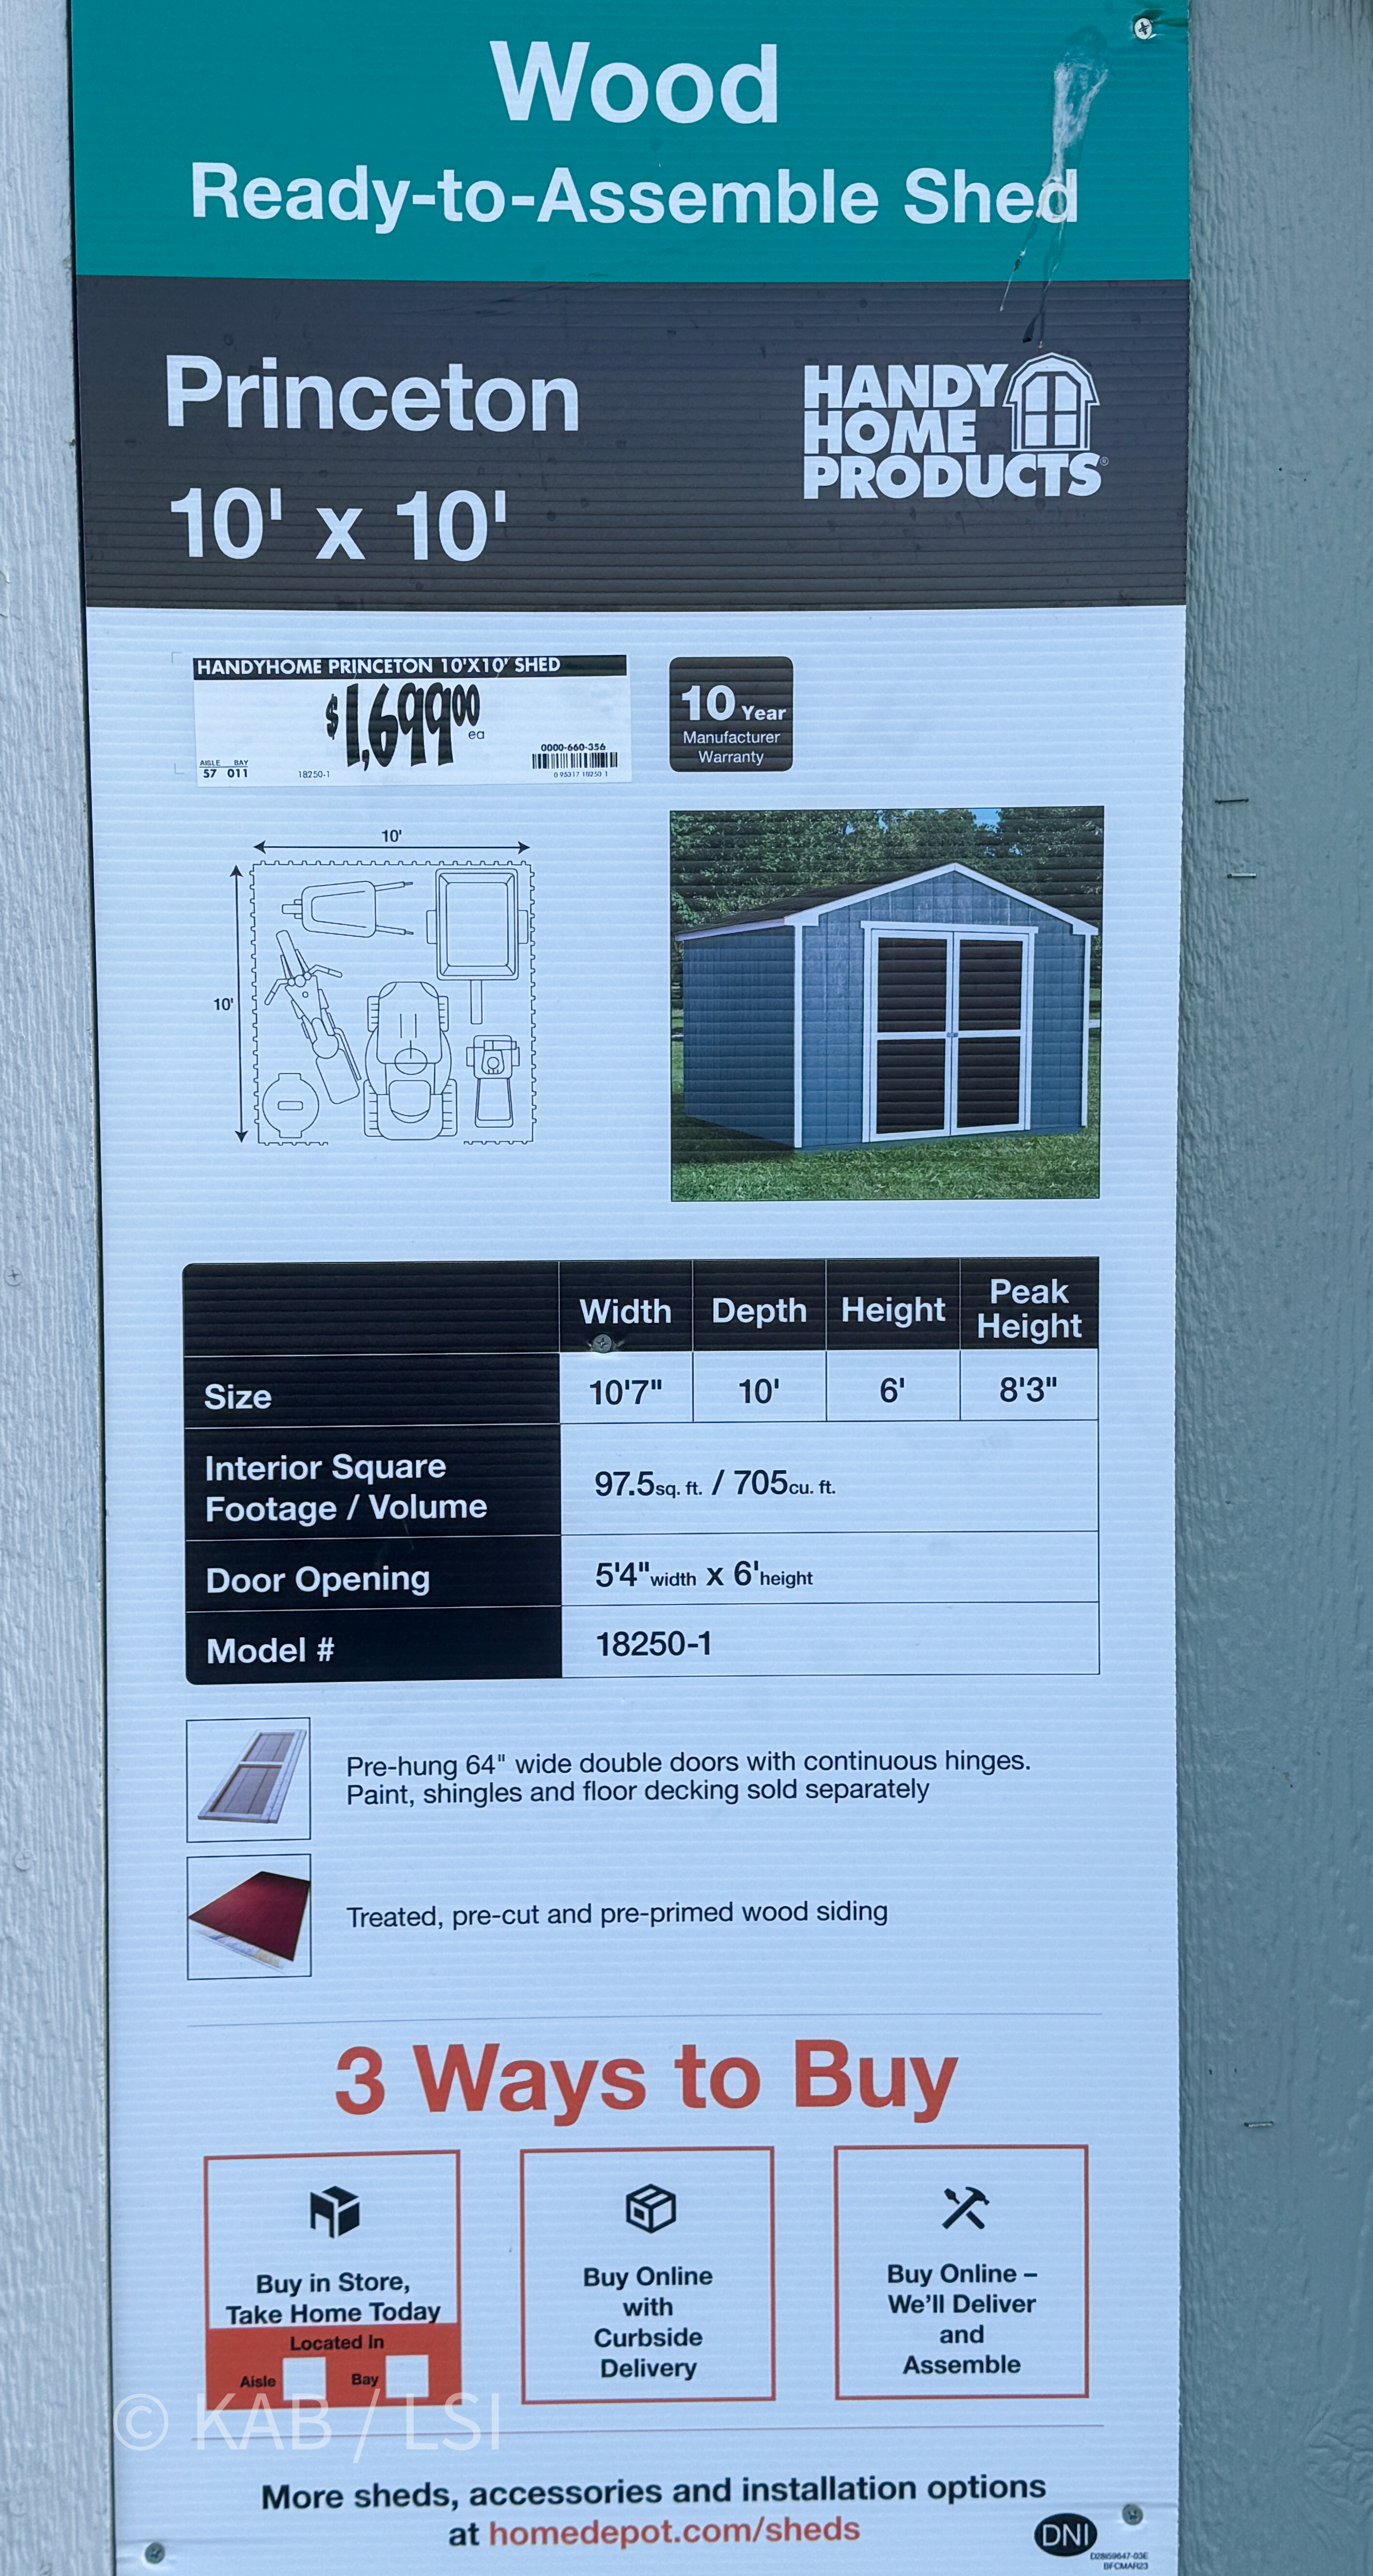
The Handy Home Princeton 10×10 at Home Depot
$1,699 on the sticker. Read the fine print: paint, shingles, and floor decking sold separately. Different product philosophy (RTA kit) under the same retail roof.
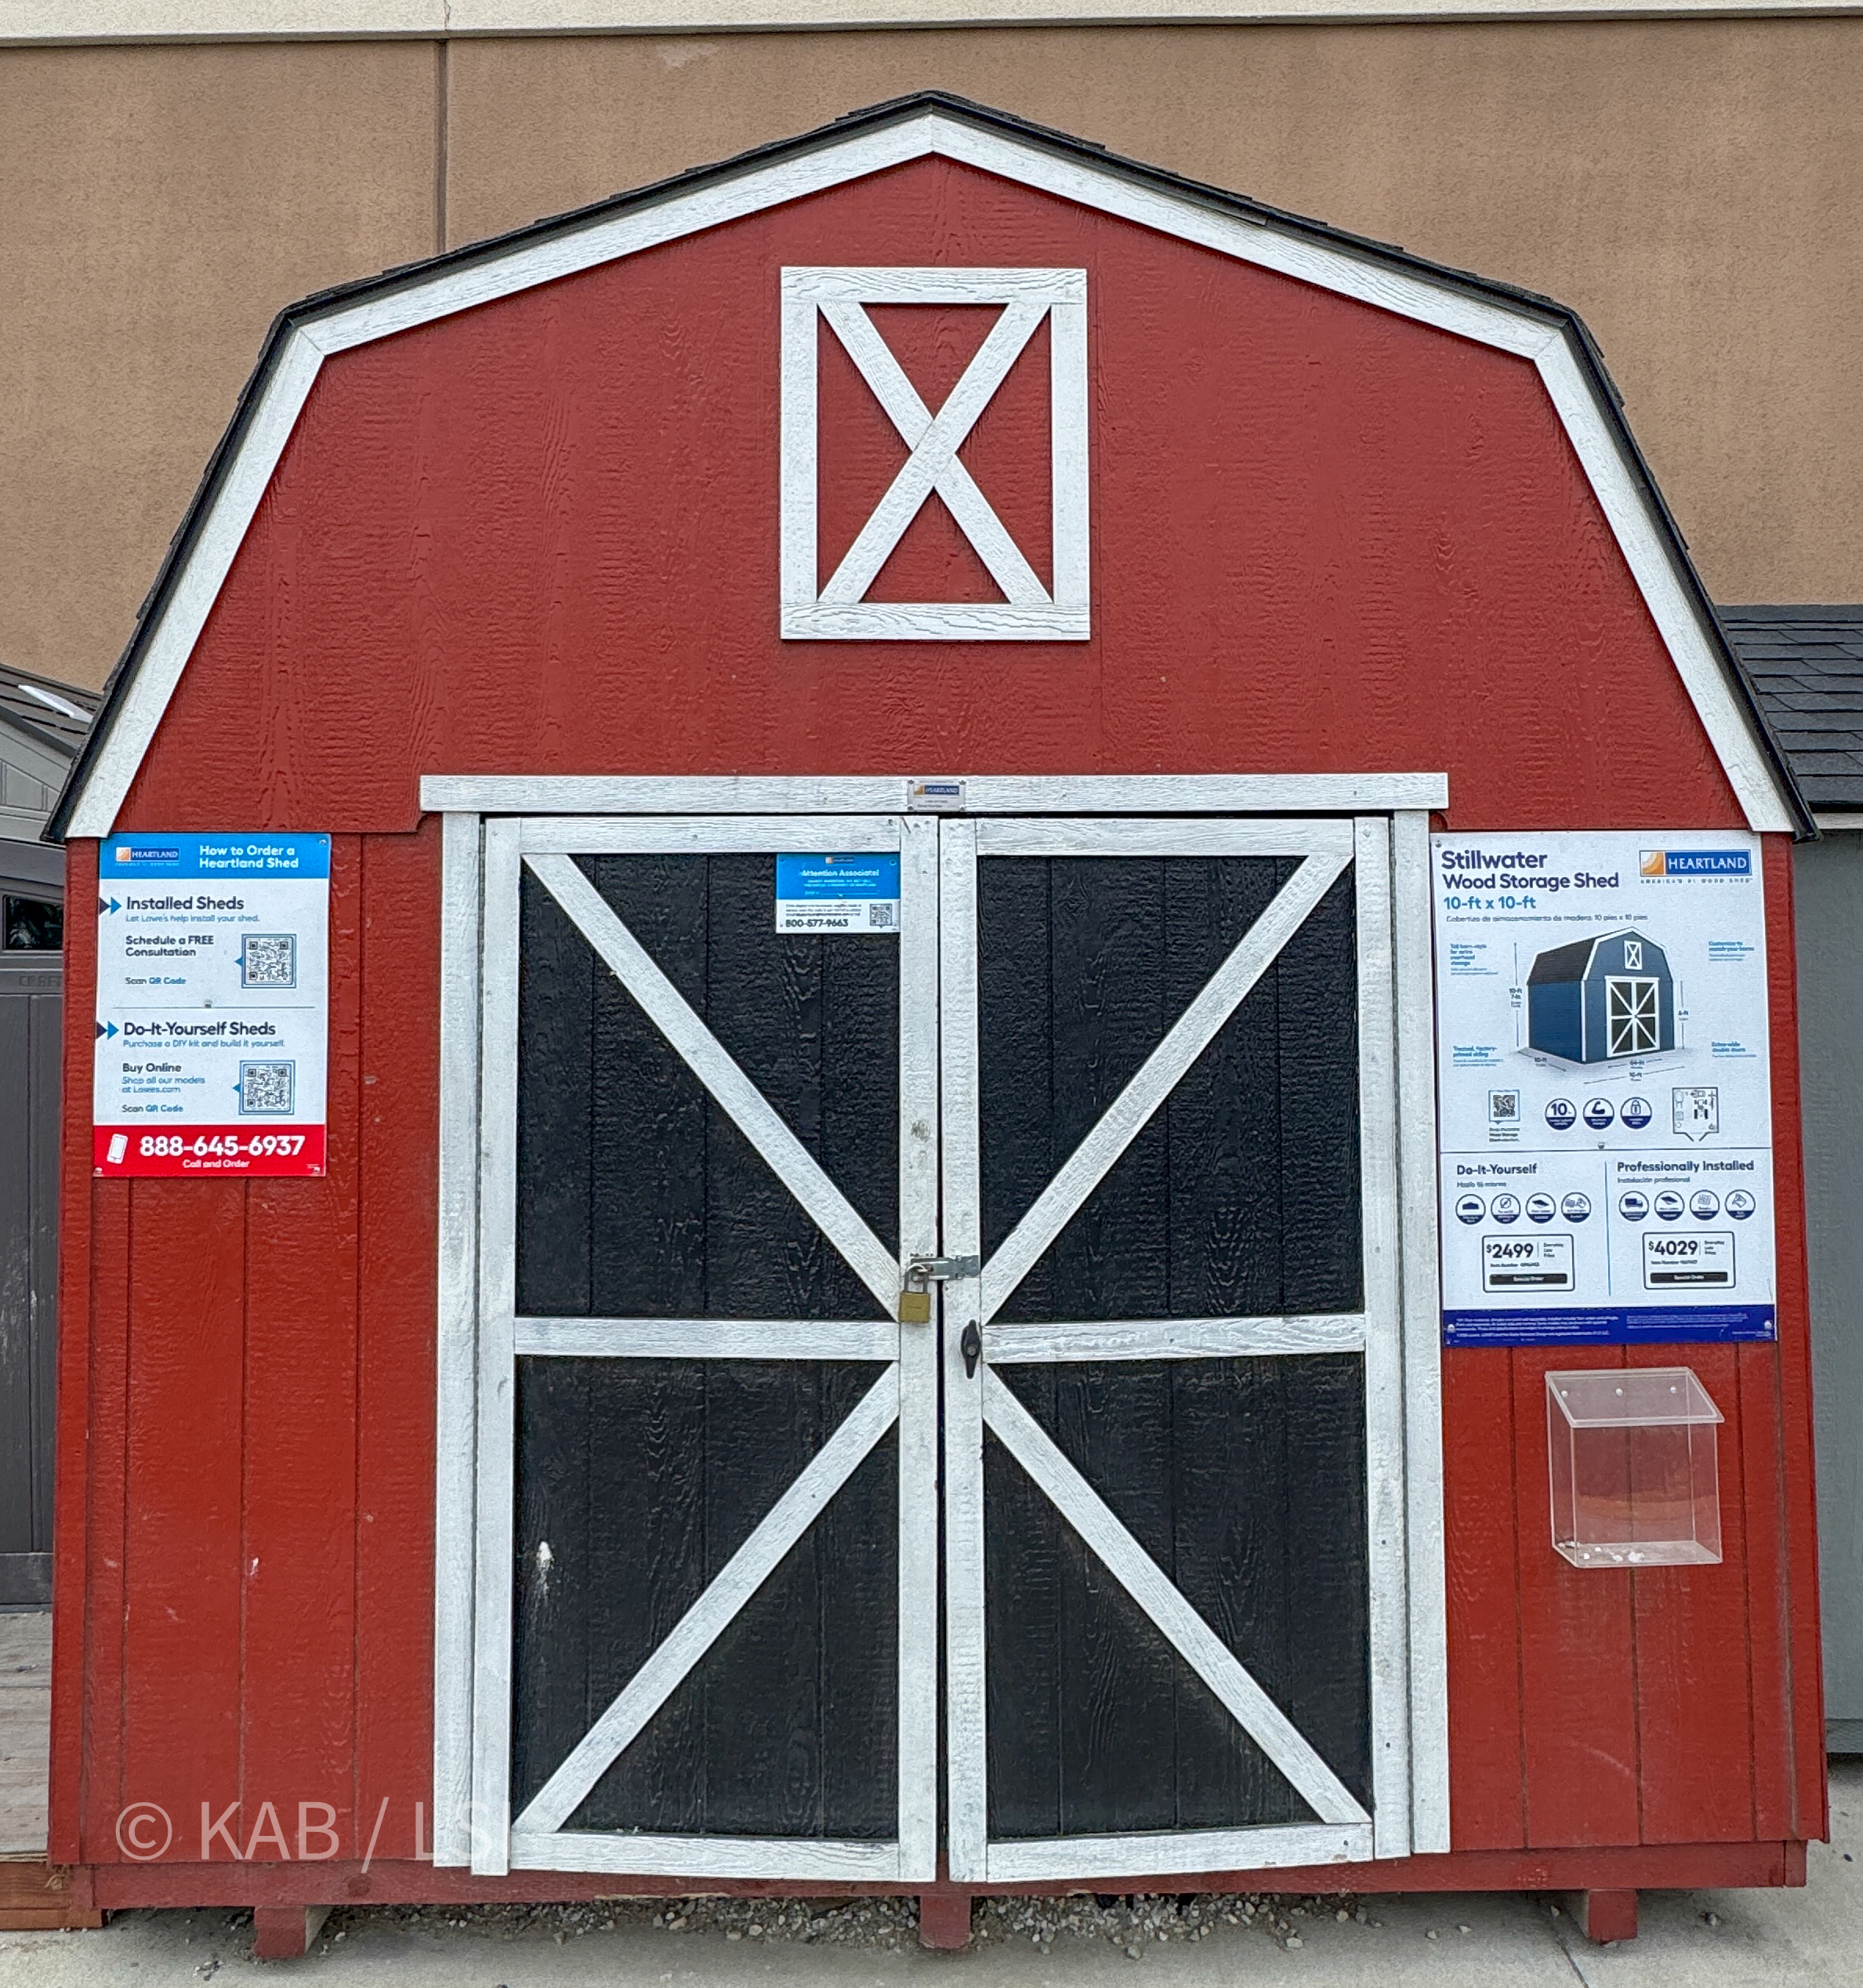
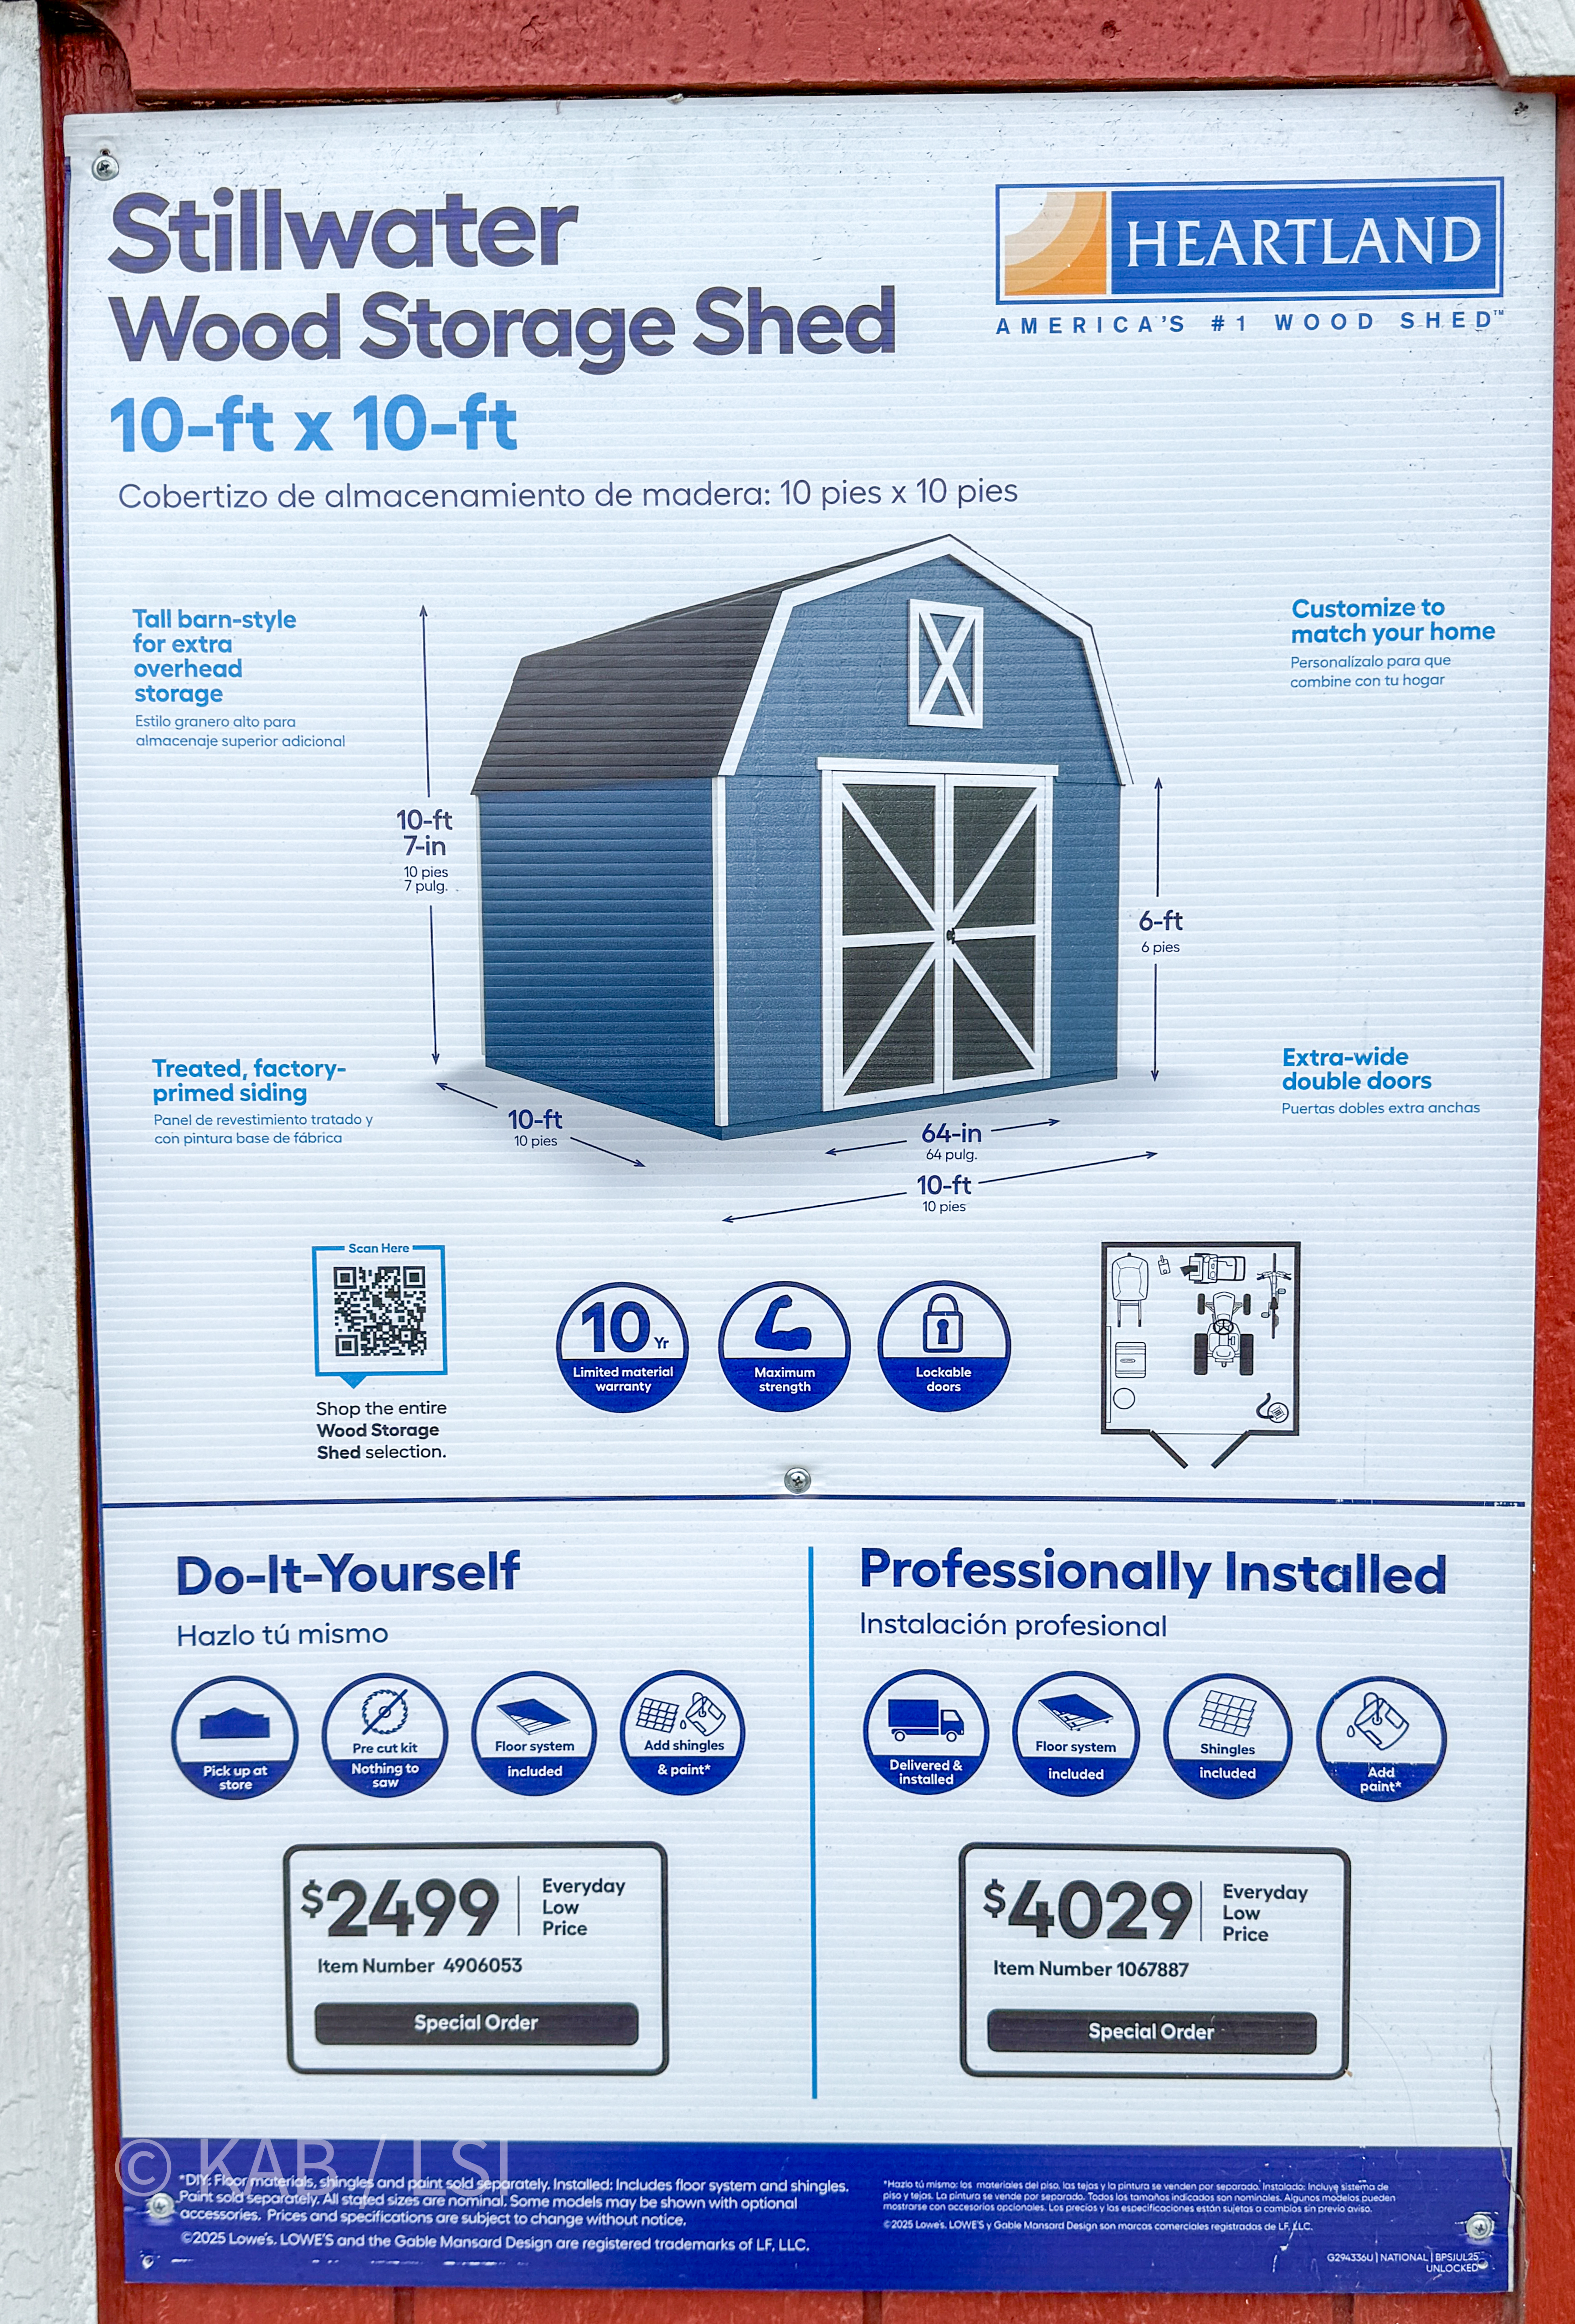
Heartland Stillwater red barn 10×10 at Lowe’s
$2,499 DIY, $4,029 installed. That $1,530 gap is where the hillside questions actually start.
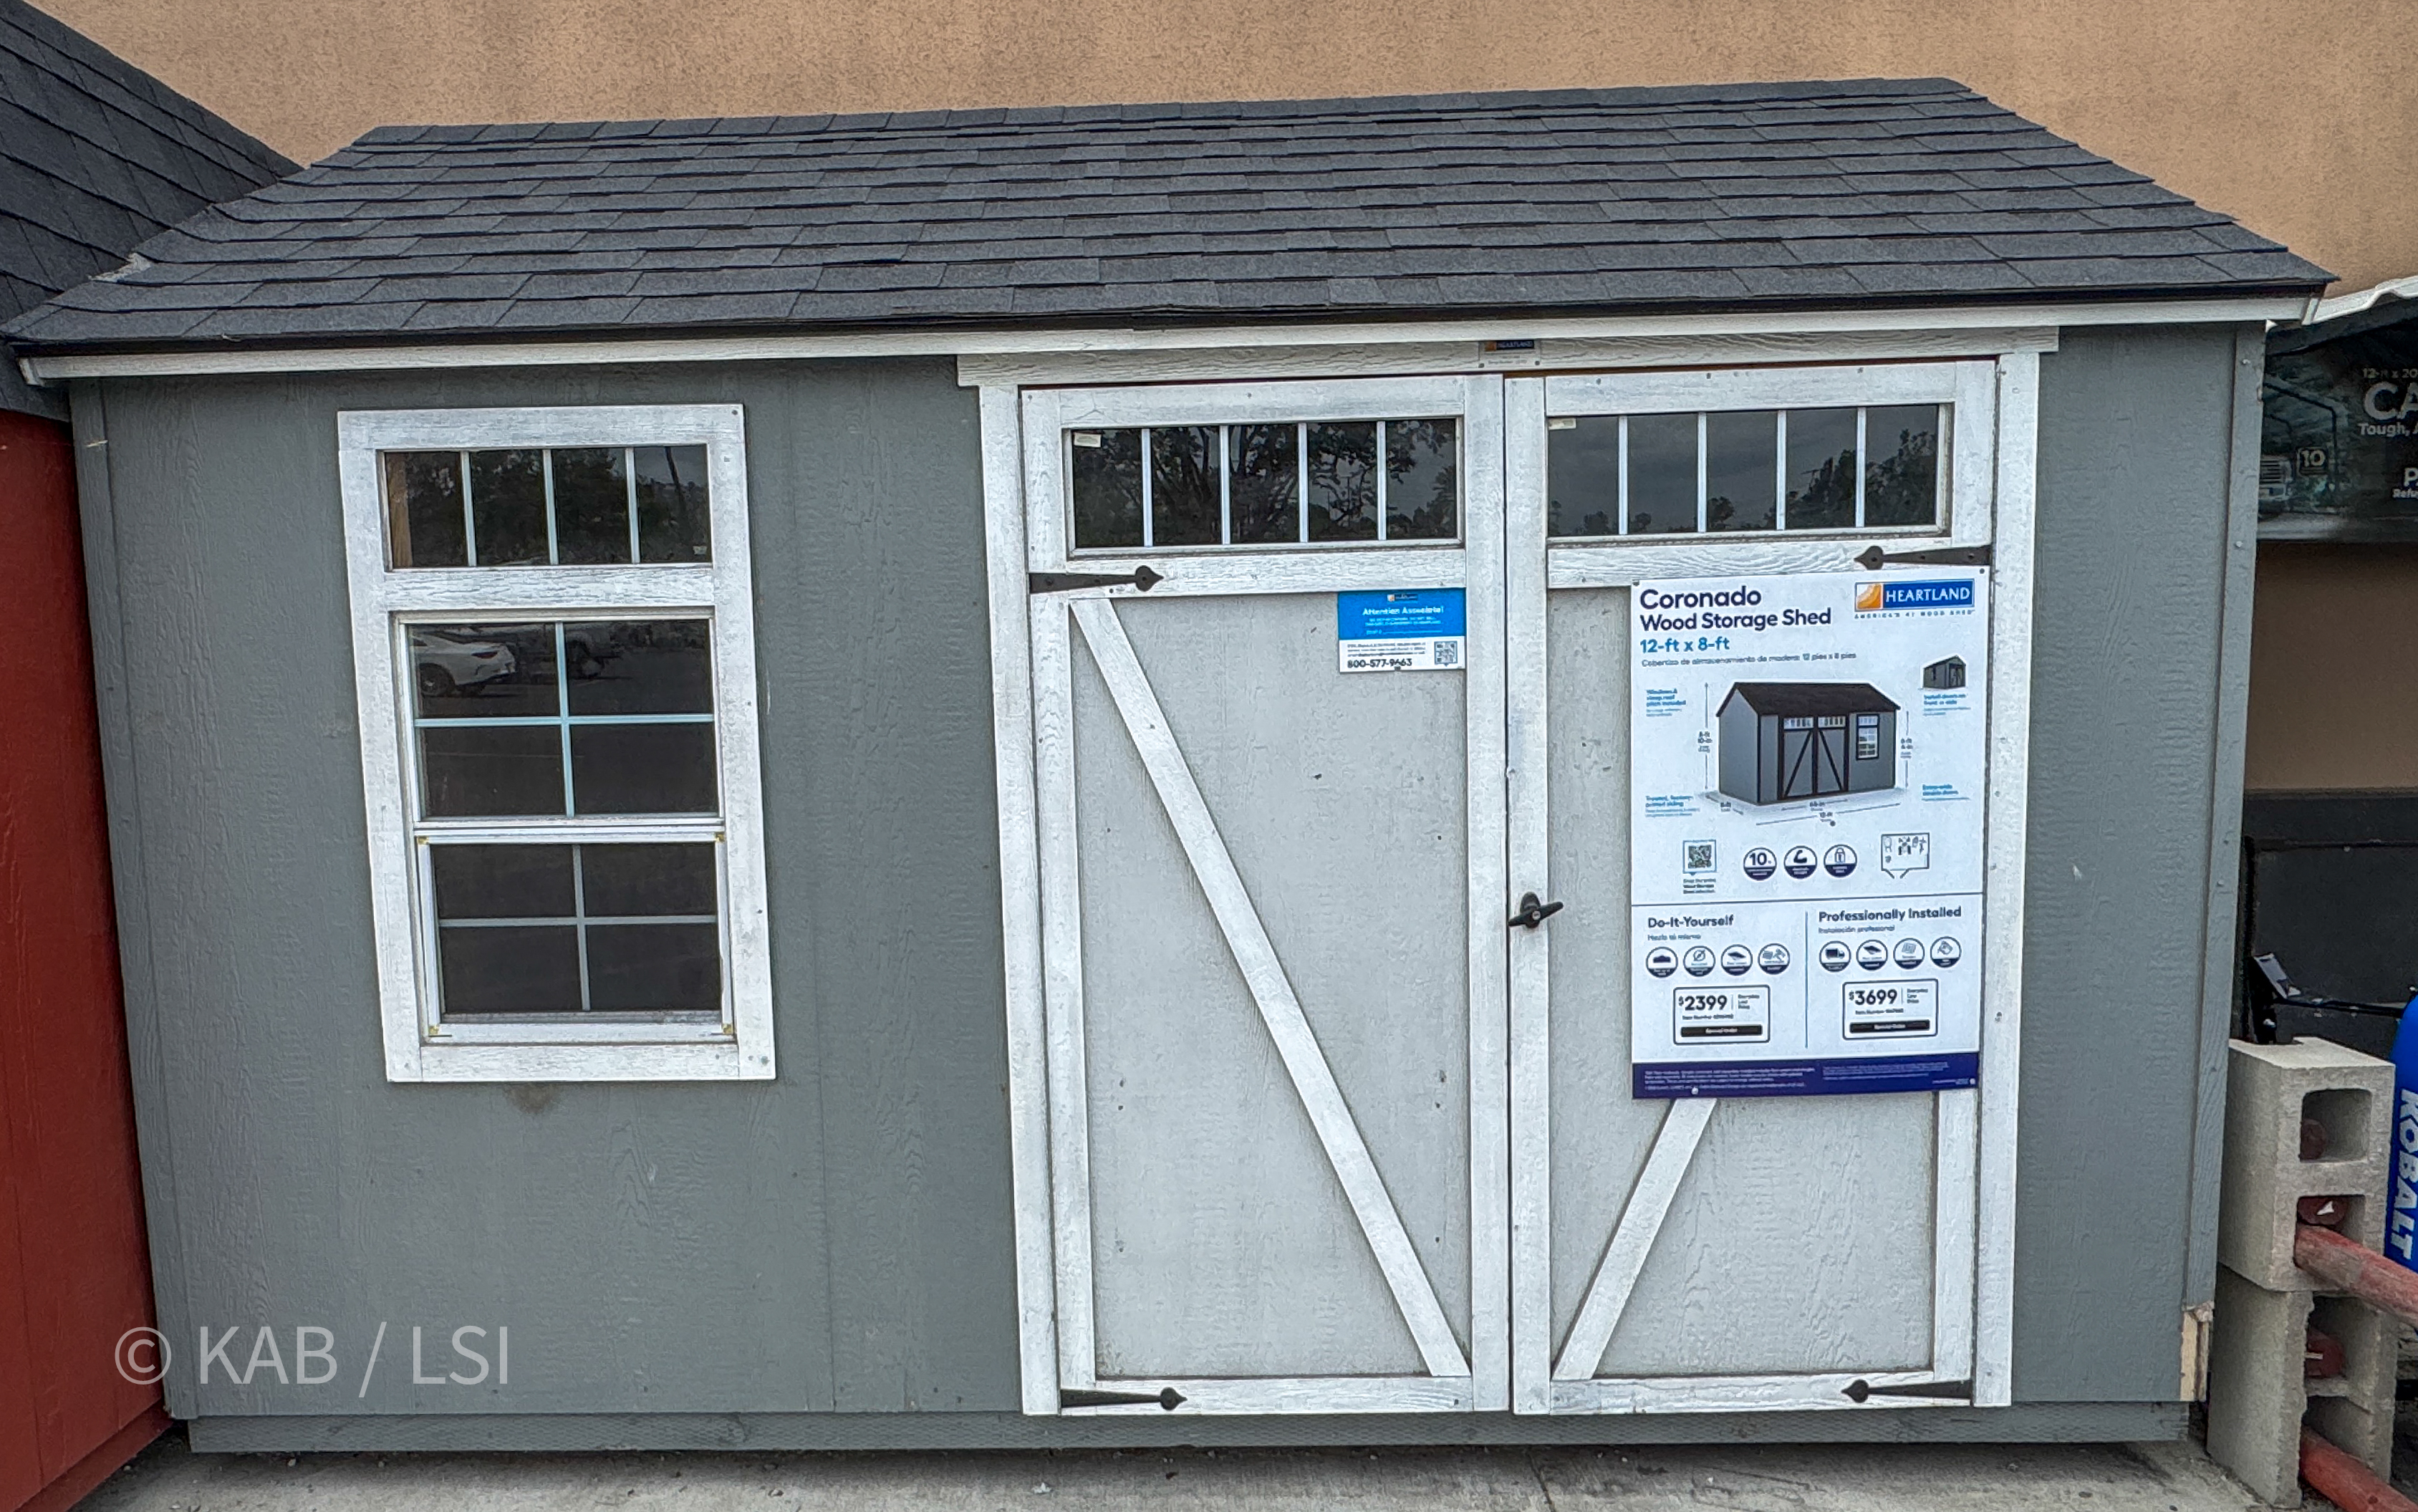
Heartland Coronado 12×8 in weathered gray at Lowe’s
$2,399 DIY, $3,699 installed. Contemporary sibling to the red barn; same maker, different century.
The Heartland spec placard itself
what the manufacturer publishes about the shed you’d be buying. Read the placard before you read the price tag.
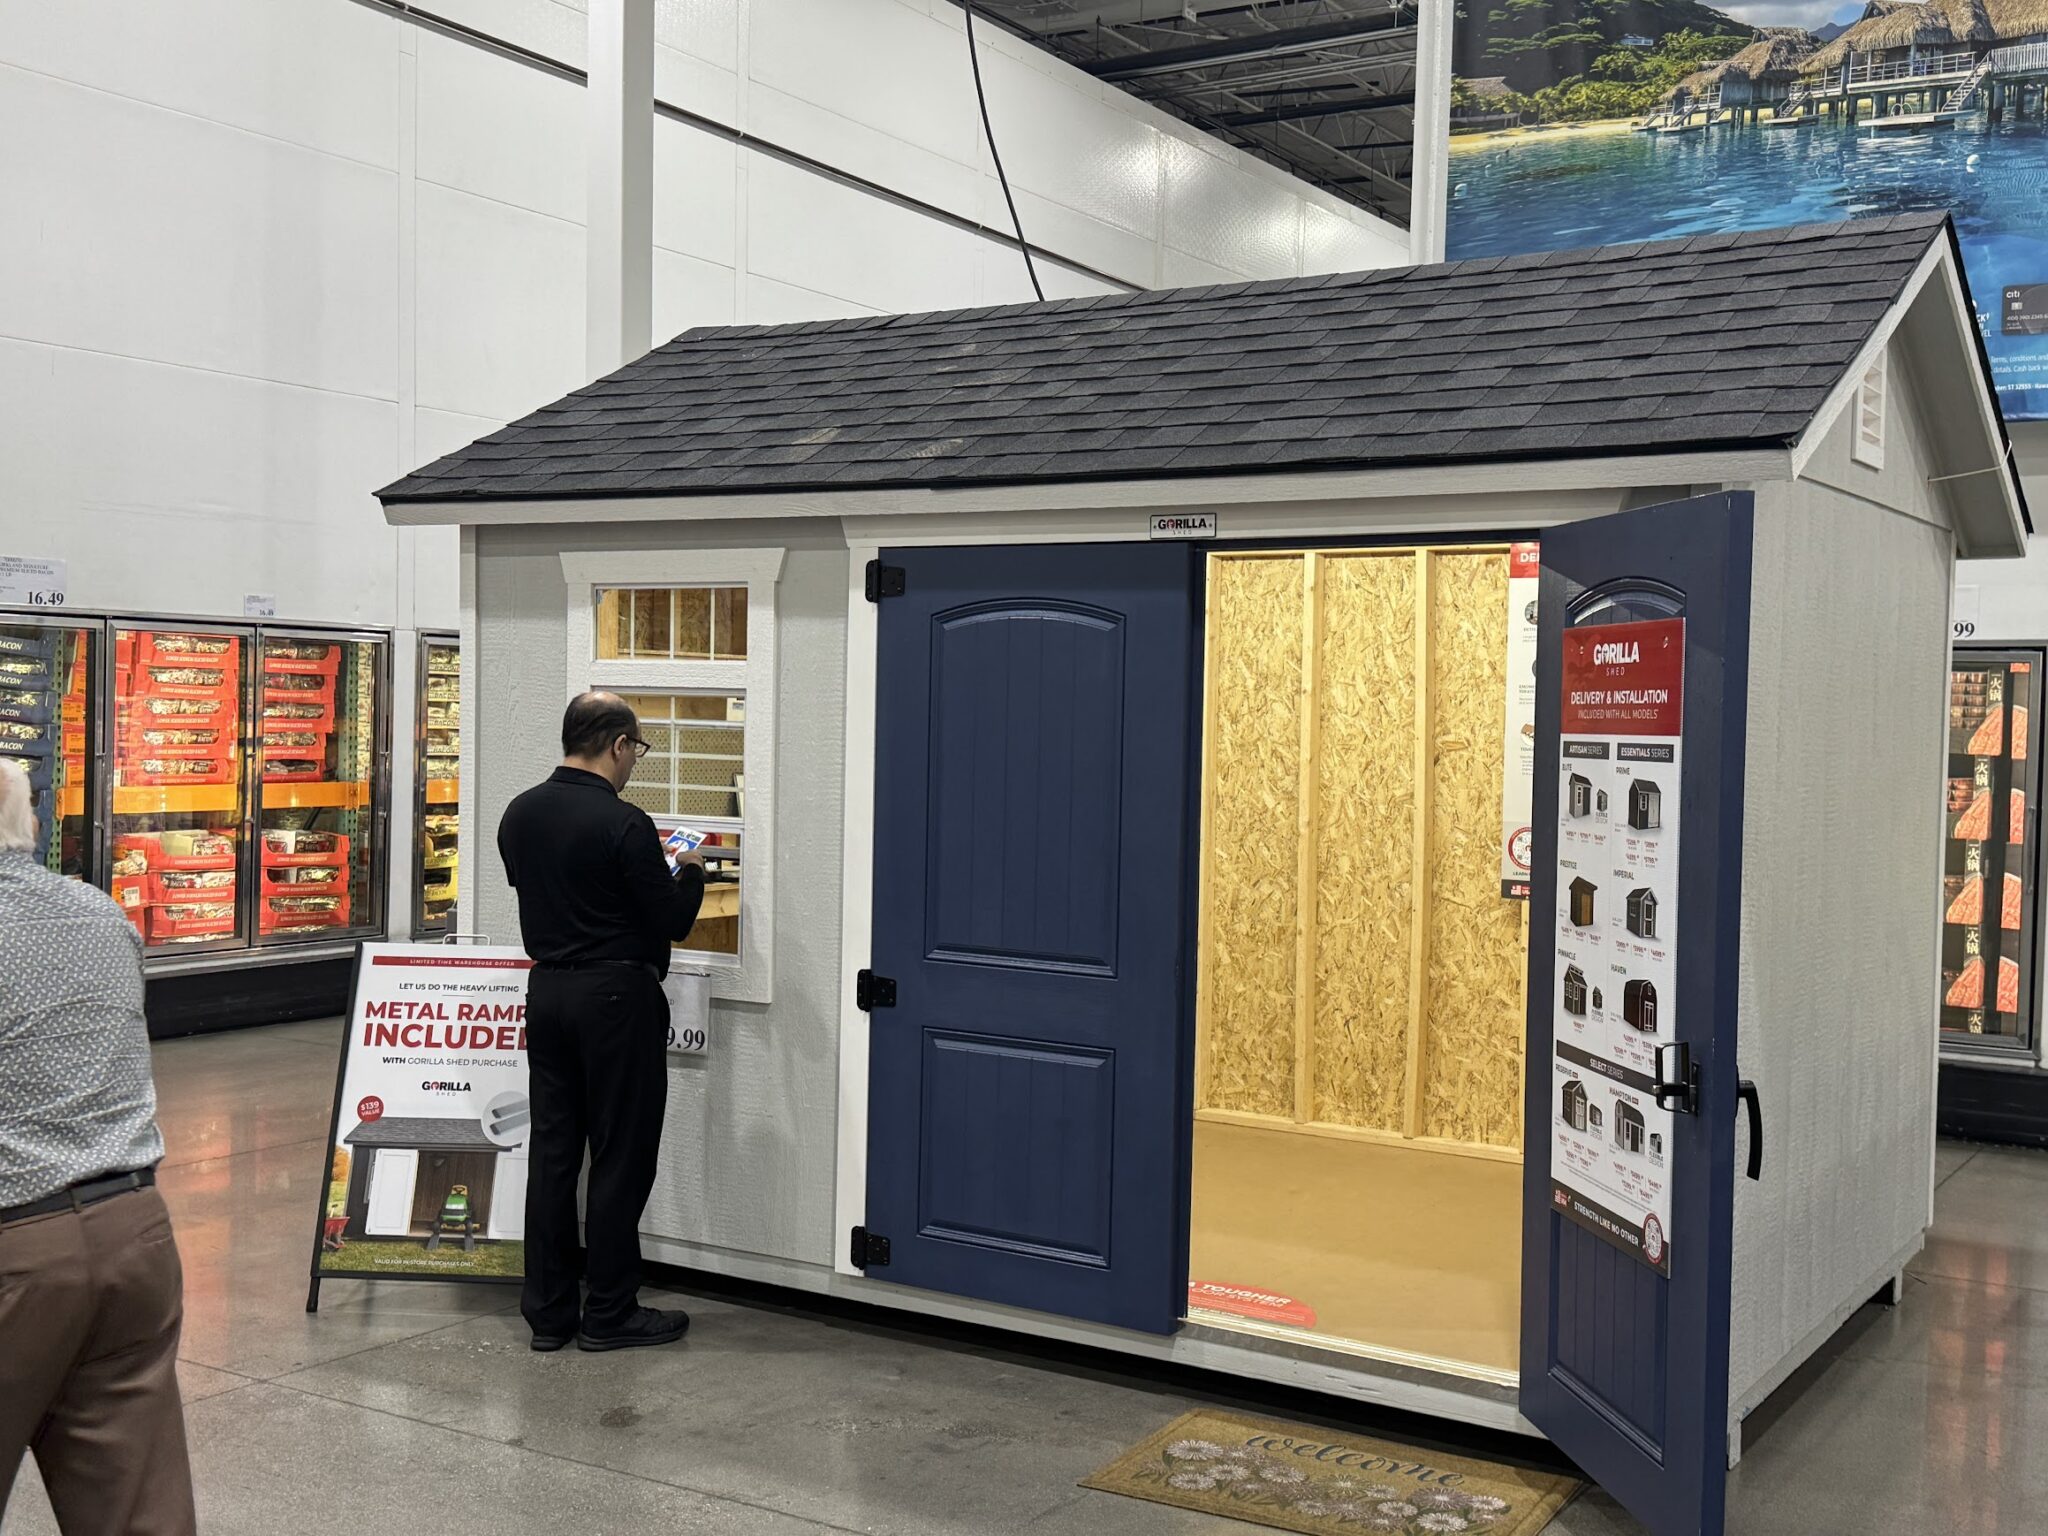
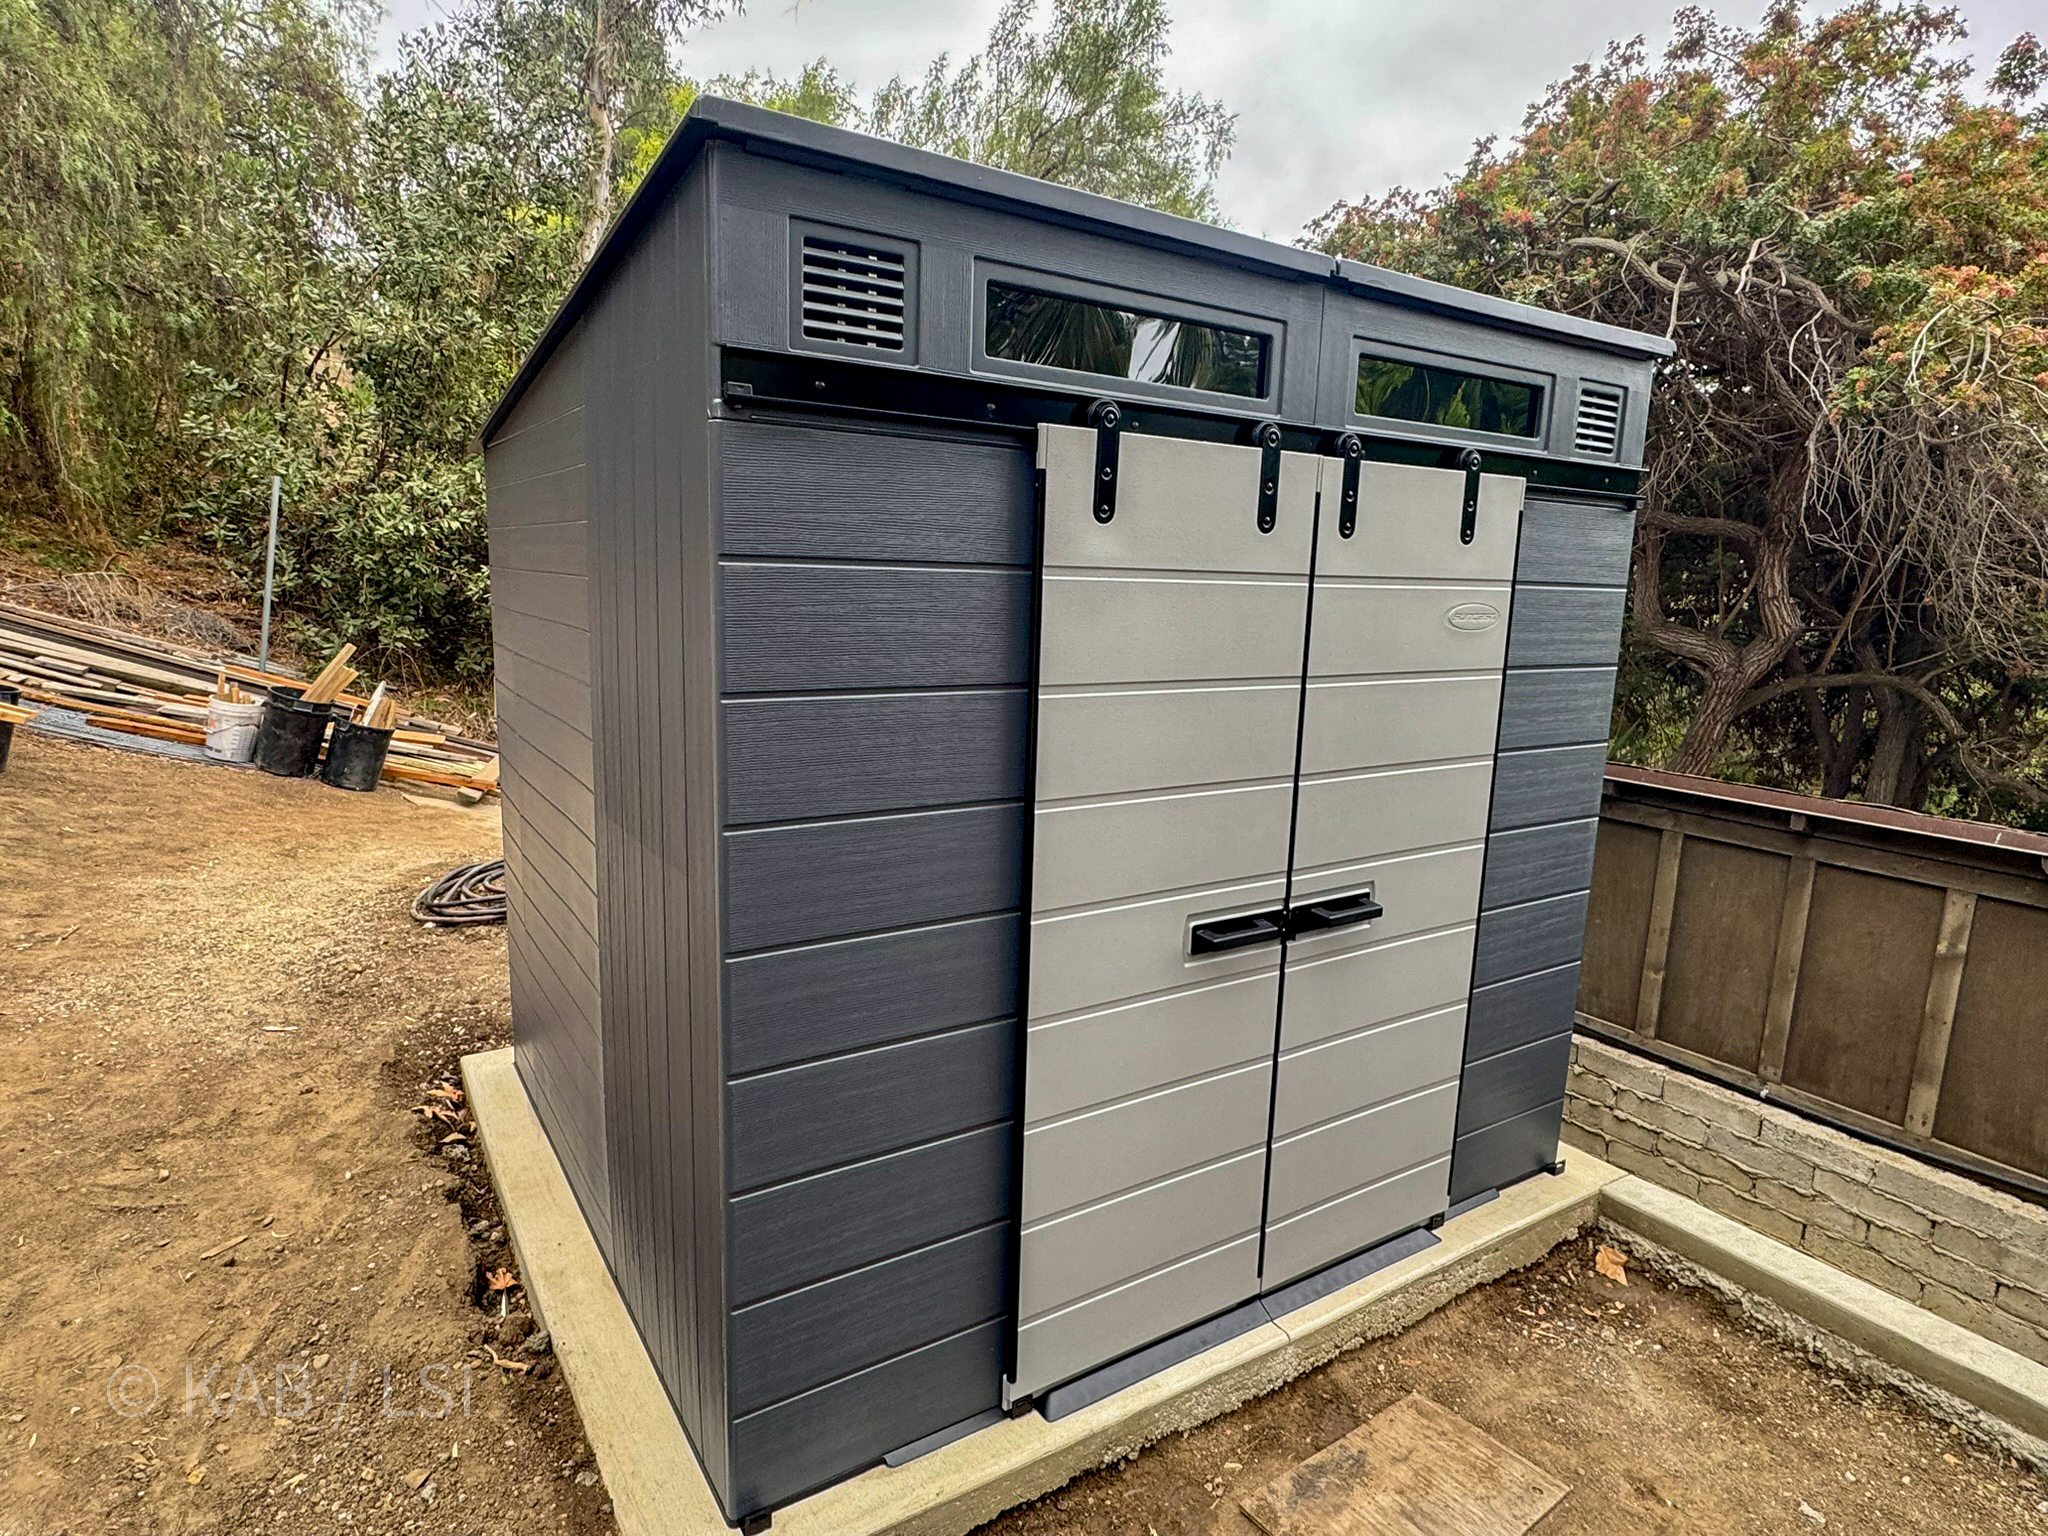
Gorilla Premium wood shed at Costco
Rotational vendor — in the aisle some months, gone others. Wood frame, shingled gambrel roof, $4,999.99 with metal ramp and delivery-install included. The warranty advantage lives behind the membership desk, not in the spec sheet.
The one I’d buy myself.
If I’m spending five thousand on a wood-framed shed, I’m spending it at Costco. Home Depot’s warranty runs thirty days. Costco’s runs as long as your membership does — and in my forty-five years on this hillside, I’ve never had Costco refuse to make a member whole.
Every neighbor in La Habra Heights knows the drive. You take your parking brake off and roll down to that Costco. The shed in the aisle. The ‘No Questions Asked Return Policy’ sign behind the membership desk. That’s the reason I always put my faith in Costco over any other big box store.
Step Two
The ground it sits on
This is where most homeowners stall. Here's the honest answer for a La Habra Heights hillside:
Grass? No. Dirt? No. Concrete blocks at the corners? No. Bags of gravel dumped out? Also no.
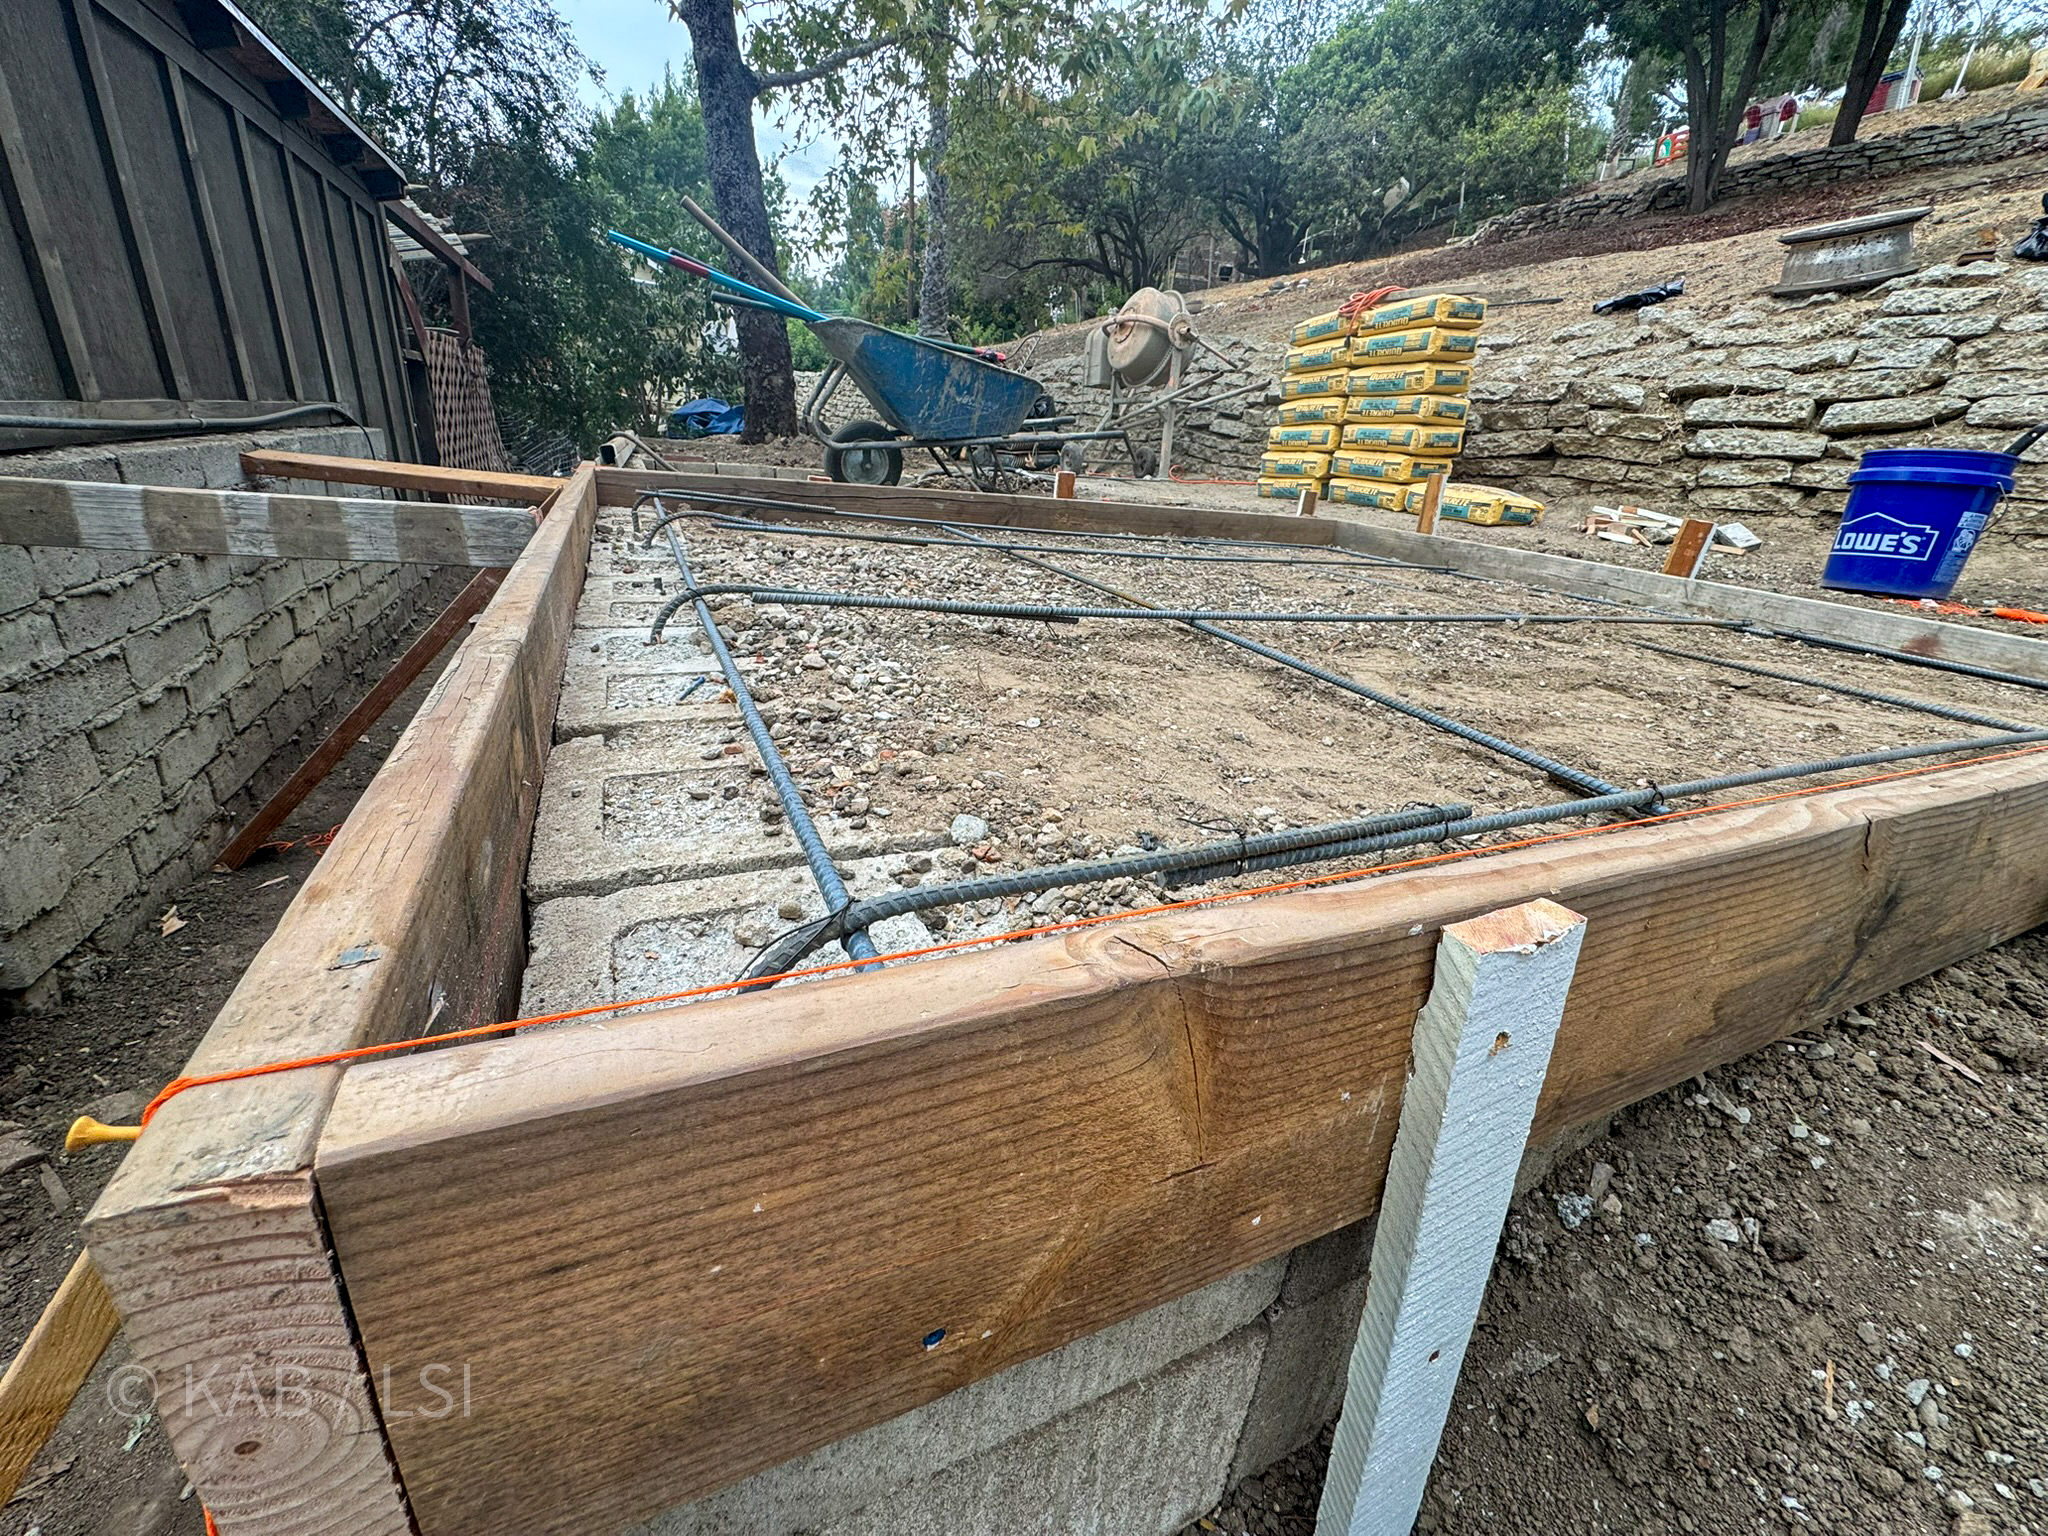
I’ve been fighting clay soil on these hillsides for forty-five years. Clay up here moves buildings. It breaks concrete. It lifts driveways. It makes the doors and windows in your house close tight some months and stick in others. You can’t dig all of it out. But you can put the right barrier between the clay and your pad — and when you do, a concrete slab on top of that barrier will last indefinitely.
What actually works on clay soil in this climate:
- Find a level spot that makes sense for the house it belongs to — a walk away from the main building, a clean sight line.
- Dig out the native soil to the depth you need. On a hillside, this usually means cutting back into the grade and dealing with what comes down in a hard rain.
- Lay down road base and gravel, or a compacted mix of the two. This is your drainage layer.
- Frame the slab — level, squared, and sized for the specific shed you've already picked. The shed has real dimensions you can measure, and the pad needs to match them exactly, with enough overhang to step out of the door onto dry concrete instead of dirt.
- Place rebar or wire grid inside the form for structural reinforcement. This is what keeps the slab from cracking the first winter.
- Pour concrete at the right mix for the weather the day you're pouring. Finish it flat and level, broom-textured for grip, except where you want it to spill off an edge at a door or a walking side.
“Your concrete is guaranteed to crack.”— the truth every savvy concrete contractor puts on their business card
Every honest concrete man will tell you the same thing. Concrete cracks. Always has, always will. What a real contractor controls isn’t whether it cracks — it’s where. The control joints a good contractor cuts into the pour are where the slab is designed to crack, cleanly, along a line. The rest stays flat for decades.
You’ve almost bought one twice.
If you’re on this page, you’ve been to Costco. You’ve stood next to the polymer shed in the aisle. You almost pulled the trigger. Something stopped you — and the thing that stopped you was right.
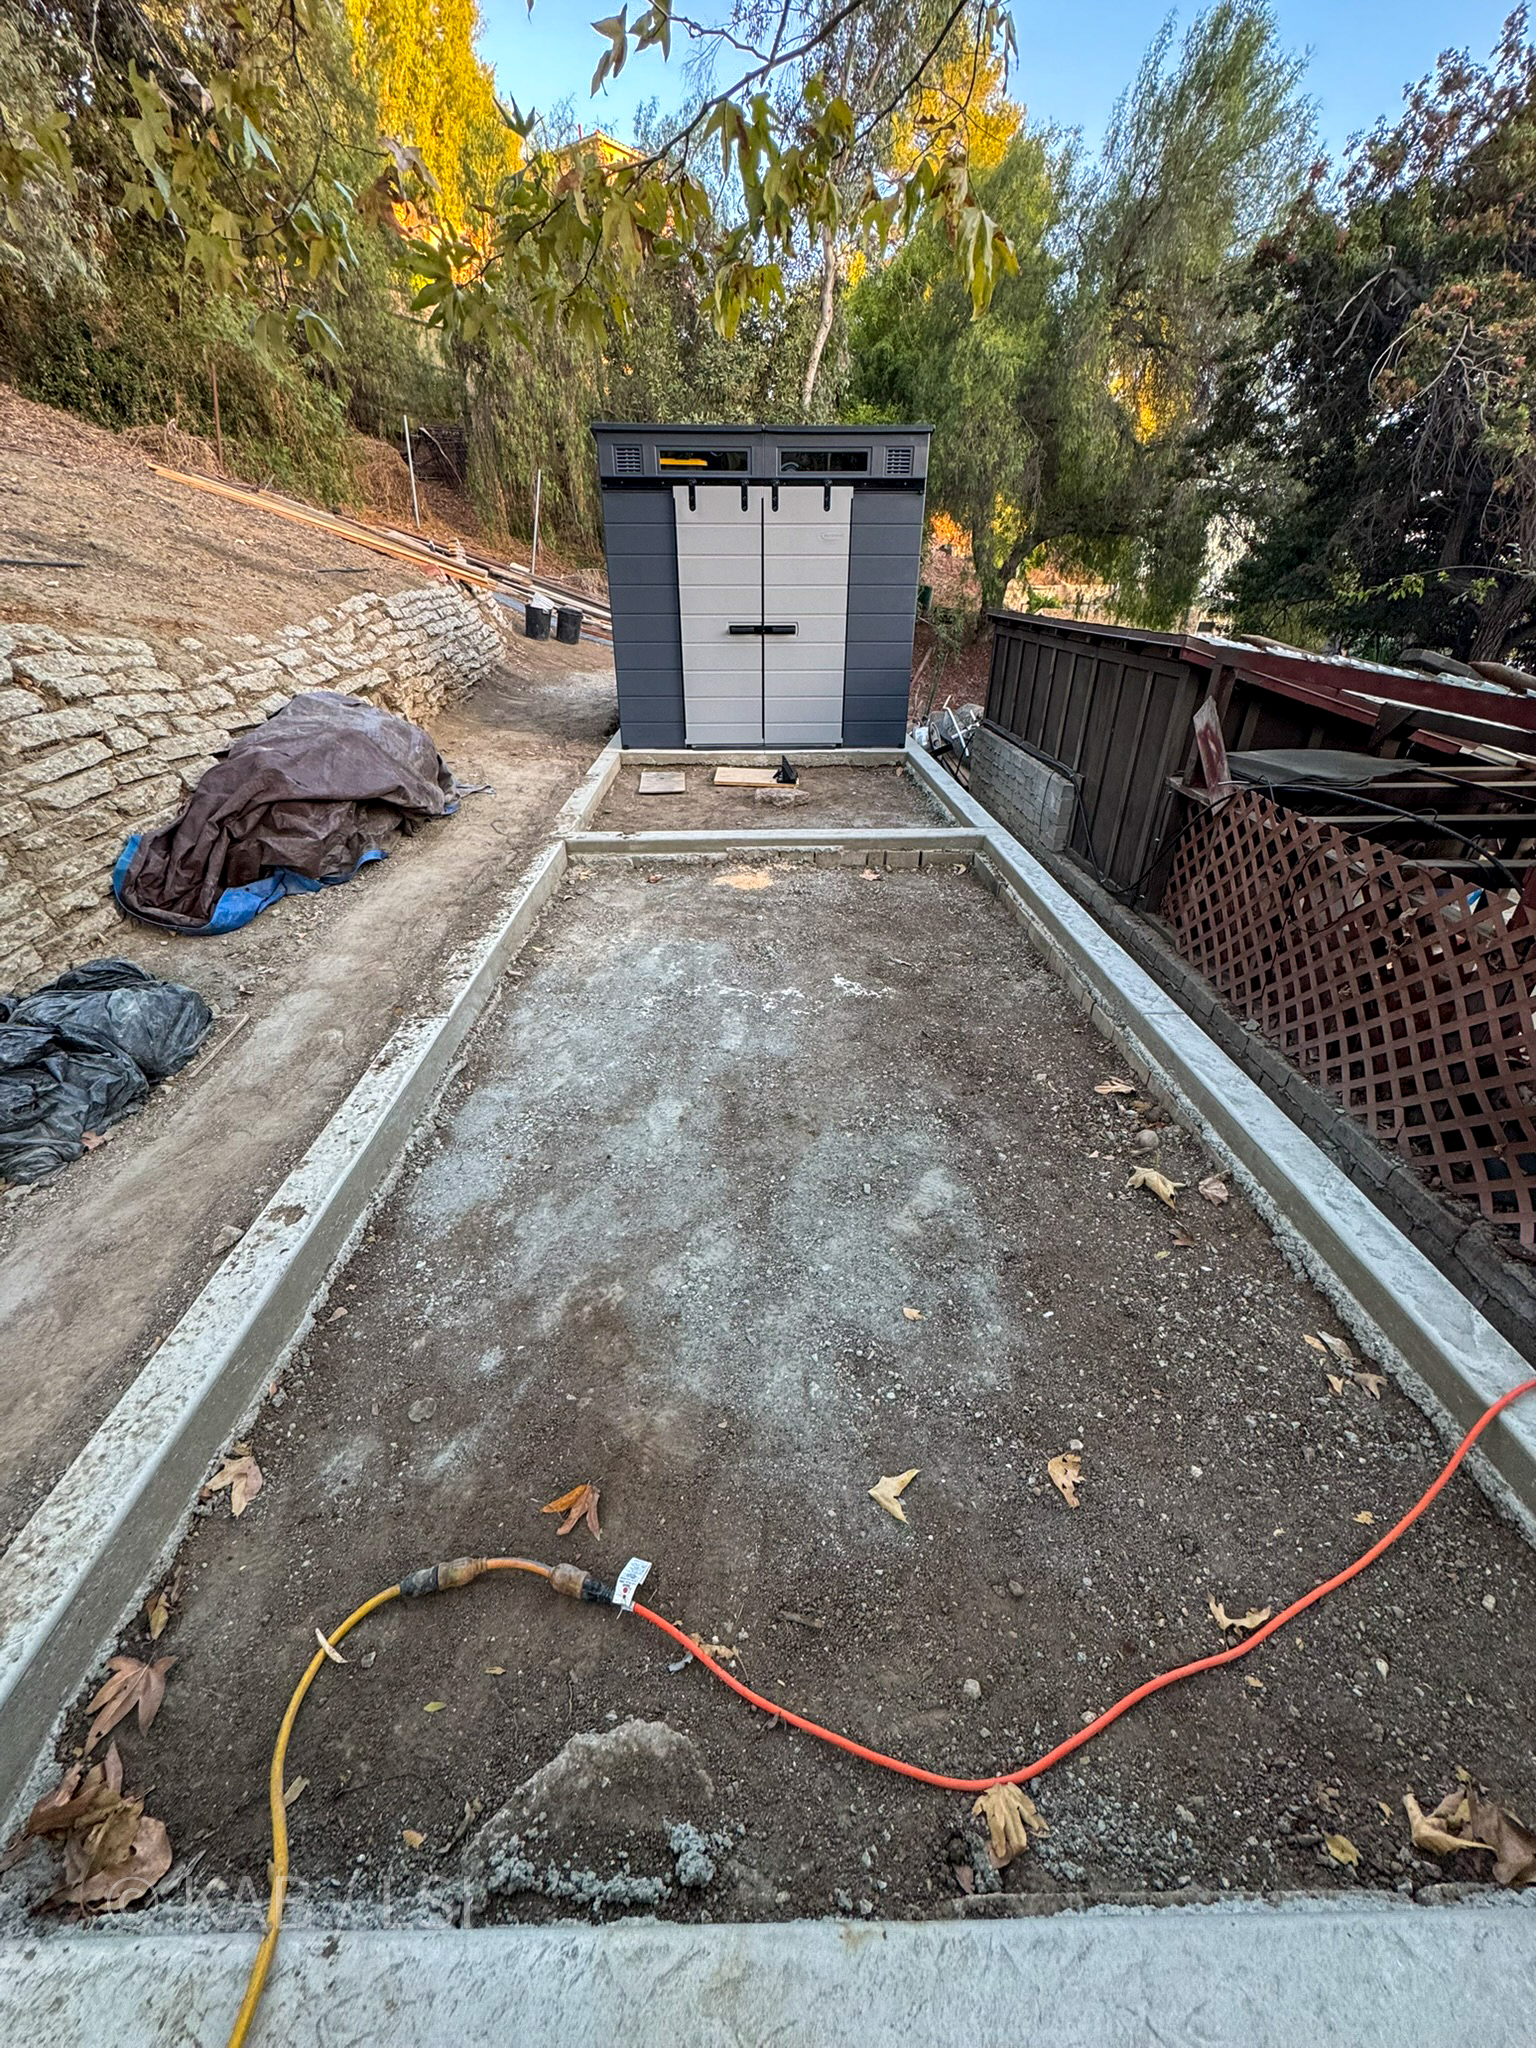
This is the exact spot where Sherri wanted her storage shed. It wasn’t level. Two-and-a-half feet below grade on one side. The pad you see here took CMU blocks, an in-ground footing, a squared wood form, and a rebar grid — a forever build for what’s going on top of it.
$1,000 shed. $2,000 to $3,000 pad. The math only works if you’re honest about how long the shed needs to last, and whether the spot you want it is a spot that’s ready to receive it.
The same pad conversation applies to a gazebo. And to a pergola. Only more so.

The green broom. The exact moment.
Jeff pulls a broom finish in one direction, evenly, at the precise window when the concrete has set up enough to hold the texture but not so much that the broom tears it. Not too soft, not too hard. This is forty-five years of knowing when.
What you don’t see at the big-box store.
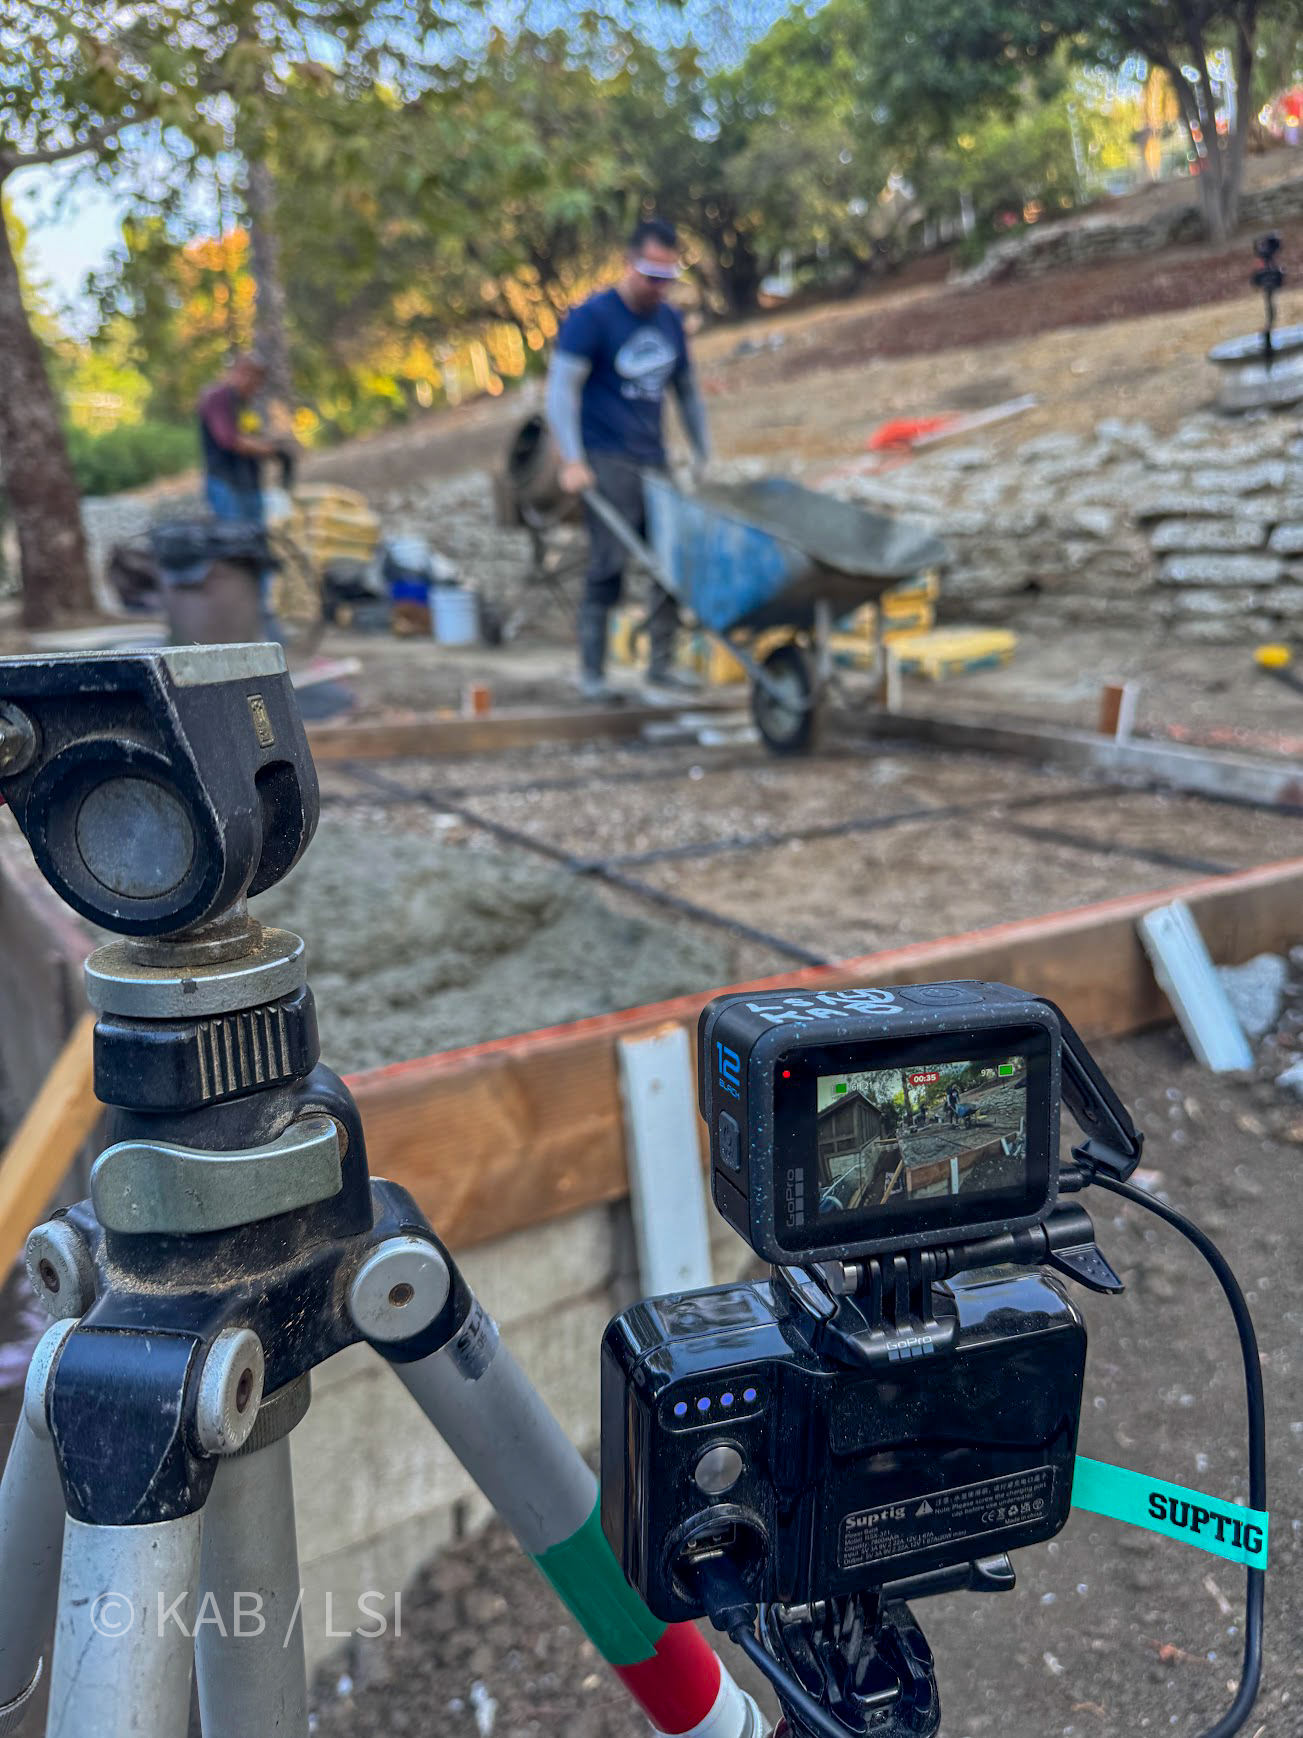
On projects where I’m engaged as steward, I film the primary contractor. GoPro on a tripod, extended battery, about four hours per run. The footage is mine — I use it to decide whether a crew earns a place in my referral database. If they do, your neighbor gets the benefit of someone I’ve already watched work. That’s how it’s done here.
Step Three
Power. Water. Gas. Cameras.
The pad is the half of this job that lasts forever. The other half is what makes the shed actually usable the week you need it most — the Saturday after Thanksgiving when you go out there in the dark, in the rain, to retrieve the Christmas boxes.
Power
Most battery-powered shed lights are a promise you break. If you don’t recharge them every few weeks, they’re dead on the exact dark November evening you went out there to find them. The real answer is a conduit trench from your house to the shed, with a proper circuit and a switch inside the door.
The concrete finisher and his helper can trench to the shed, or your favorite electrician or plumber can. And while the trench is open, consider what else travels in it: a water line for a faucet is always a blessing; a security camera cable; Wi-Fi conduit if the shed ever becomes a pergola, gazebo, or a home office. Dig the trench once. Put everything in it.
And while the trench is open, think about yard lights along the path from the house to the shed. Motion-activated, low-voltage, spaced every fifteen or twenty feet. They light your way as you near them — you’re never fumbling in the dark with an armful of Christmas boxes. But they do something else, too: they fire up when something that isn’t you walks past. A coyote. A raccoon. Or worse. From inside the house, you see a light snap on you didn’t trigger, and you know something’s out there. A path of lights is a wayfinder and a sentinel at the same time.
Water
We’re in Southern California. It’s dry here. Water is for cleaning, for sprinklers where they’re needed, for soaking the perimeter when the wind comes up and fire is a worry. On a one-acre parcel with structures at different corners, water doesn’t just belong at the shed — it belongs strategically, halfway there.
You don’t dig a hole on your property very often. You dig a trench even less often. When the trench is open, brainstorm it. What goes in the ground today saves you from breaking concrete, pulling back siding, or running conduit on the surface five years from now.
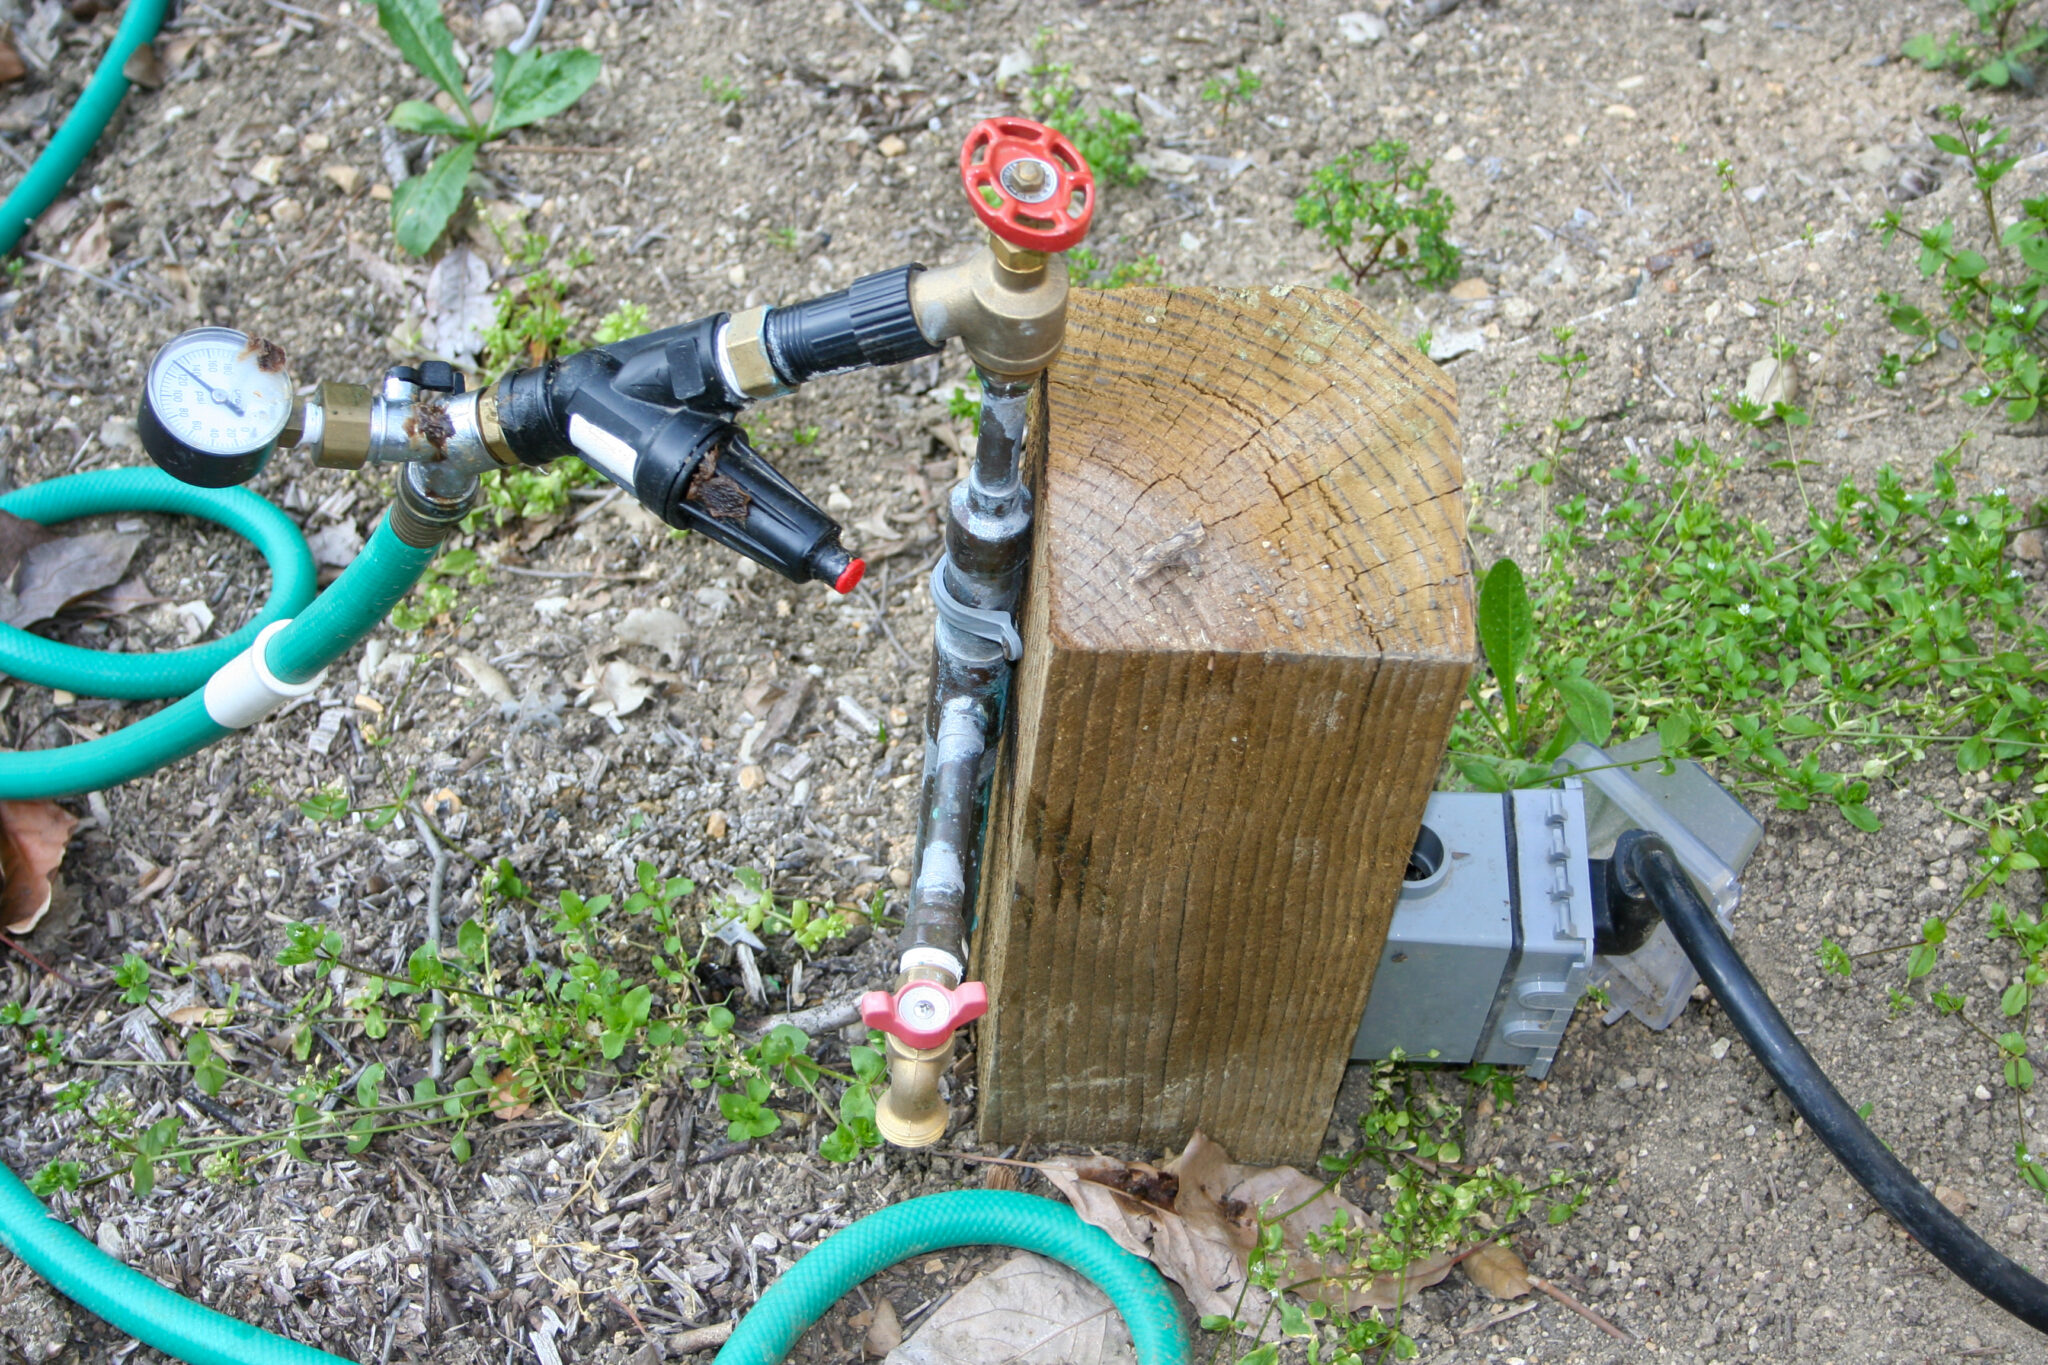
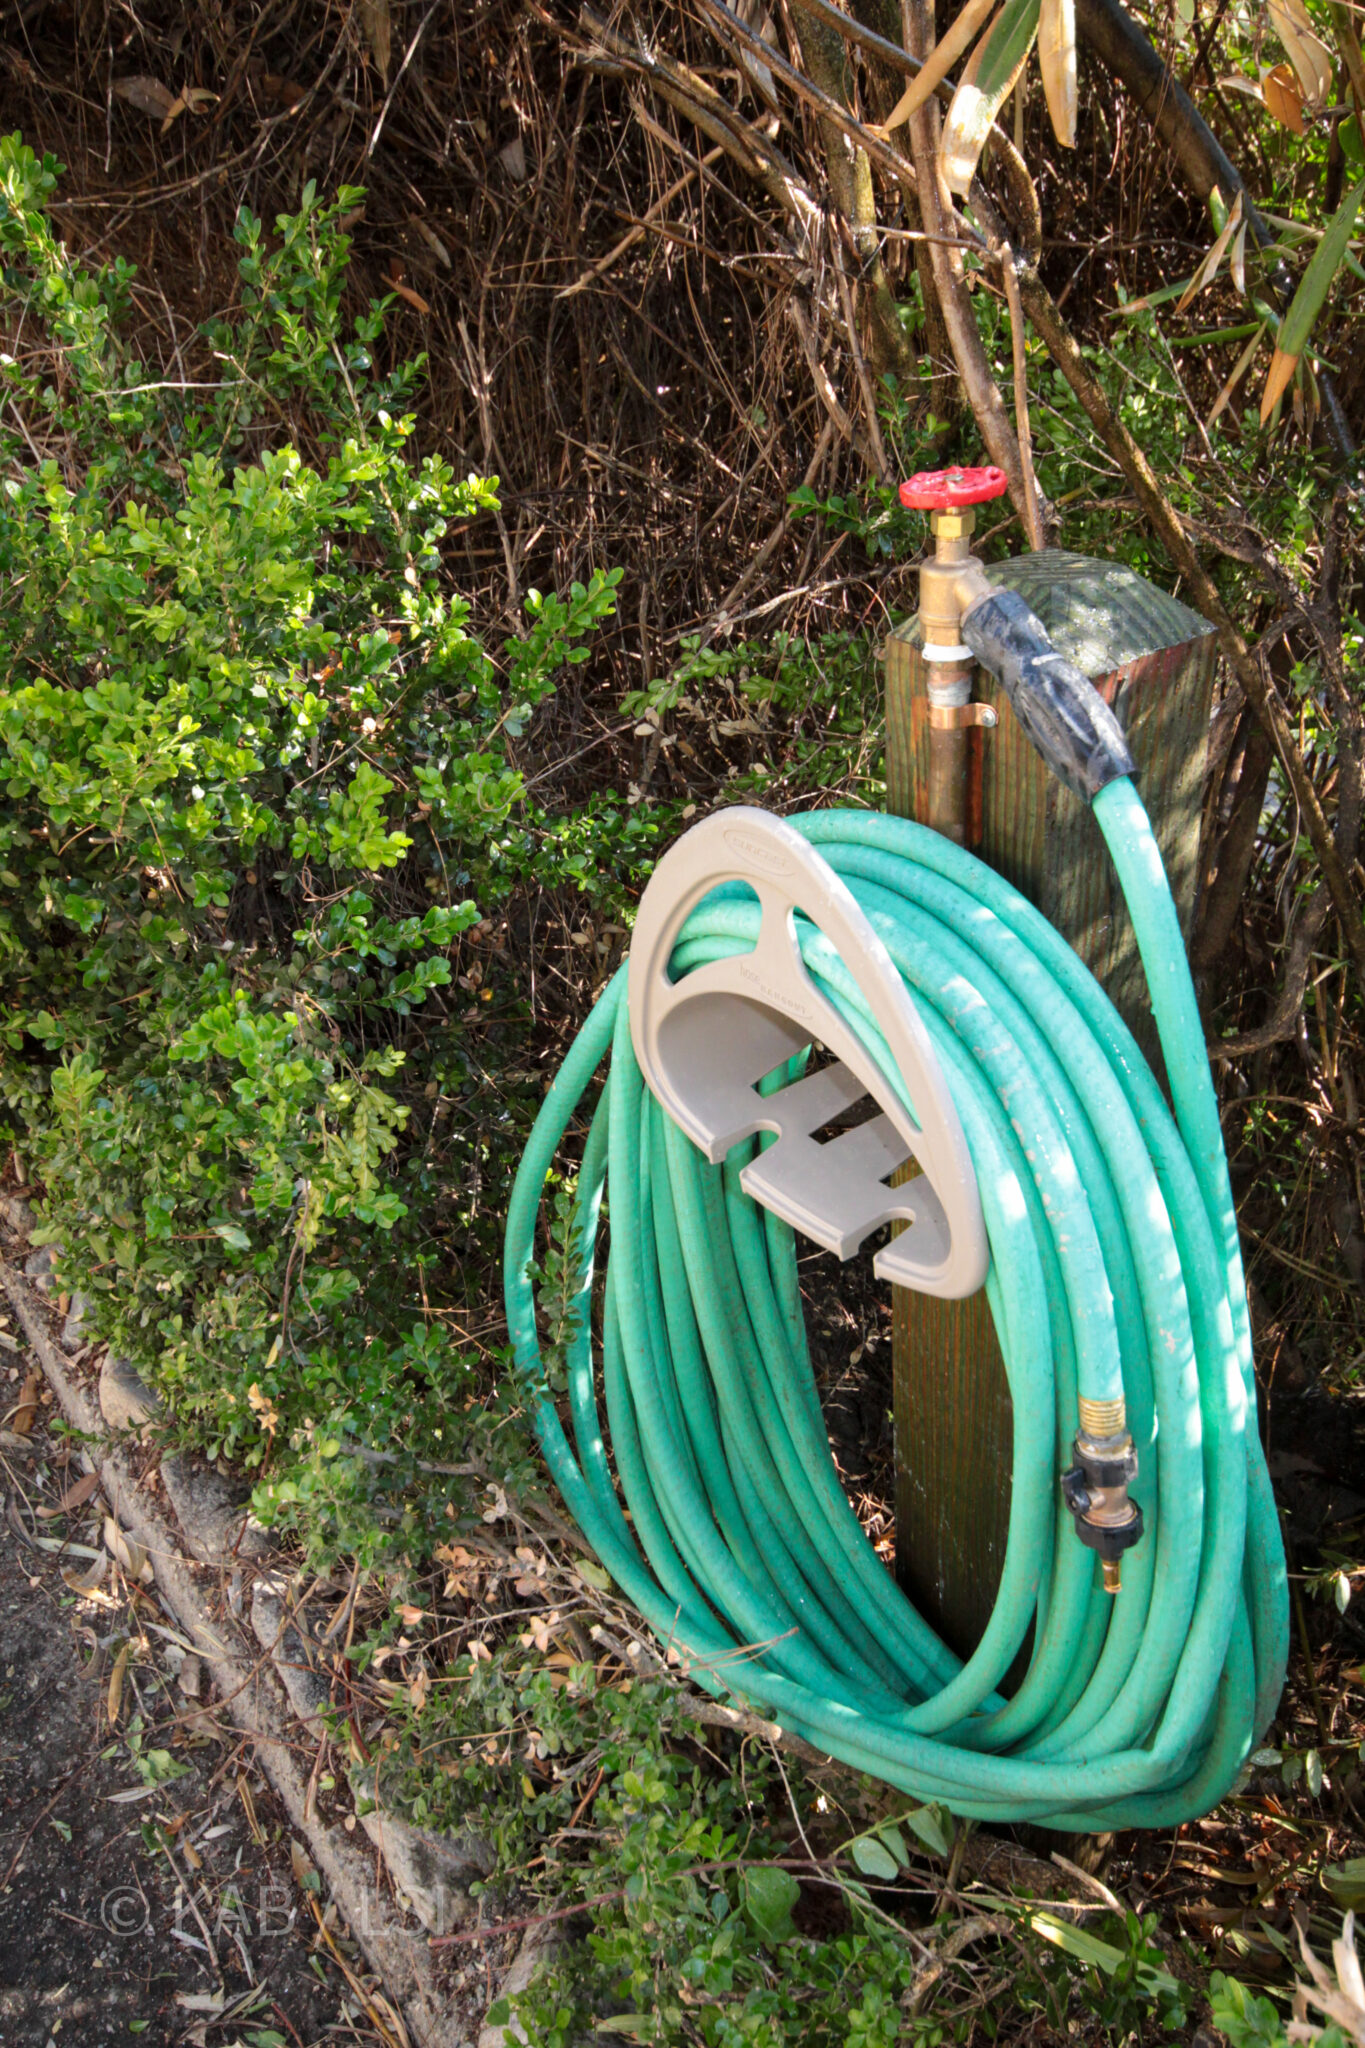
Left: a low-profile station with water inlet, pressure gauge, pressure regulator, brass valves, and electrical outlet on the same fixture. Middle: a taller water-only post at the edge of a hedge, set up as a hose-reel waystation. Right: the same first station, a few months into a whole-house makeover, handling something no one planned for.
Under the ground in all of them: twenty-foot sections of PVC rated at 450 PSI — economical, extremely durable, but vulnerable to UV and impact, which is why it stays buried. Above ground: Type L copper, the thicker, UV-resistant grade of copper that lasts decades in direct sun. The posts are pressure-treated six-by-sixes that stand up to twenty or thirty years of weather.
La Habra Heights runs water at 125 PSI system pressure — which is why these stations can throw a real stream for wildfire defense, and why the ones nearest the house sit thirty feet off each corner as a matter of principle. High pressure also cleans anything you point it at. But an RV’s plumbing won’t survive 125 PSI, so the stations that might ever feed a trailer get a pressure regulator stepped down at the fixture.
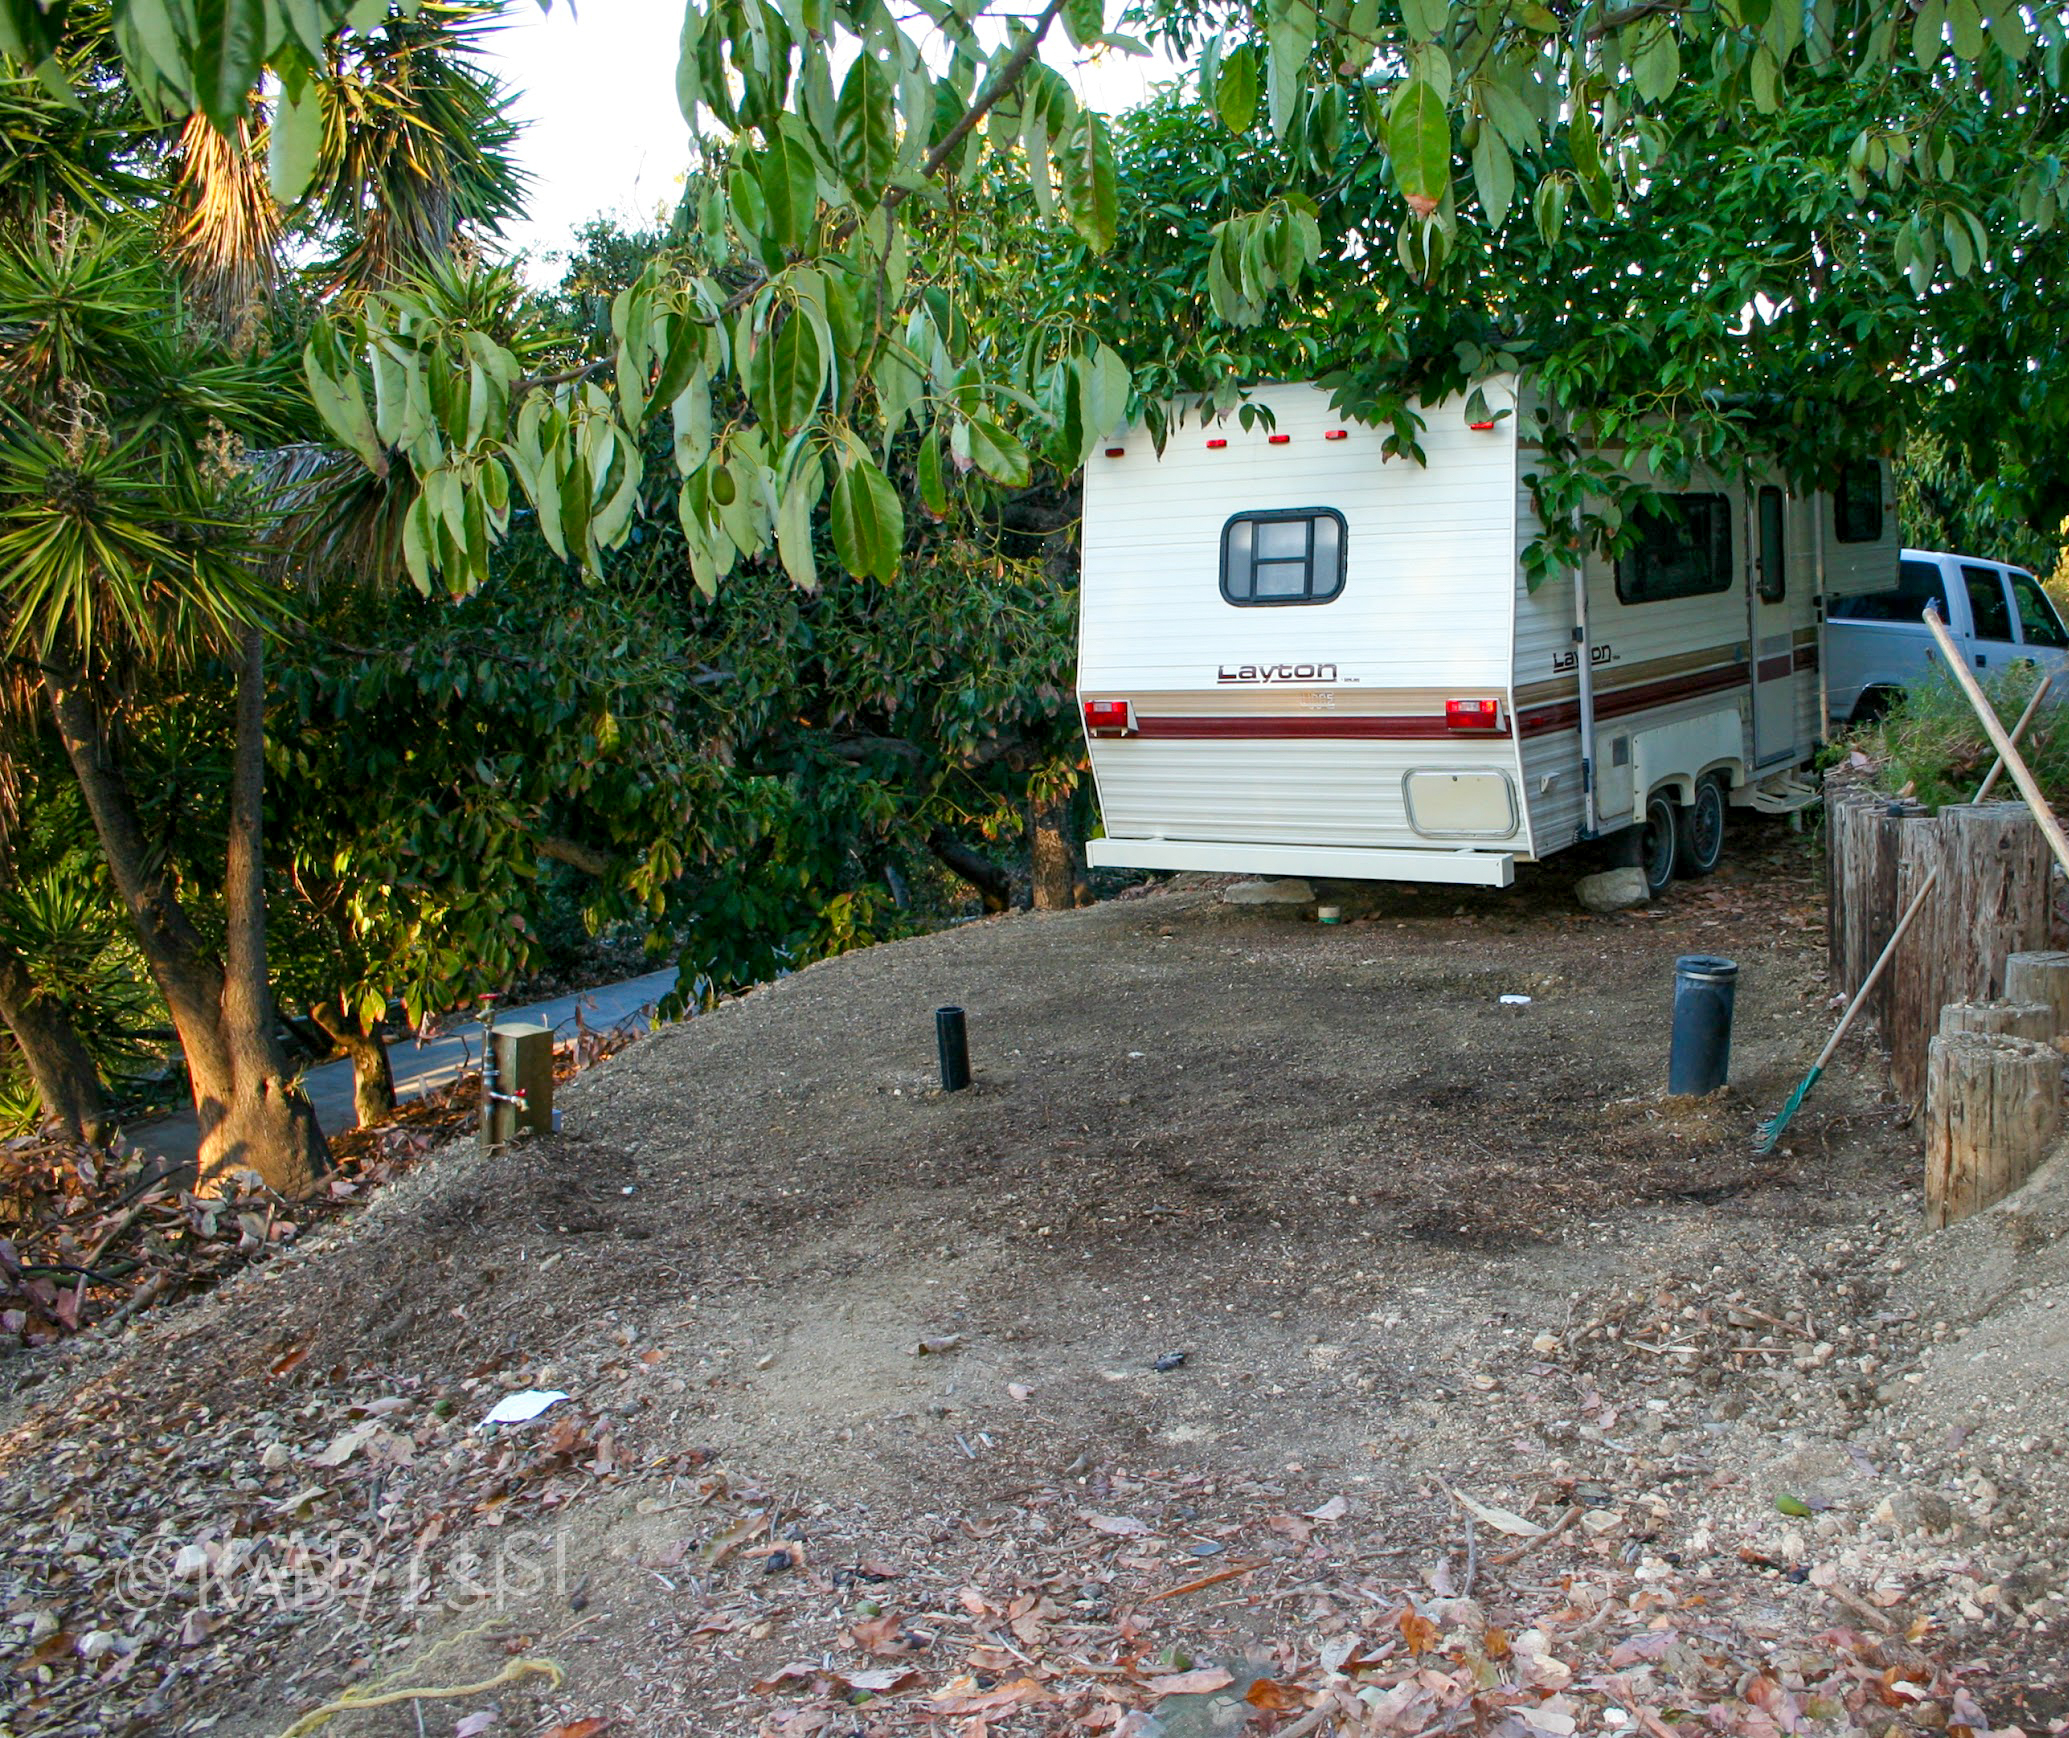
Which is how that station ended up serving the homeowners’ live-in chef and housekeeper. Their guest quarters were still months from completion. We parked a twenty-foot Layton fifth-wheel a few steps from a Water + Power Station we’d put in for a completely different reason — fire defense — and plugged it into shore power off the same post. Kitchen, bathroom, full setup. The station hadn’t been designed for a trailer. It was just there, because we’d trenched for it months earlier.
Not every water station needs the outlet on the post itself. Sometimes it’s safer to offset the electrical box five or ten feet from the faucet — water and electricity live well apart. Either configuration is valid; the property decides which.
The cost of building the infrastructure right the first time shows up once, in one line of the invoice. The value of it keeps showing up for the next thirty years, in situations no one planned for.
Gas
Most sheds don’t need a gas line. Gazebos and pergolas often do — an outdoor kitchen, a patio heater, a BBQ you don’t have to wheel out from the garage. If you’re tired of swapping five-gallon propane tanks, a gas stub-out changes the whole experience. Worth thinking about before the pad is poured, not after.
Cameras
A shed is a box full of things worth stealing. Put a camera on the house pointed at the shed. Put a second camera on the shed pointed back at the house. Both angles, both times of day, both recorded. The shed doesn’t know it’s being watched. Whoever’s thinking about visiting it at two in the morning figures it out fast.
Step Four
Pavers, curbs, and the destination.
When the concrete pad gets poured, the pour crew can set a foundation curb around an adjacent area at the same time — same day, same concrete, same minimal extra cost. That curb is what later supports the gravel and sand bed for a paver patio or a run of artificial grass right outside the shed doors.
It’s the difference between a shed and a place with a shed in it. A small flagstone landing outside the doors. Artificial grass that stays green in August without a lawnmower and without watering — which matters on a La Habra Heights hillside where clay soil fights grass and where water is never free. A pergola twelve feet away. Suddenly the back corner of the property is a destination — somewhere you walk to on purpose, not somewhere you avoid.
For anyone thinking about eventual resale, that transformation is worth more than the paver job costs. The appraiser sees a finished outdoor room. The buyer sees themselves standing in it.
Step Five
The shed goes on the pad
If it's a kit, the big-box delivery crew drops the pieces. The floor comes in a flat-pack — composite deck planks that lock together on top of the cured concrete. Walls go up next. Roof last. A crew of two can do most of these kits in a day and a half.
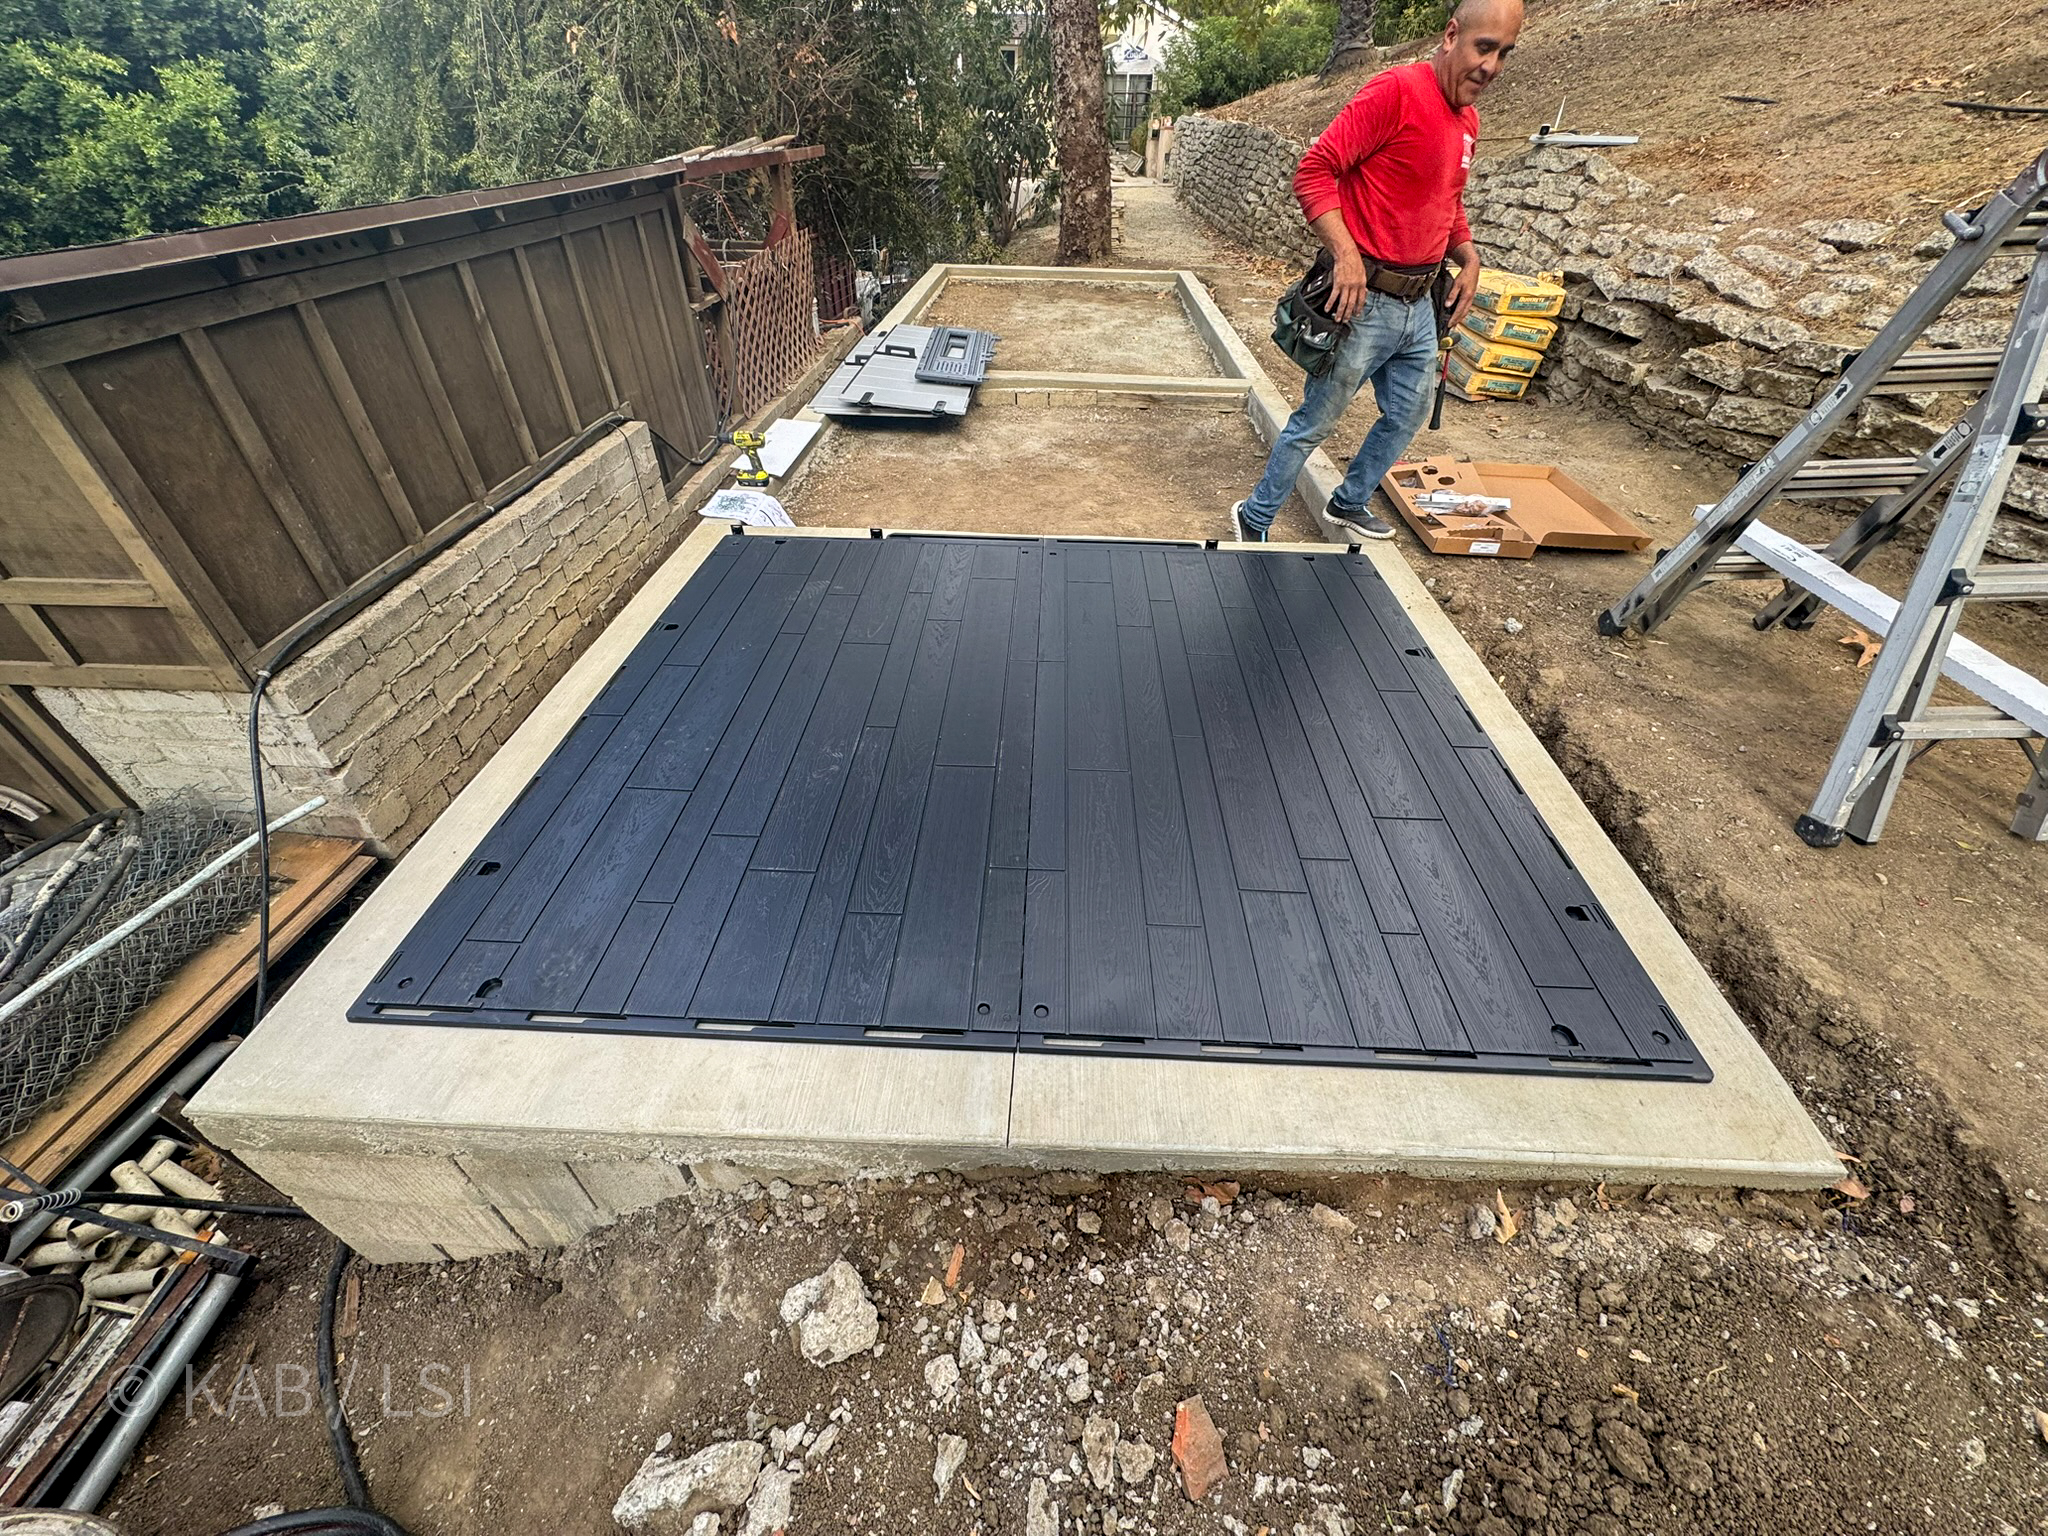
Base deck on cured pad
Composite deck floor lands on the poured slab. This is the moment the shed stops being a kit and becomes a building.
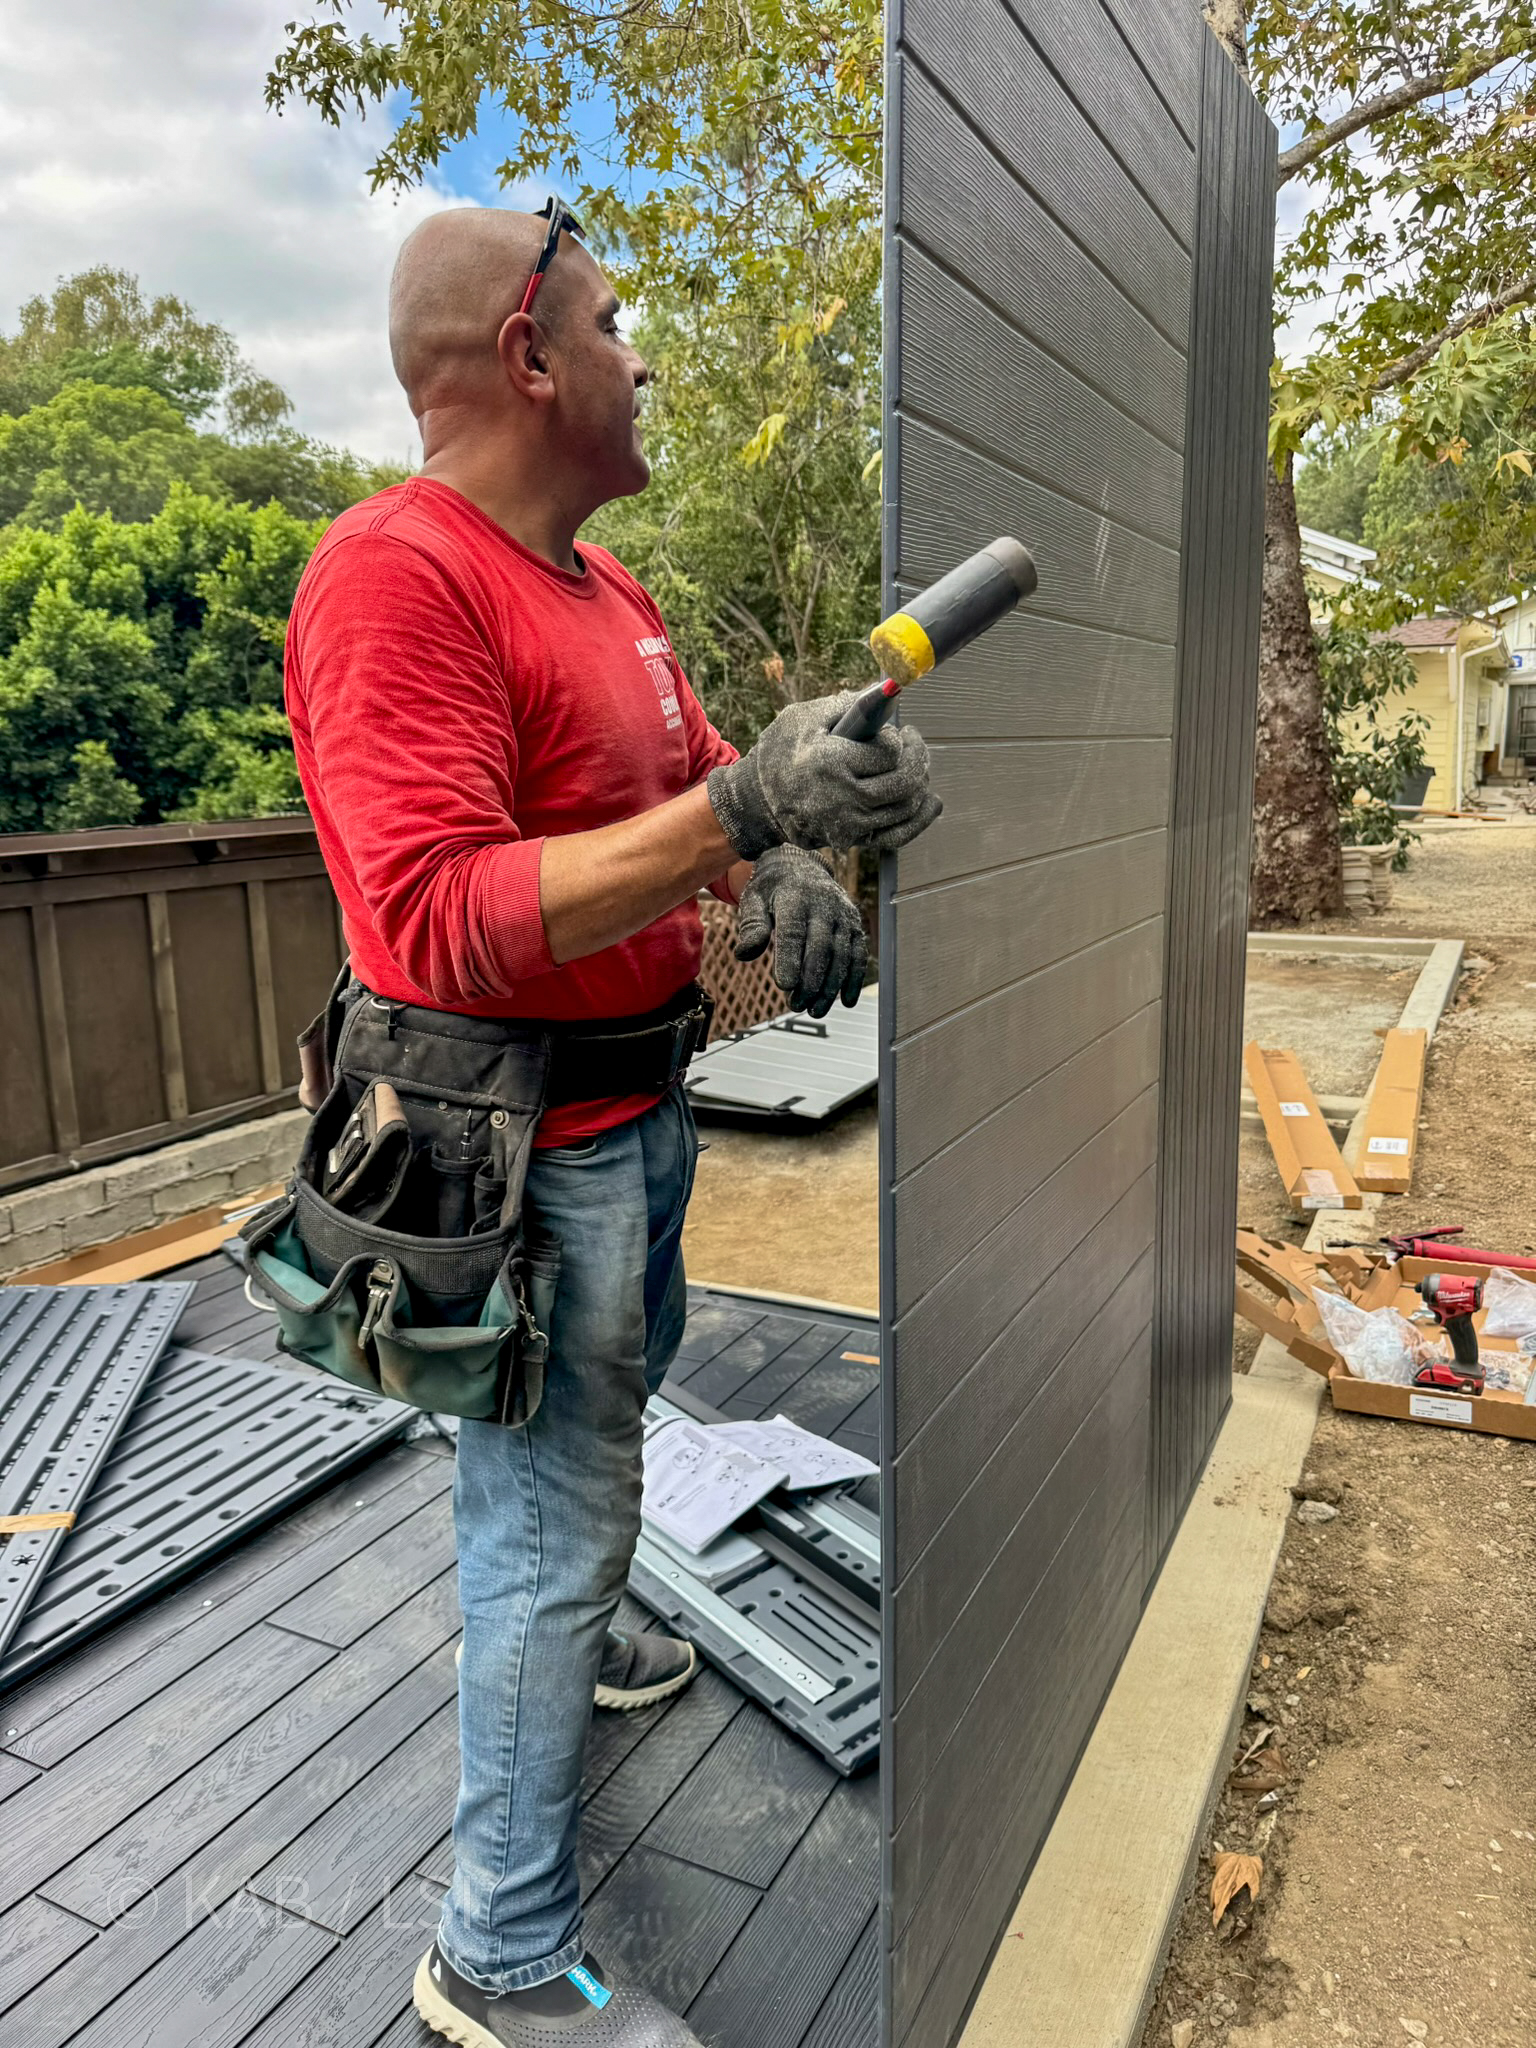
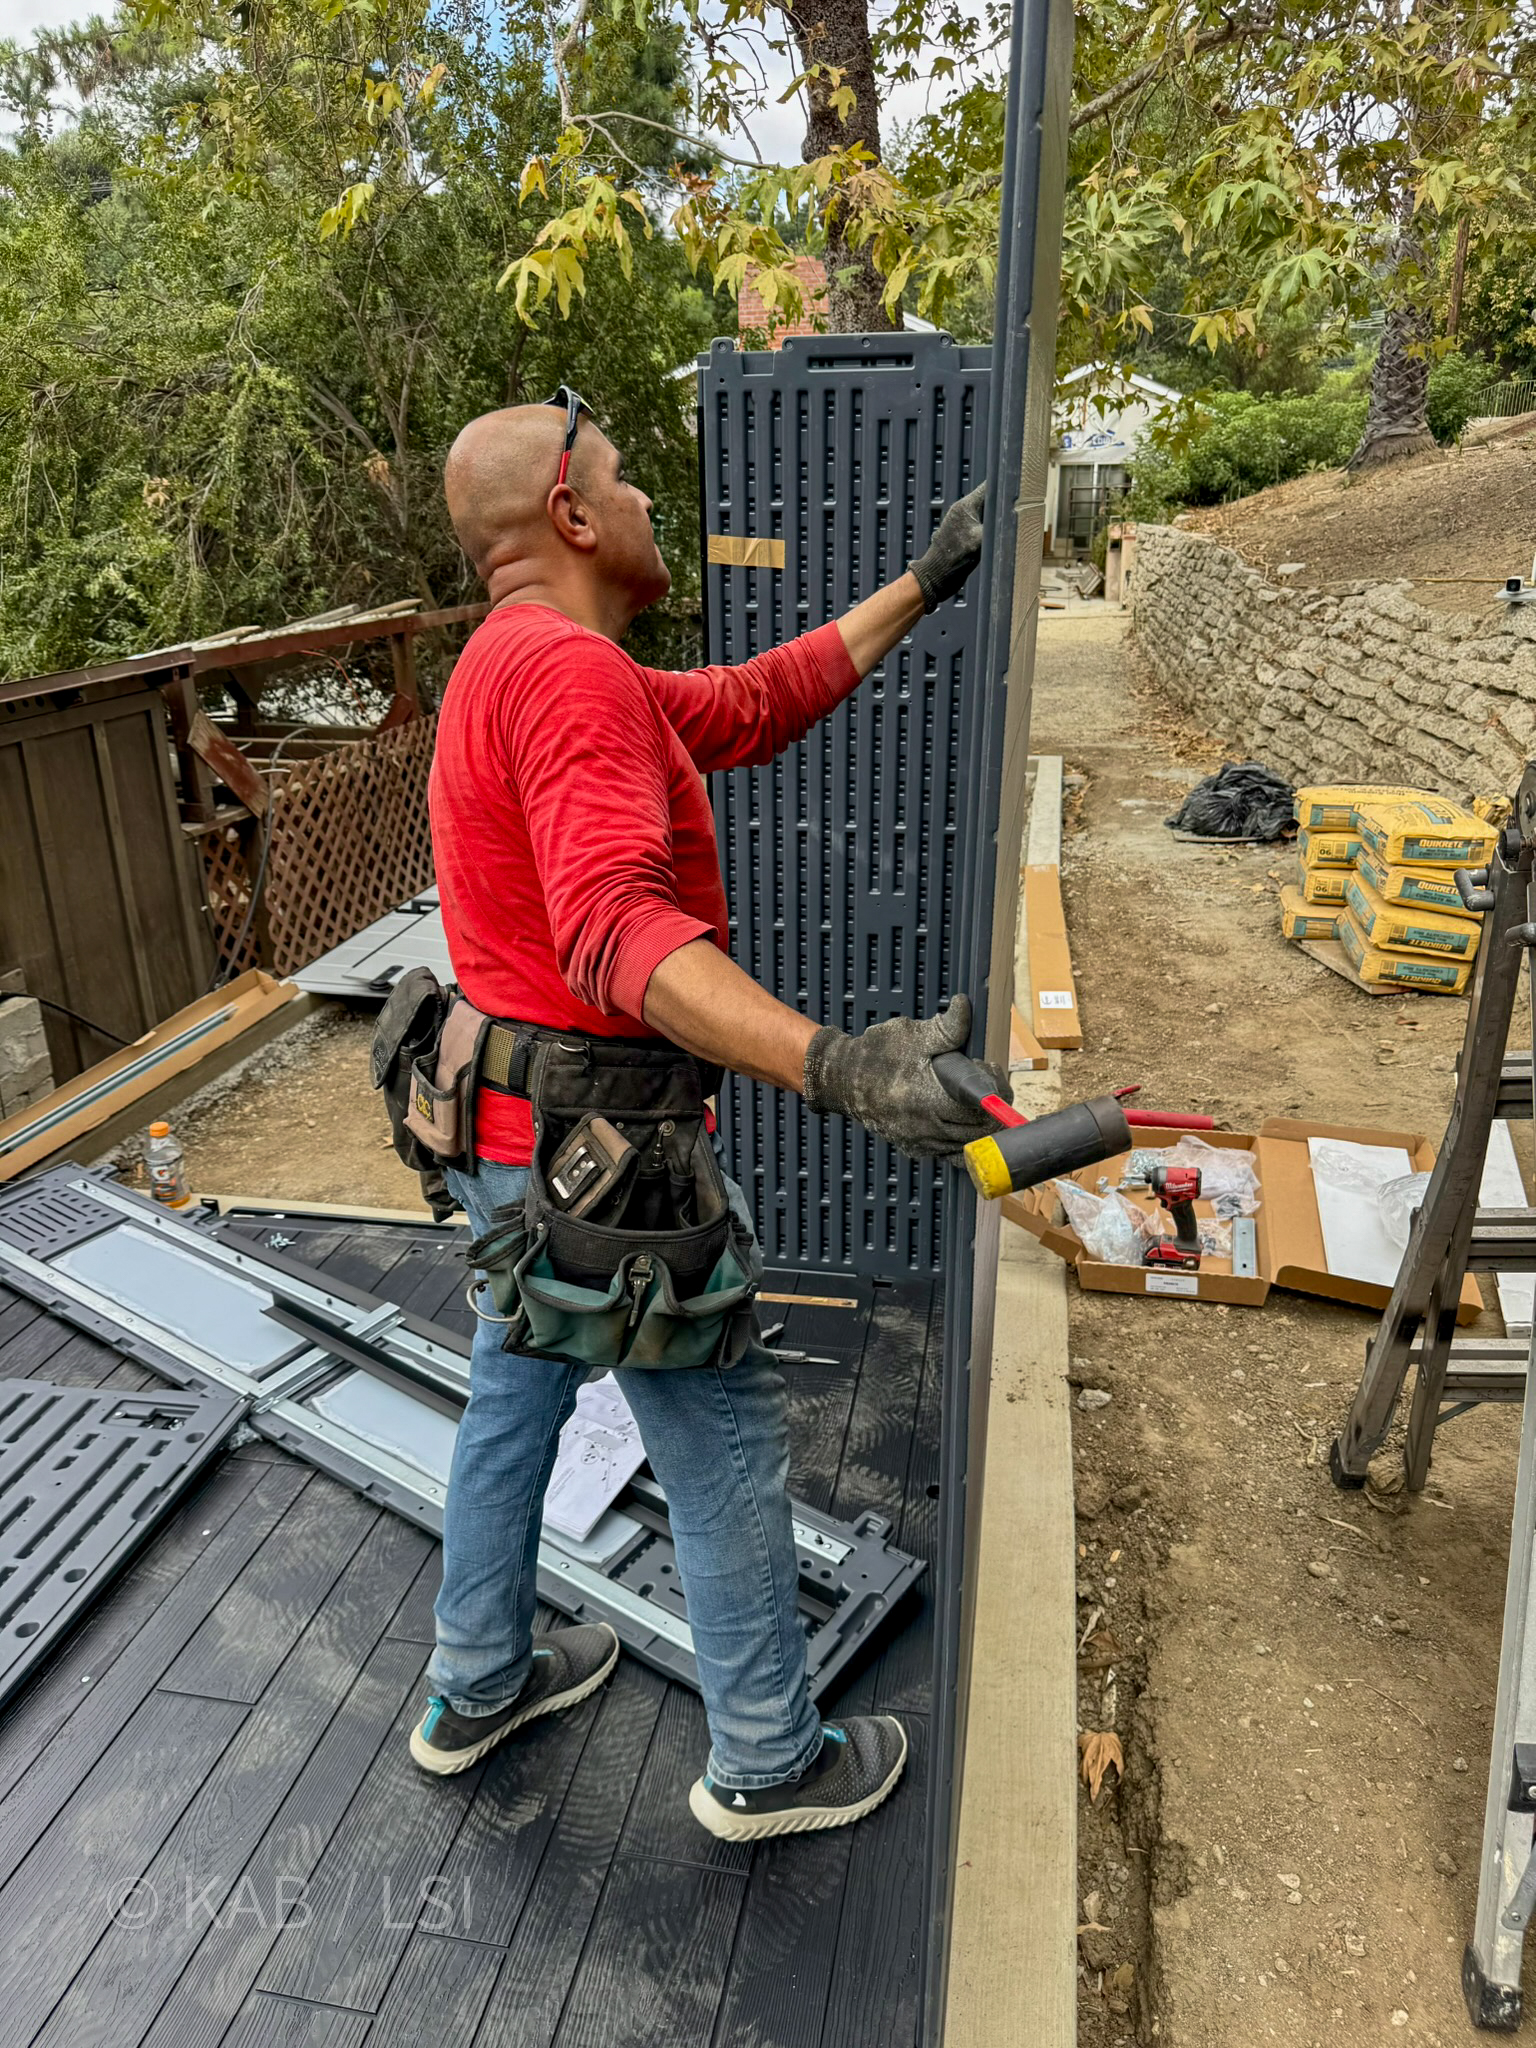
Side walls going up
Panel-by-panel, clipped to the deck rail. Ventilation slots at top become the clerestory windows once the roof closes in.
Front wall and door opening
The door frame and header panel lock into the side walls. Square to the deck, plumb to the hillside.
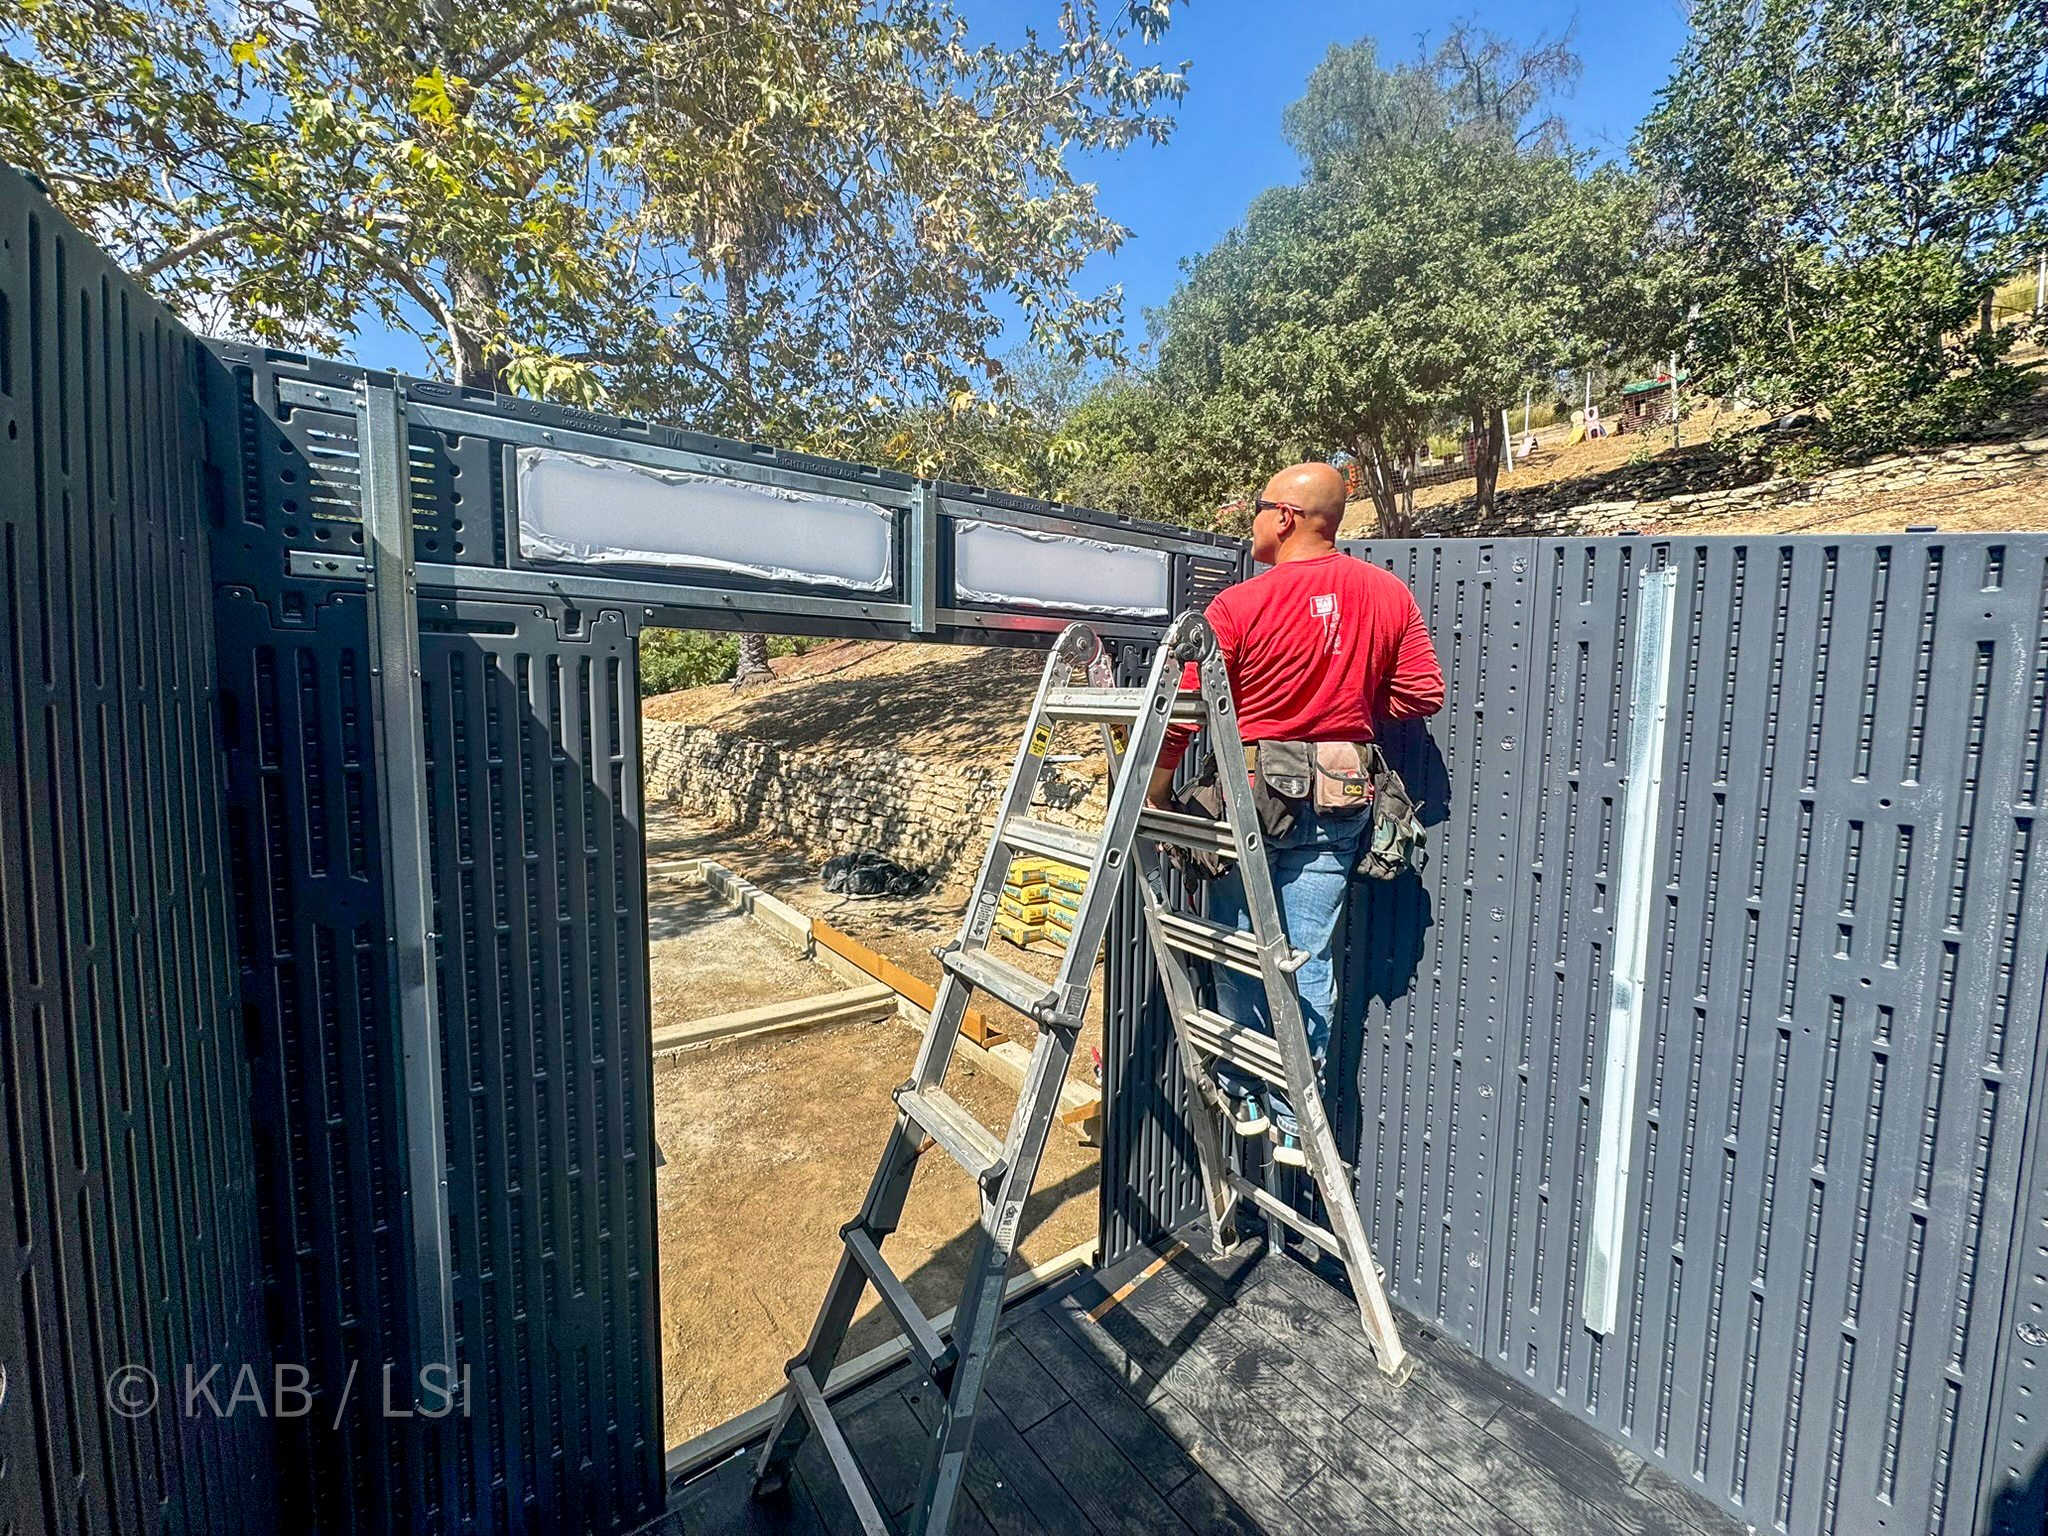
Roof rail installed
Top rail goes on. Ladder work. This is hour four of a day-and-a-half build.
Mallet on the final panel
Rubber mallet, not a hammer. Every panel seats against the last. No nails, no screws visible from outside.
Doors hung, ladder still in
Sliding doors on the track. Final fasteners inside. Door glide tested before the crew breaks.
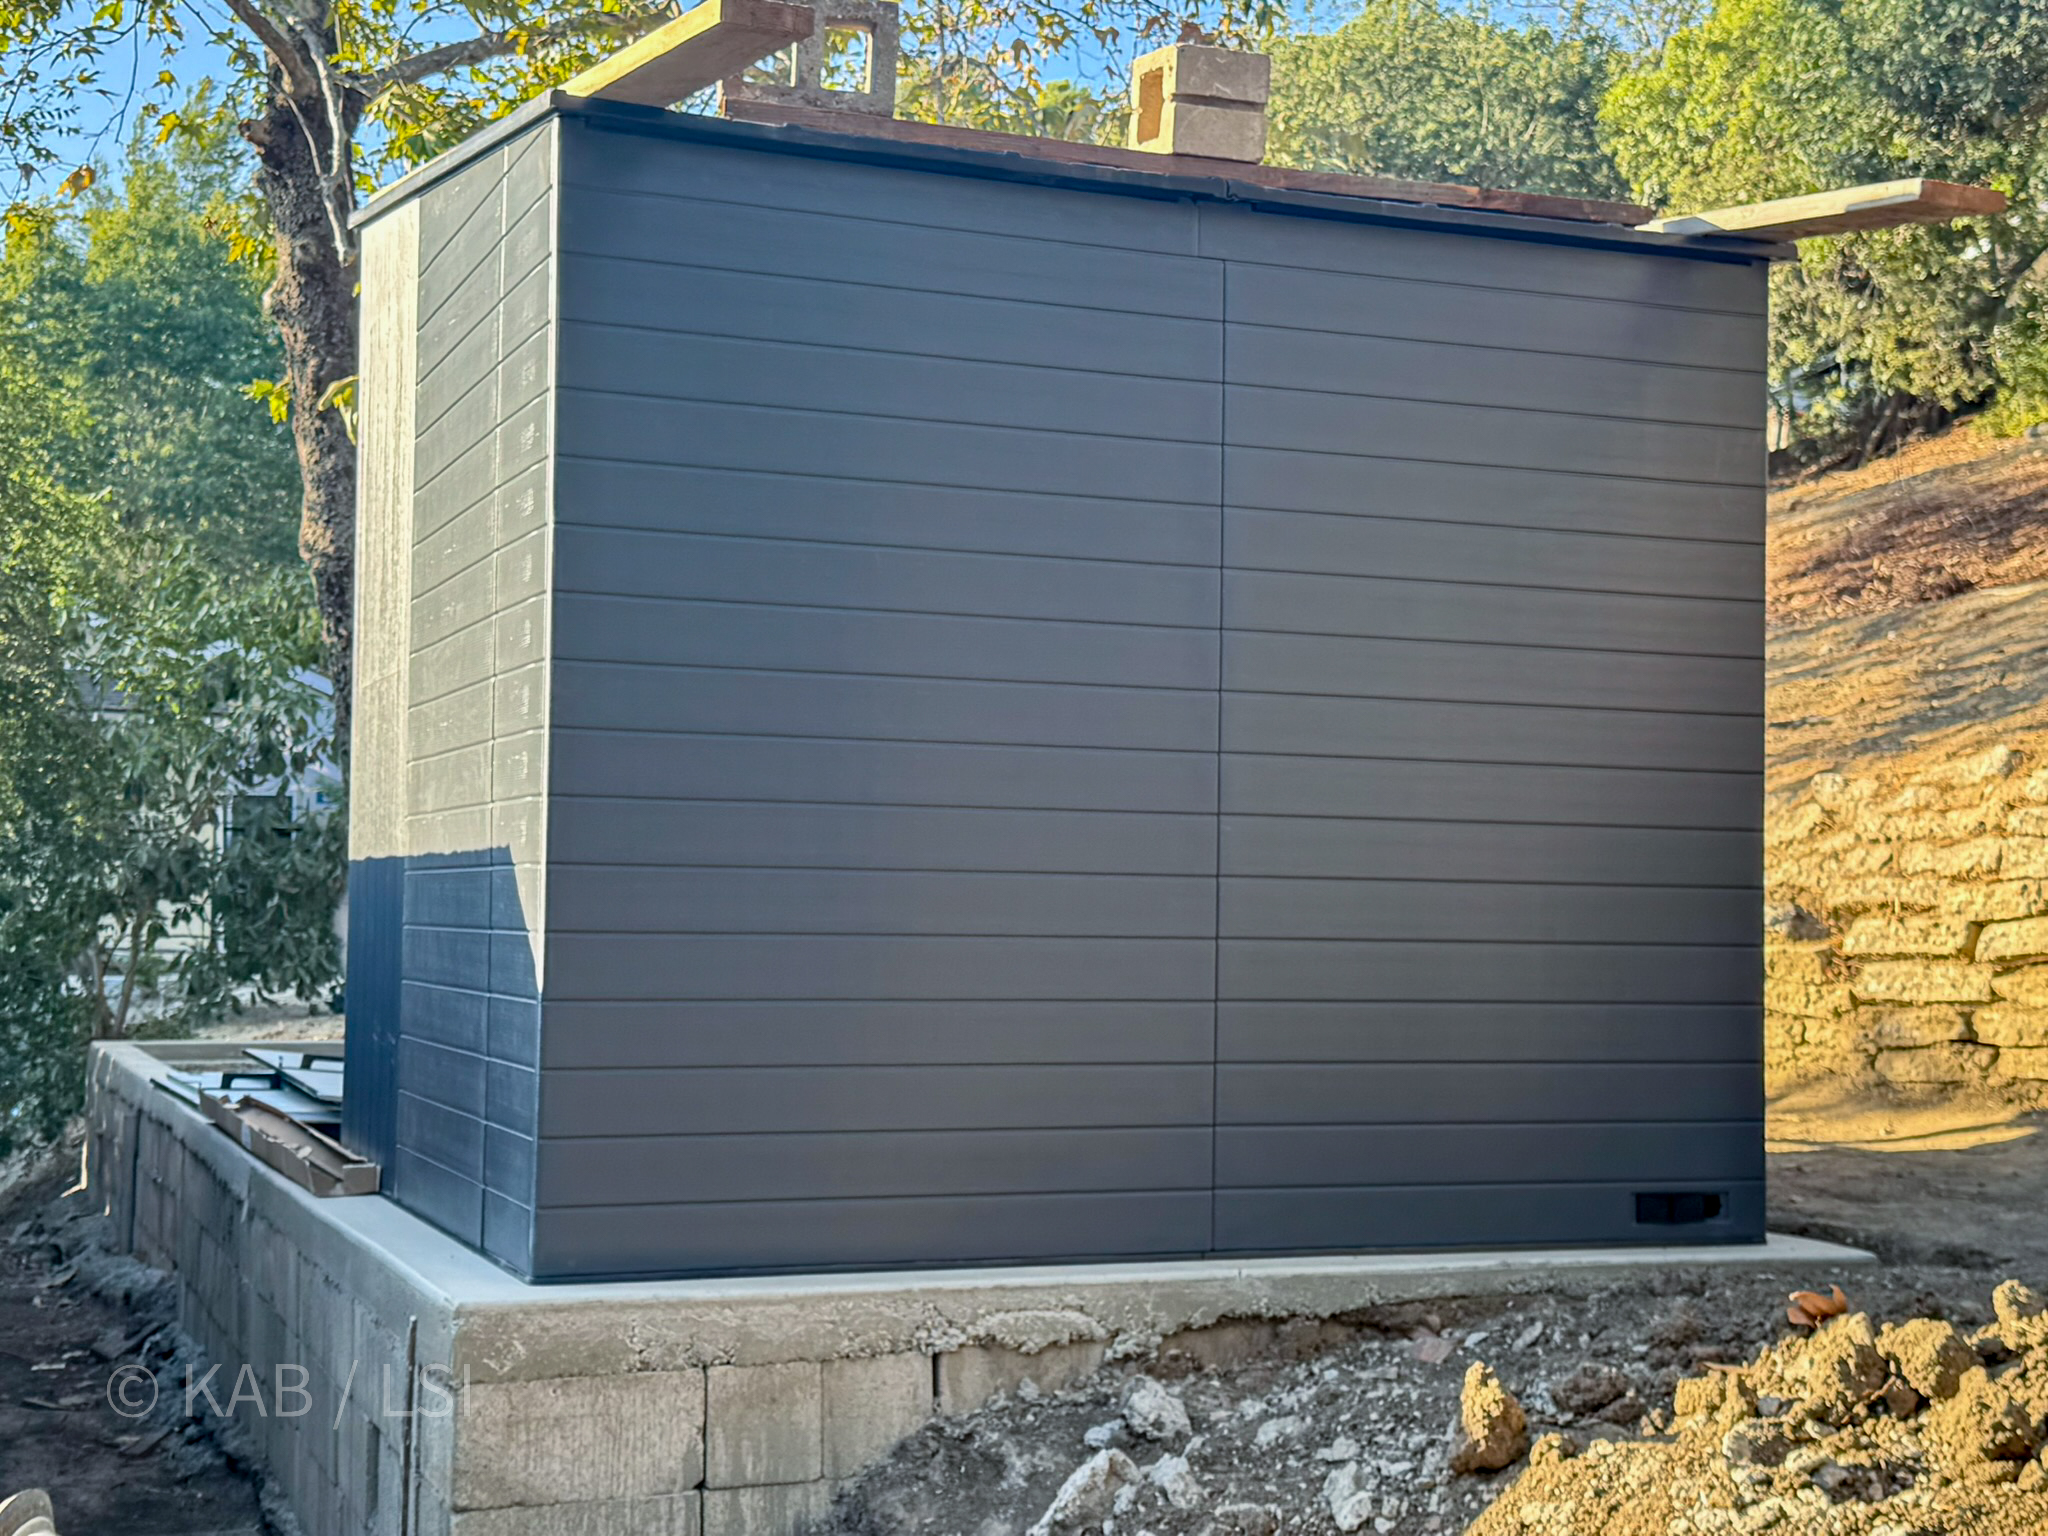
Exterior complete
Side view of the finished Suncast before the clerestory caps go on. Square, level, ready.
Step Six
What goes inside
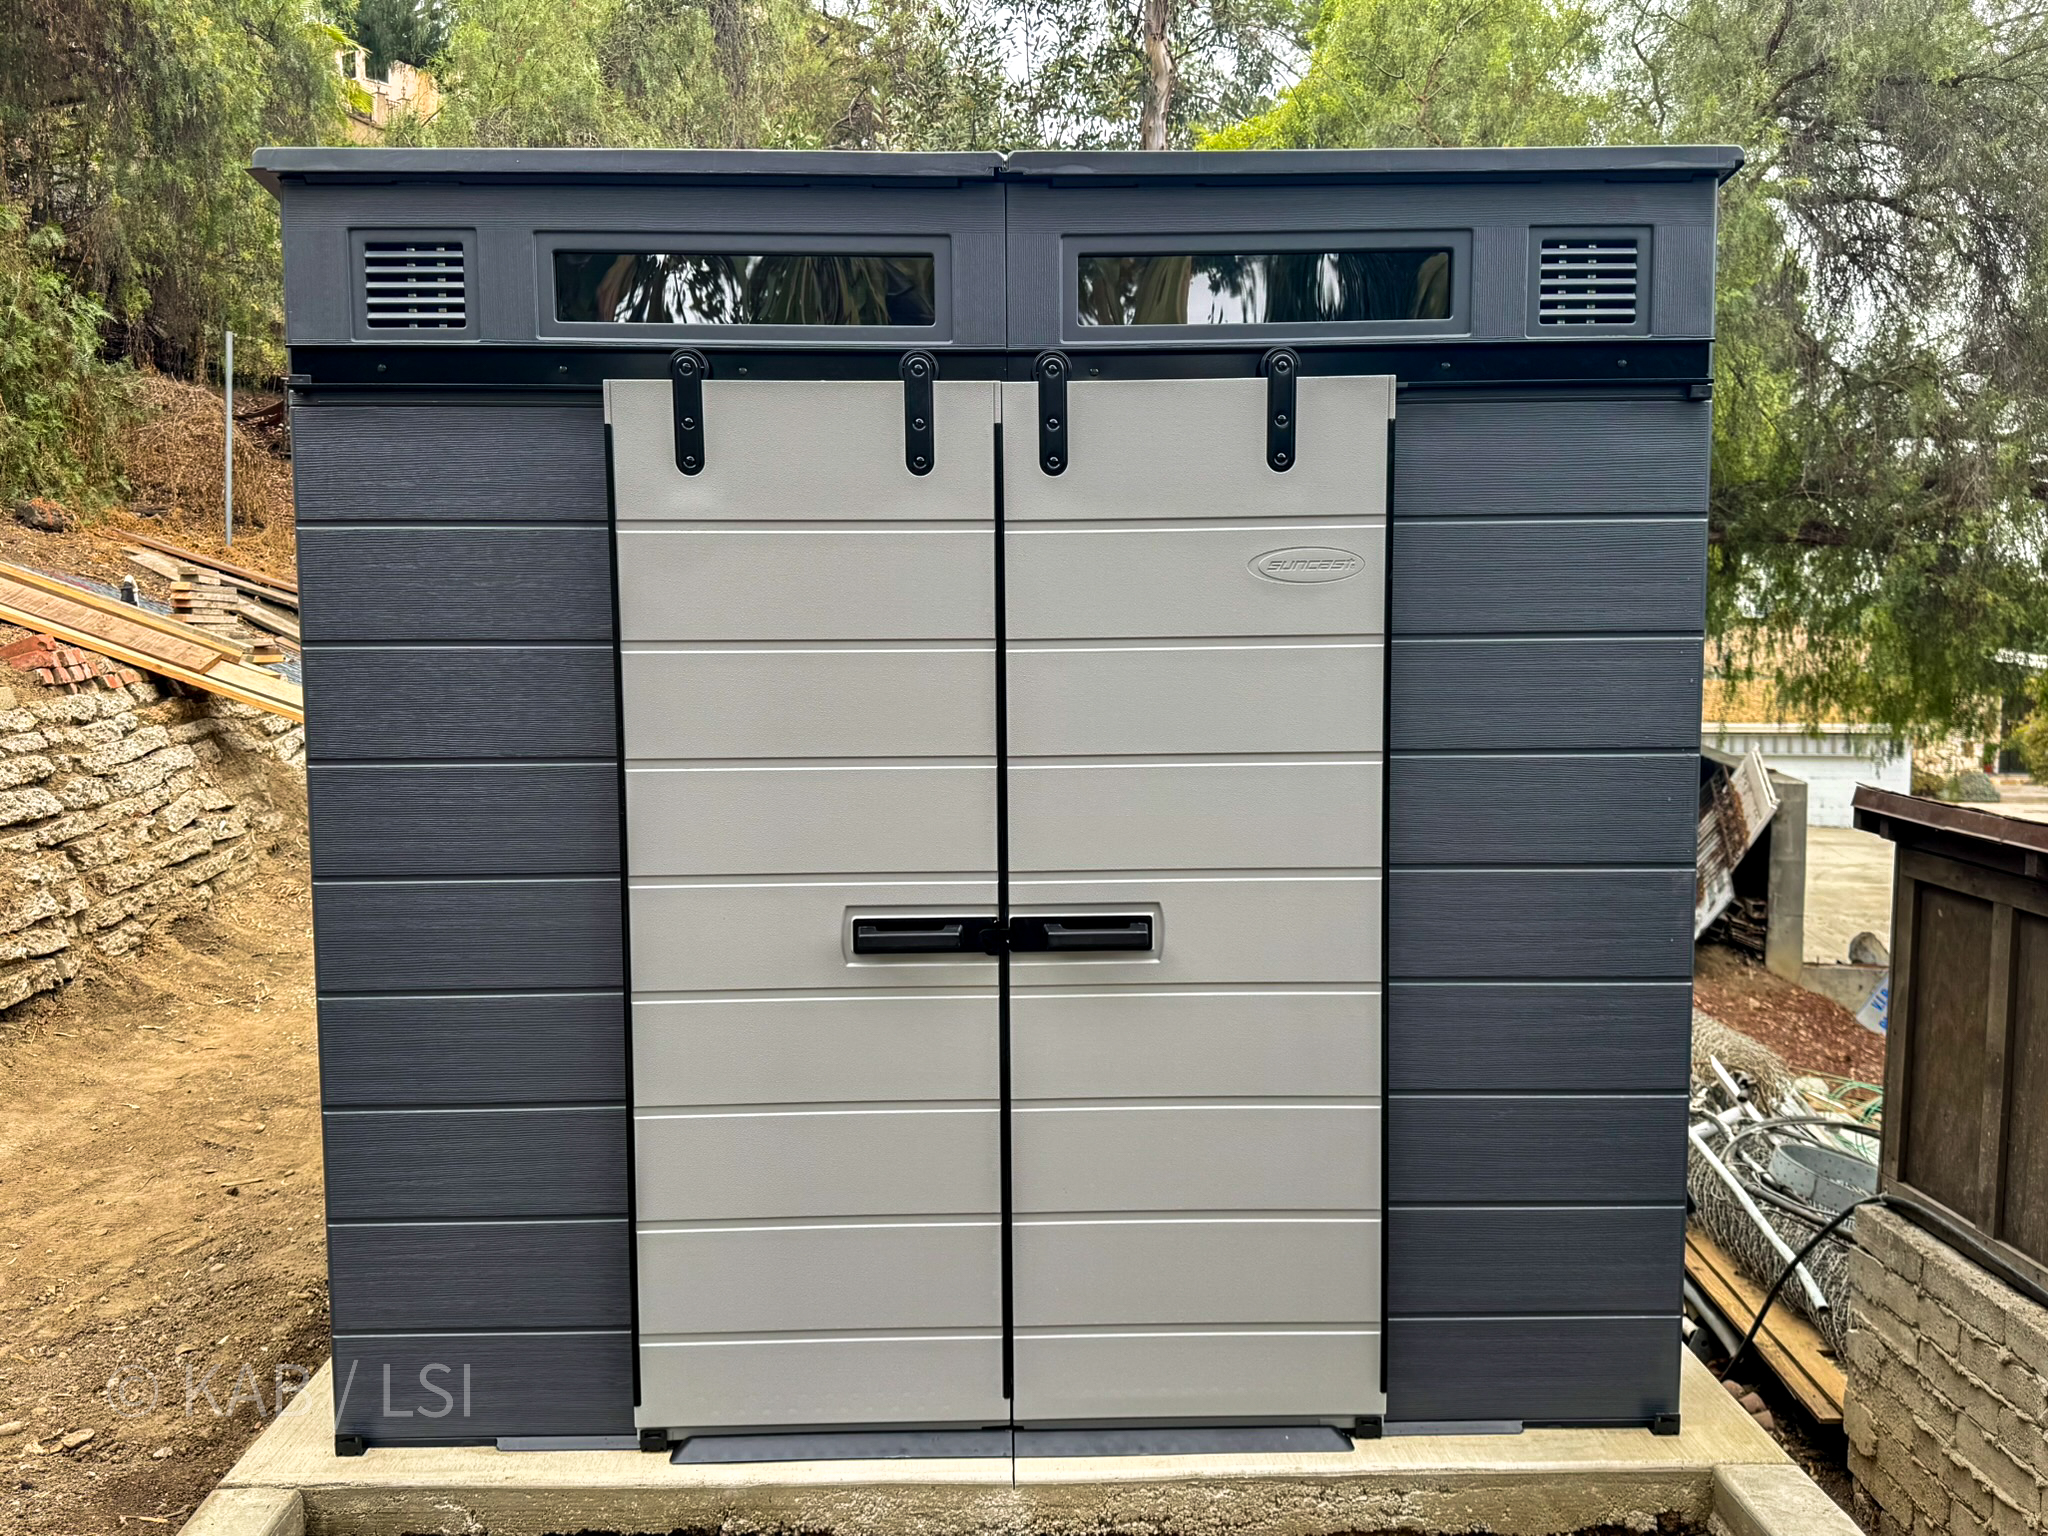
Storage sheds become what the owner needs them to be. Garden tools, holiday decorations, the stuff the current spouse won't let back in the house, the records from a closed business, the bikes that the teenager swears they'll ride again. Whatever it is, it's on your property, under your lock, and not costing you a monthly storage unit bill.
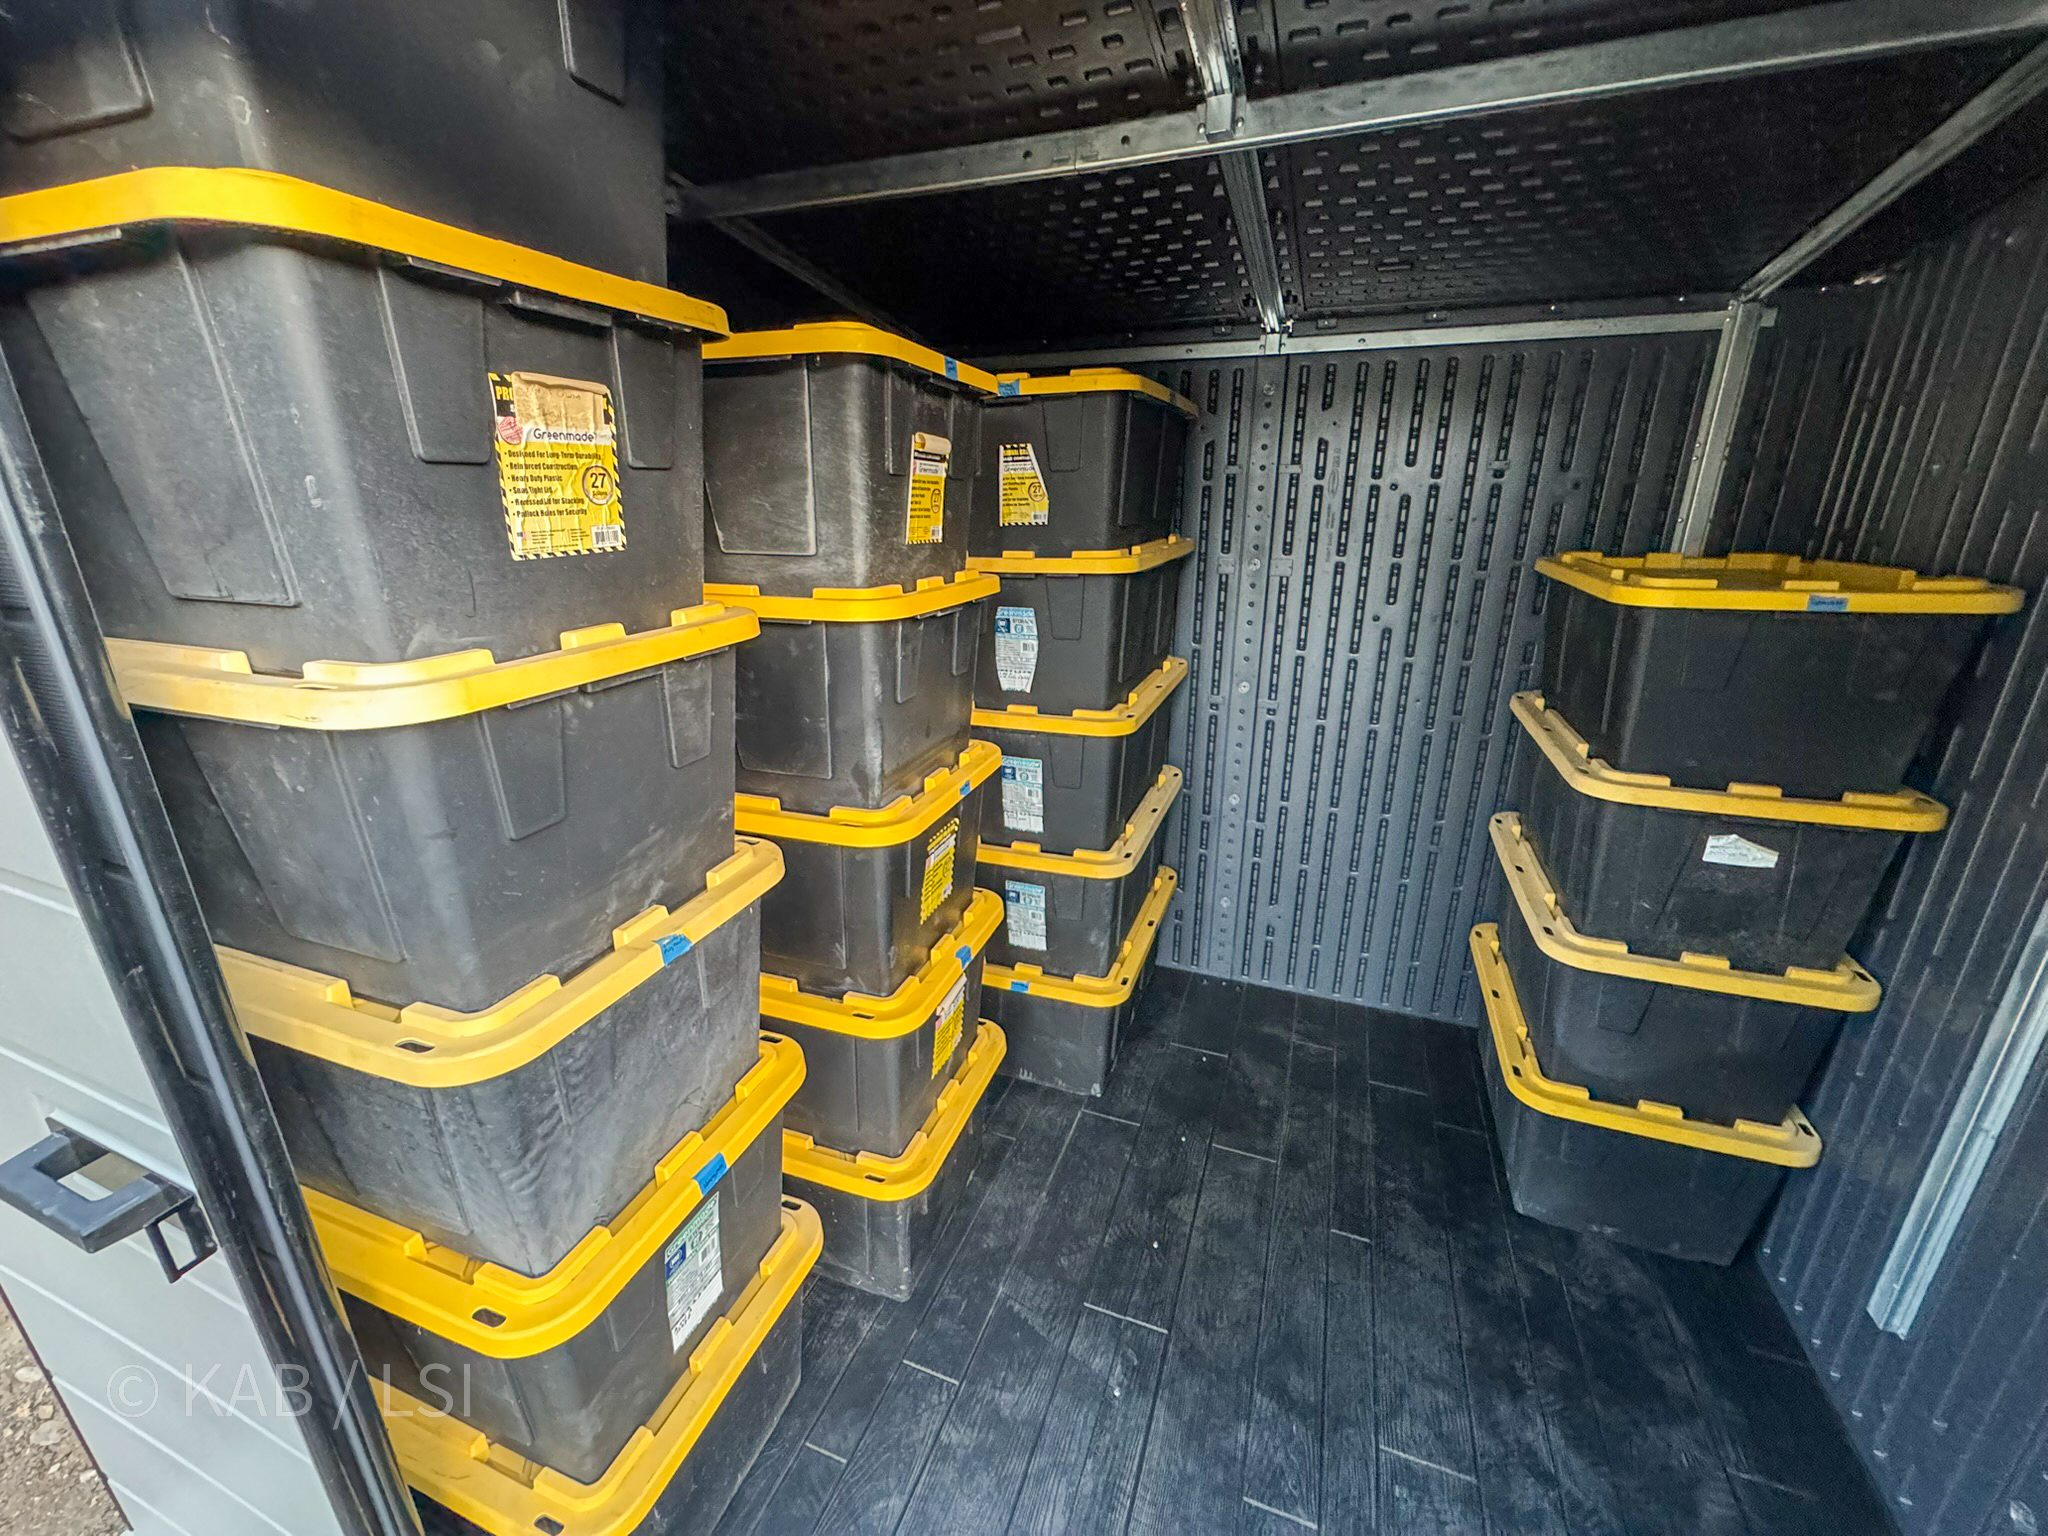
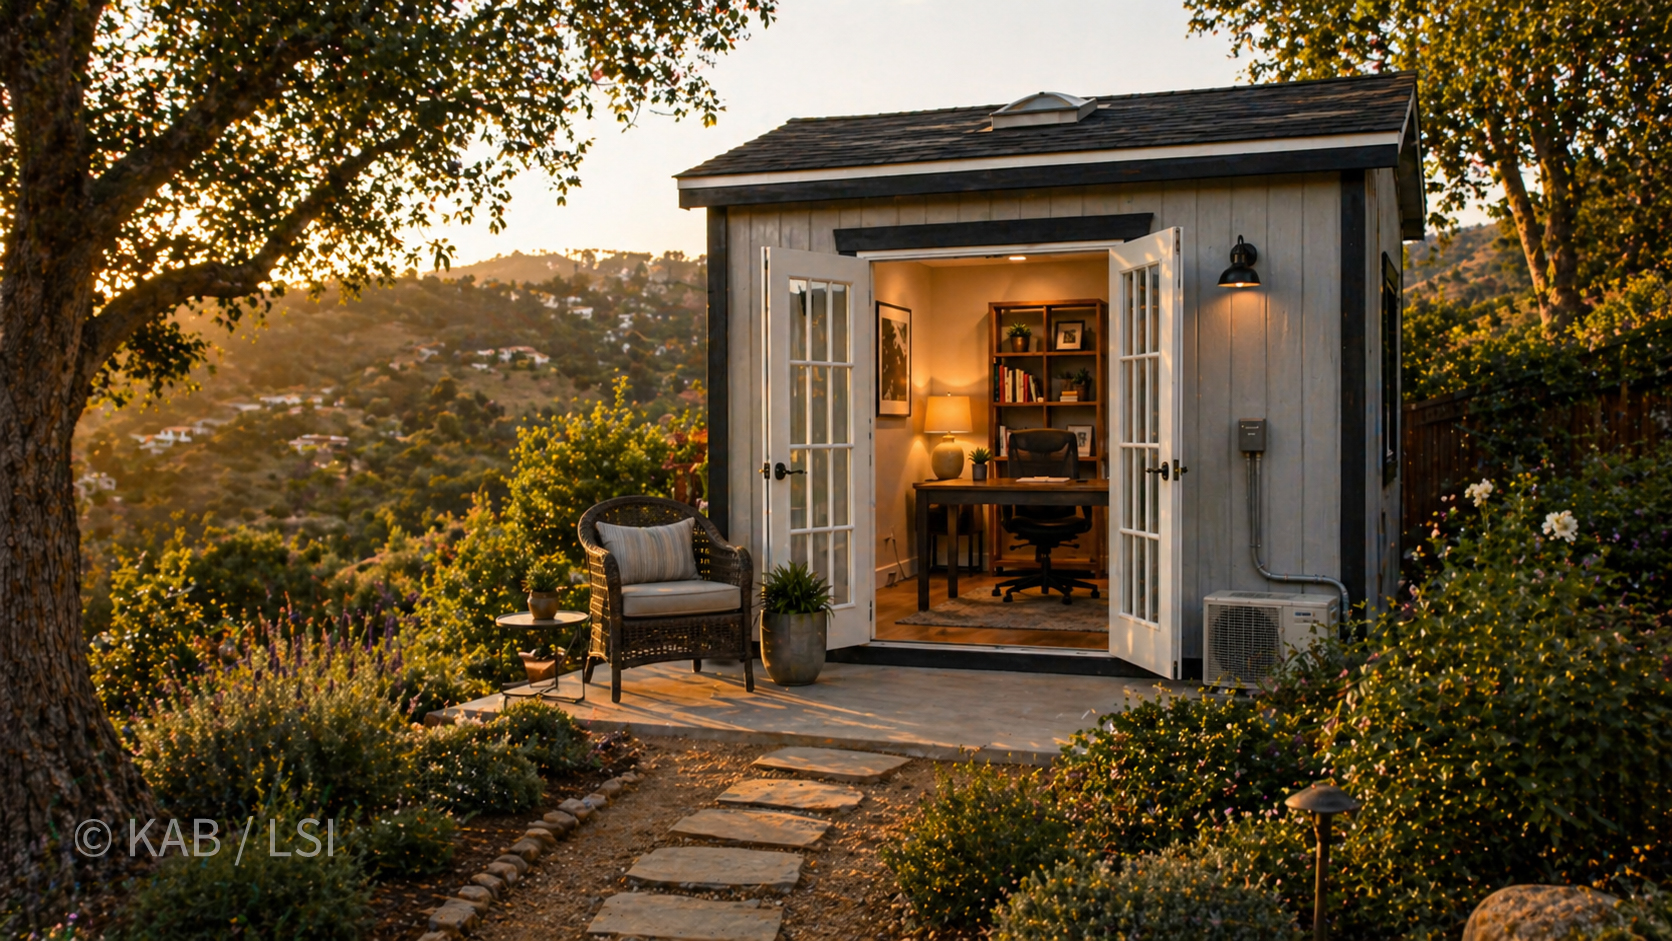
Office sheds, studio sheds, tele-health sheds, she-sheds, writing rooms, music rooms, art rooms — same concrete pad, same trenching, same crew, different interior finish. Drywall, wood floor over the composite deck, a mini-split heat pump for comfort year-round, bookshelves, desk, light fixtures. What started as a $999 storage solution at Costco turns into a real working room at the end of a short walk from the back door.
Step Seven — & 45 Years of Continuity
The craft underneath is not new
We've been building, specifying, and overseeing outbuildings on Southern California hillsides since the late 1970s. The Vintage Guardian product line was our own — prefab, free-standing, fully insulated climate-controlled outbuildings that shipped to the site and assembled on a concrete slab. We built them for Hollywood homes before the big-box stores carried anything comparable.
Forty-five years later, the underlying craft is the same: a level pad, the right trenching, the right ground drainage, and the right finish for the use. The materials change. The price points change. The names on the delivery truck change. The fundamentals don't.
Beyond the kit. What custom looks like.
By the time you’ve walked through the big-box options, the concrete prep, the trenching, the utilities, the pavers, and the finish — you already know more than ninety percent of homeowners ever learn about what it takes to put a small building on a hillside lot. So now I’ll show you what happens when we don’t stop at the kit.
The same craft underneath the off-the-shelf shed — level pad, trenched utilities, drainage, finish — is what makes the custom version possible. The shed shell from a kit is one option. A purpose-built structure on the same pad, with the same trenching, the same mini-split, the same French doors, the same Wi-Fi and security cameras, is another. The pad doesn’t care which one you bought. The neighbors don’t either. What changes is what fits the way you actually live.
When we go custom, you get to specify:
- The shed size and shape — narrower for a hilltop perch, wider for a real office, taller for storage above
- The roof line — gable, shed, low-slope, or none, depending on what sits behind it
- French doors in glass, solid, or split — the kind of doors that make a small building feel like a room
- The paint color and trim to either match the main house or set the building apart deliberately
- A mini-split sized to the cubic footage, with the line-set run cleanly and the condenser placed where you don’t have to look at it
- Power, water, and gas brought to the slab before the structure goes up — so finishing it later is easy
- Wi-Fi extension and security cameras tied back to the main house network
- Pavers, decomposed granite, gravel, or artificial grass framing the building — chosen for fire defense, drainage, and how it looks at golden hour
And you get to think about who actually uses it — because once you’re past the kit, the building can be sized for the person who’ll live in it during the day.
When you’ve seen what’s available off the shelf — and you’ve seen what the concrete pad and the utilities and the mini-split can support — and now you can picture your version on your property, that’s the conversation I’m here for. Send a note. We’ll walk it. I’ll tell you honestly what’s possible, what it’ll cost, and what order to do it in.
Gazebos and pergolas follow the same rules, with one extra question: wind load. See the gazebo page →
What Happens Next
One hour. Your property. A clear sequence.
The next step is a one-hour visit to your property. I walk the site with you, read the grade, look at where you're thinking of placing the shed or gazebo, and tell you what's needed in what order.
You leave the conversation with:
- A realistic cost estimate for the pad, the trenching, and the install
- Three to five specific store SKUs or brand-model recommendations that fit your lot
- Referrals to vetted concrete, electrical, and (if needed) gas contractors who've worked on La Habra Heights hillsides before
- A written sequence — what gets done when, so you don't spend money out of order
One visit · no obligation beyond the conversation
Request the Property ReviewIf you're in La Habra Heights or the surrounding hillside communities — Hacienda Heights, Whittier, Rowland Heights, Diamond Bar, Glendora — this is the introduction. Most clients come back for bigger work once they've seen how the first small project gets done.